Are you having trouble connecting your iPhone to Wi-Fi? Don’t worry, it’s not only with you. Many iPhone users face this annoying issue from time to time. Luckily, there are some simple steps you can take to fix Wi-Fi not connecting to your iPhone. In this blog post, we’ll show you how to troubleshoot and solve the most common Wi-Fi problems on your iPhone. Let’s see in detail.
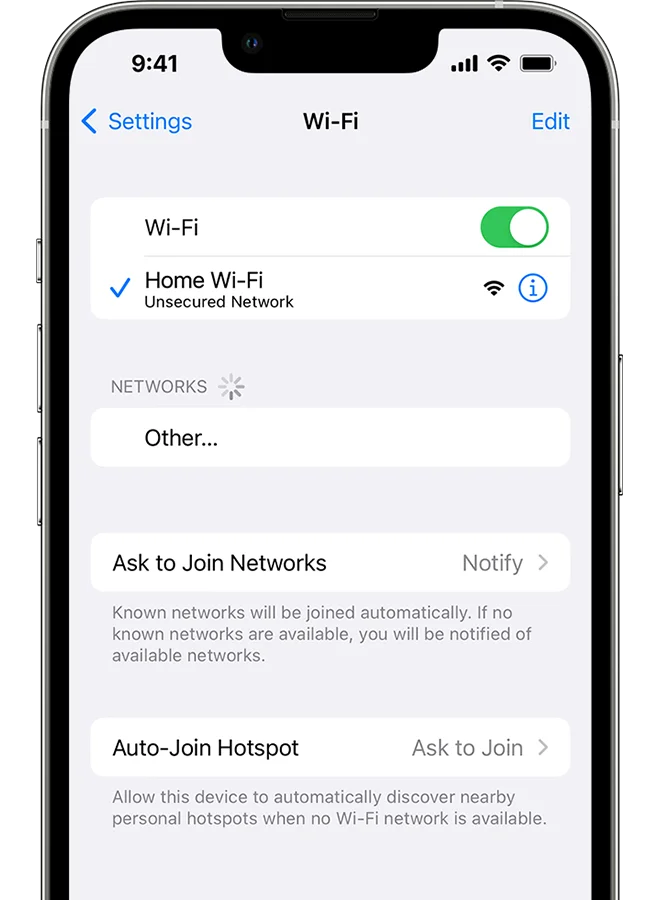
1. Turn on Airplane Mode and Turn off it again
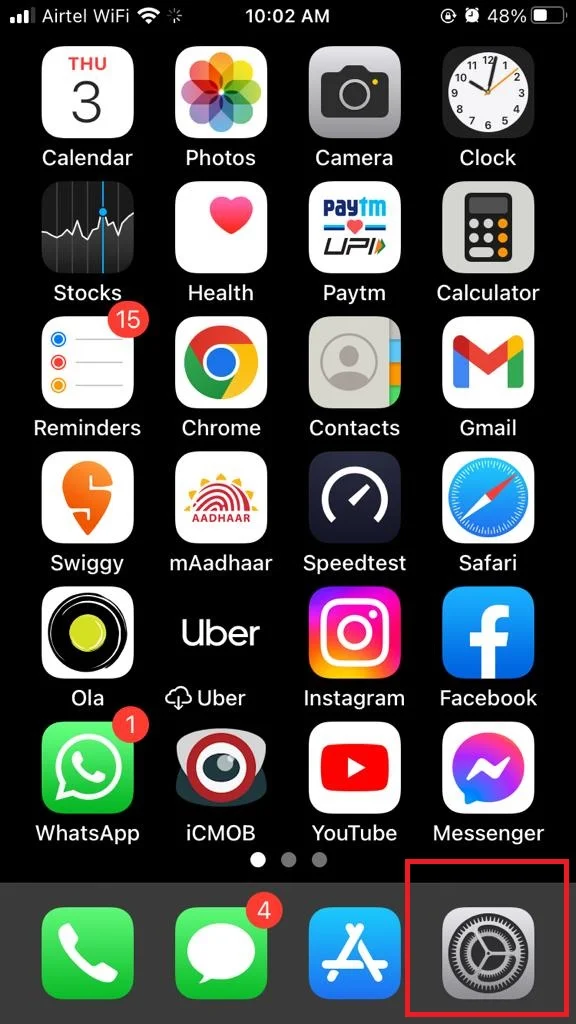
Turning on and turning off airplane mode on your iPhone will refresh your network connection and fix any glitches on your iPhone. Let’s see how to do this.
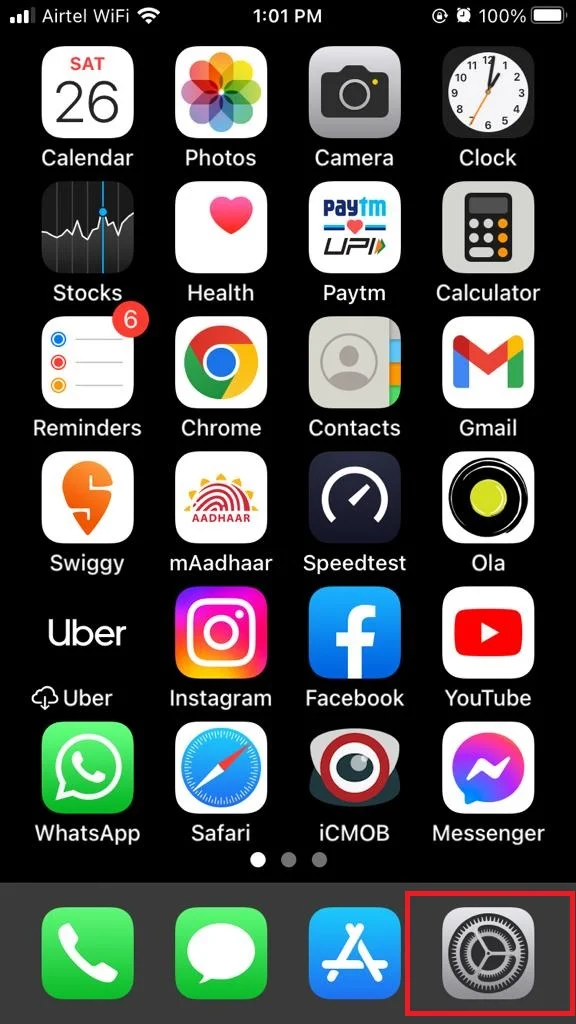
- Tap on the Settings App.
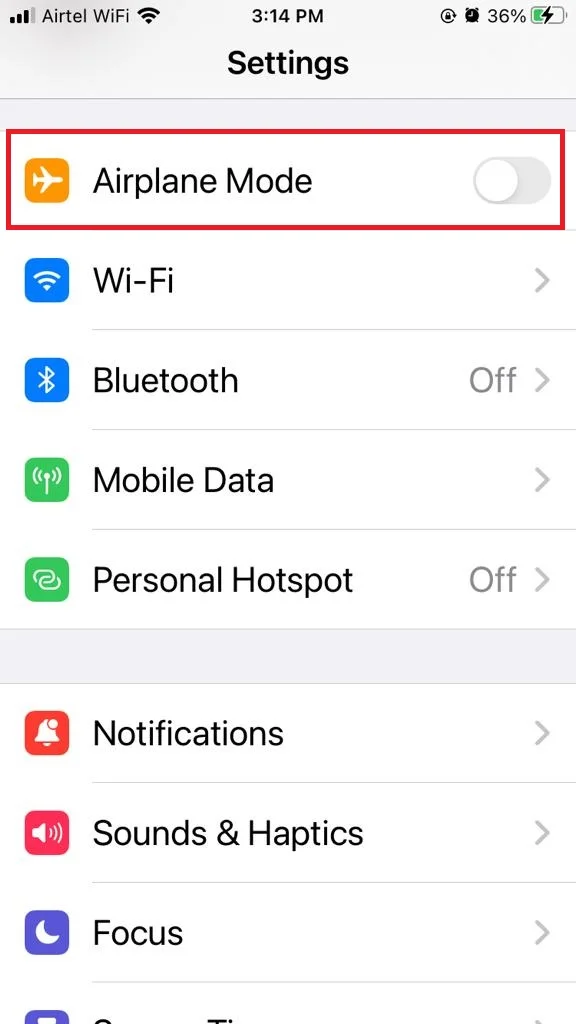
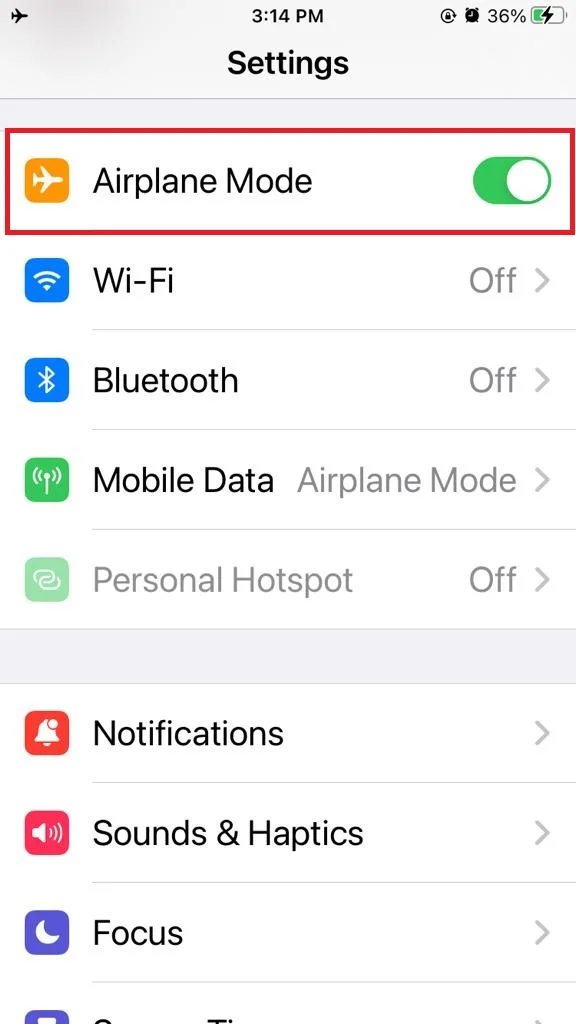
- Now turn on the toggle for Airplane Mode.
- Wait for 20 seconds and turn off the toggle for Airplane Mode.
2. Check Your Wi-Fi Settings to Fix Wi-Fi Not Connecting
The first thing you should do is make sure your Wi-Fi settings are correct. Let’s see how to do this.
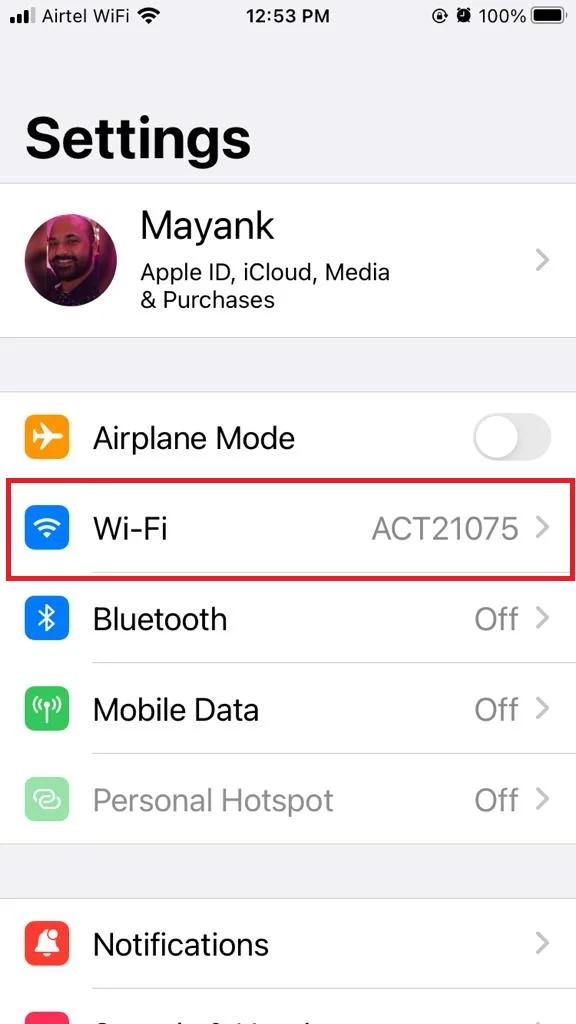
- Tap on the Settings app.
- Tap on Wi-Fi.
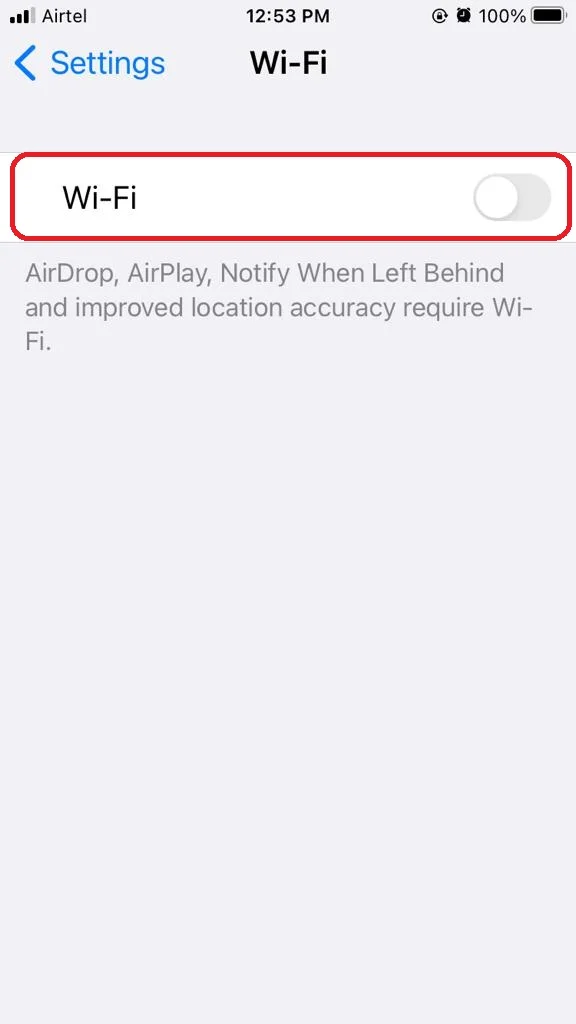
- Turn off the toggle for Wi-Fi.
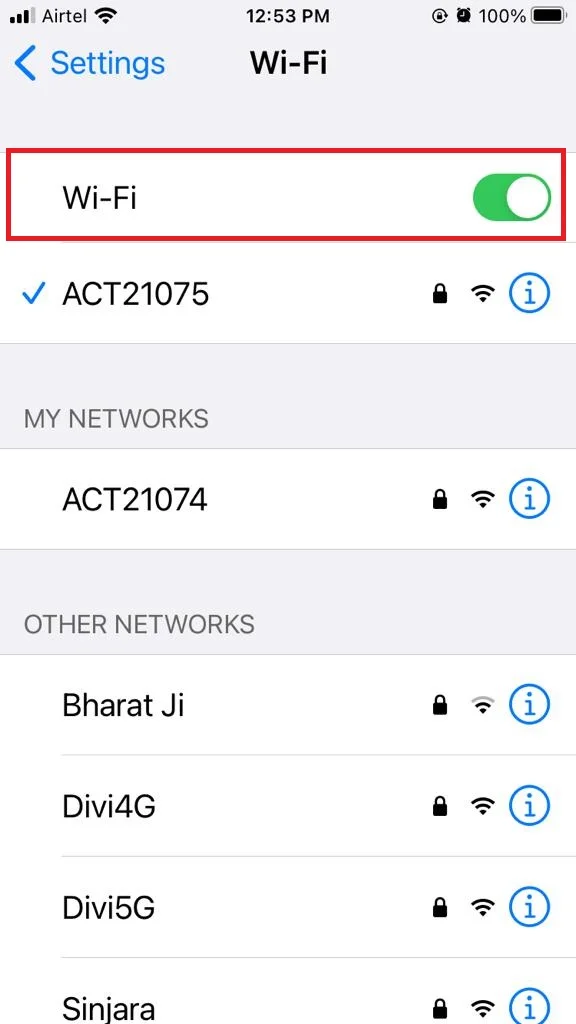
- Now again, turn on the toggle for Wi-Fi.
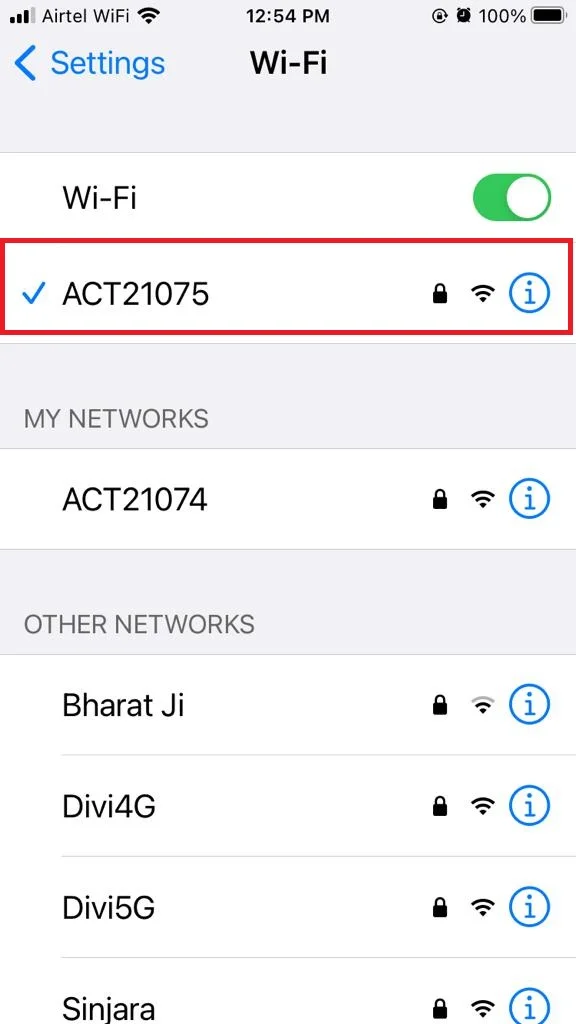
- Tap on one of the network options you want to connect and enter the password if needed. If you don’t see any networks, or if you see a message that says “No Internet Connection”, move on to the next step.
3. Restart Your iPhone and Router to Fix Wi-Fi Not Connecting
Sometimes, a simple restart can fix many issues, including Wi-Fi problems.
To restart your iPhone, press and hold the power button until you see the slide to power off option on the screen. Swipe it and wait for your iPhone to shut down (turn off). Then you need to press & hold the power button of your iPhone until you see the Apple logo on your screen. Click on Restart iPhone to see in details.
To restart your router, unplug it from the power source, and wait for about 60 seconds. Now plug your router back into the power source and wait for it to boot up.
4. Forget and Rejoin the Network to Fix Wi-Fi Not Connecting
Another possible solution is to forget and rejoin the network. This can help if there is a problem with the network settings or configuration. Let’s see how to do this.
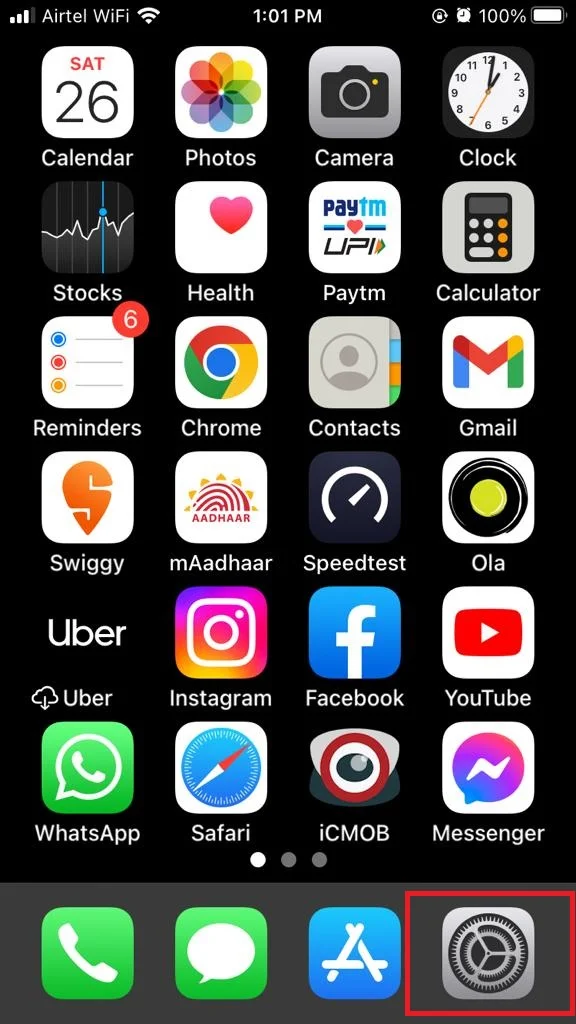
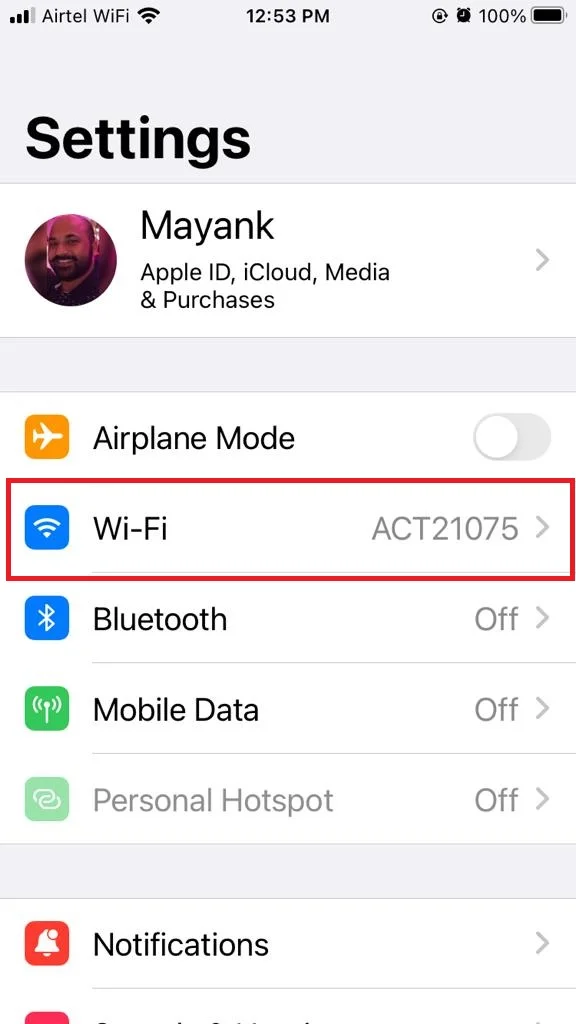
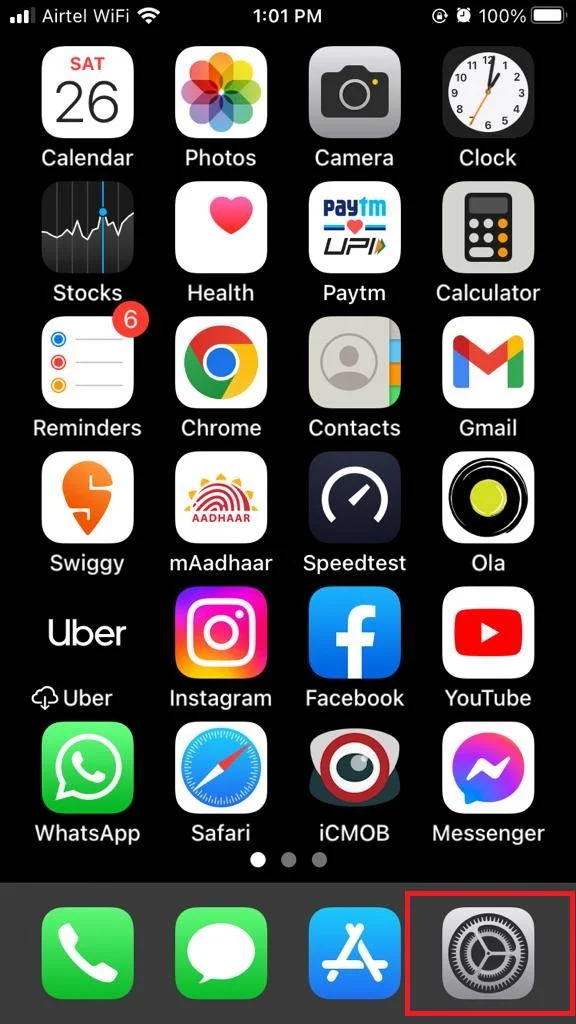
- Tap on the Settings app.
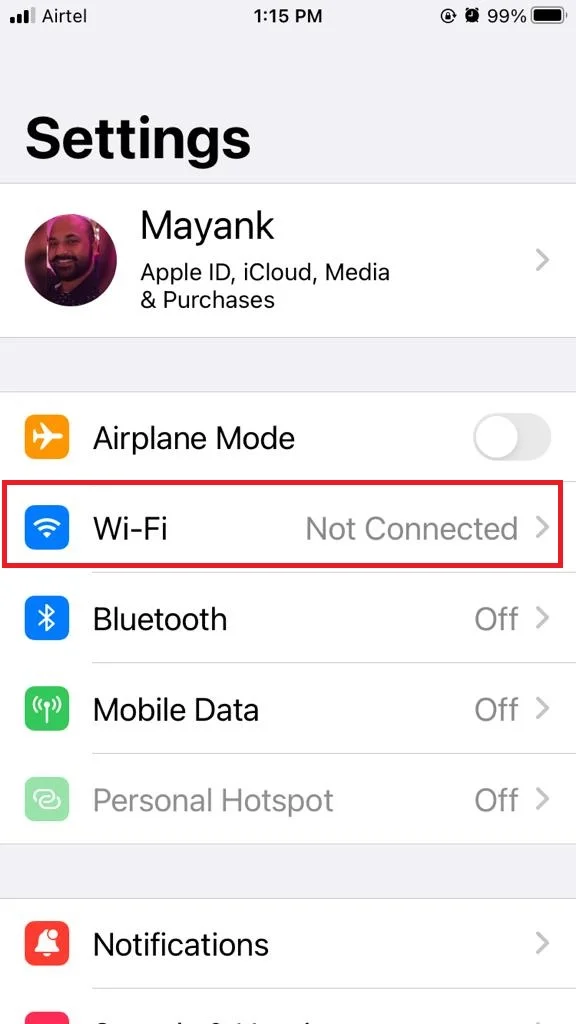
- Tap on Wi-Fi.
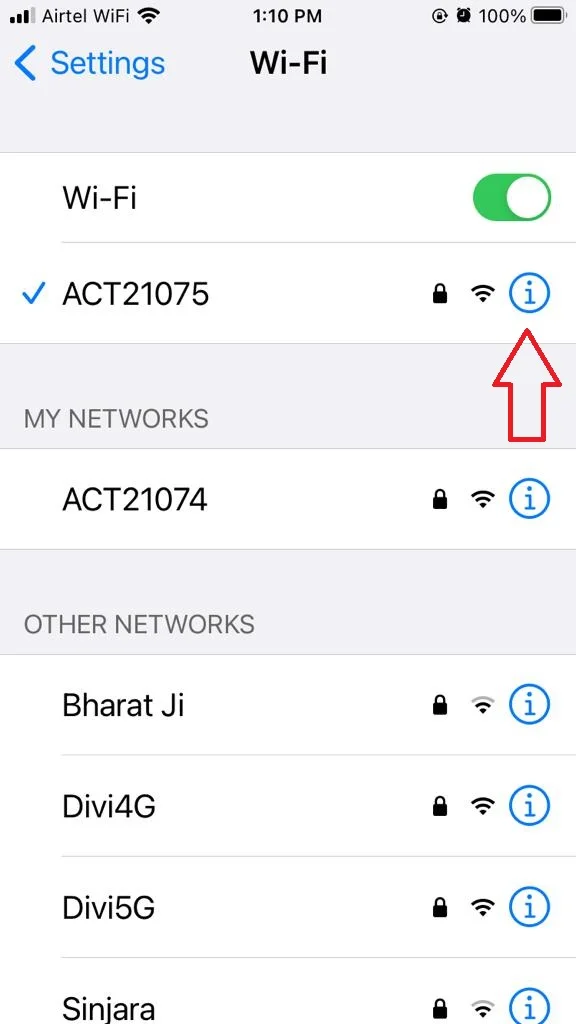
- Now tap on the “i” icon next to the network name.
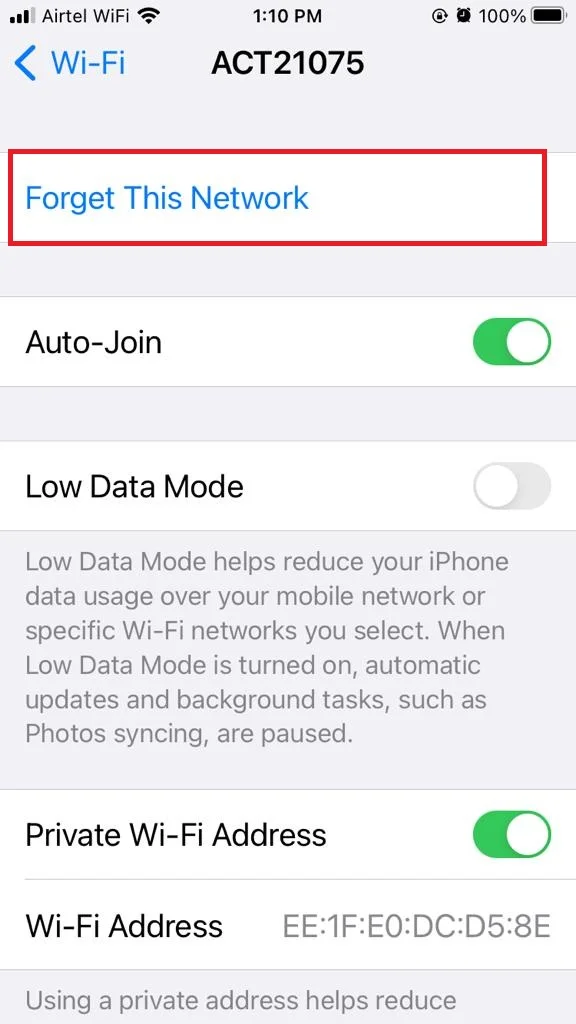
- Then, tap on Forget This Network.
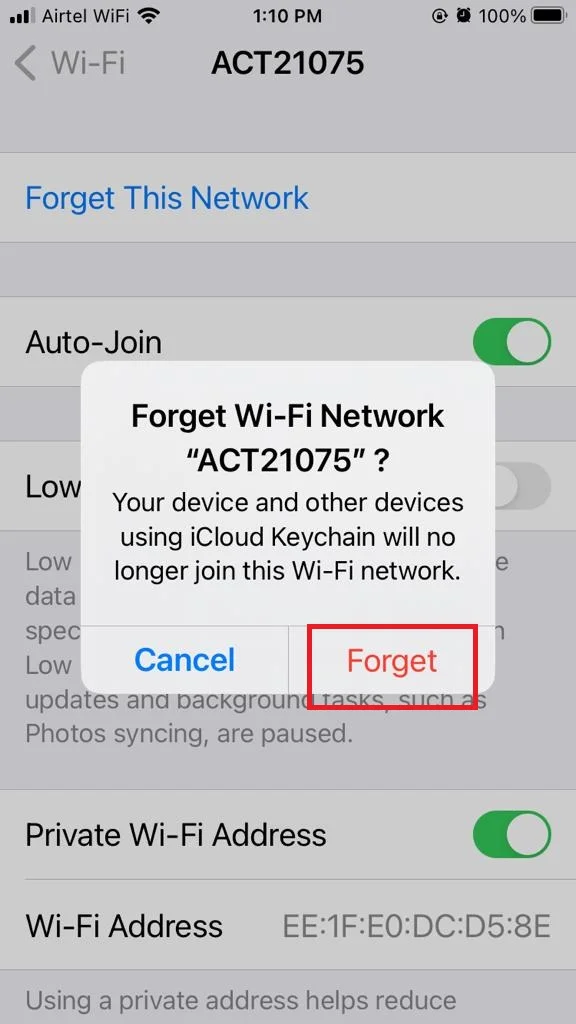
- Tap on Forget to confirm.
- Restart your iPhone if possible.
- Tap on the Settings app.
- Tap on Wi-Fi.
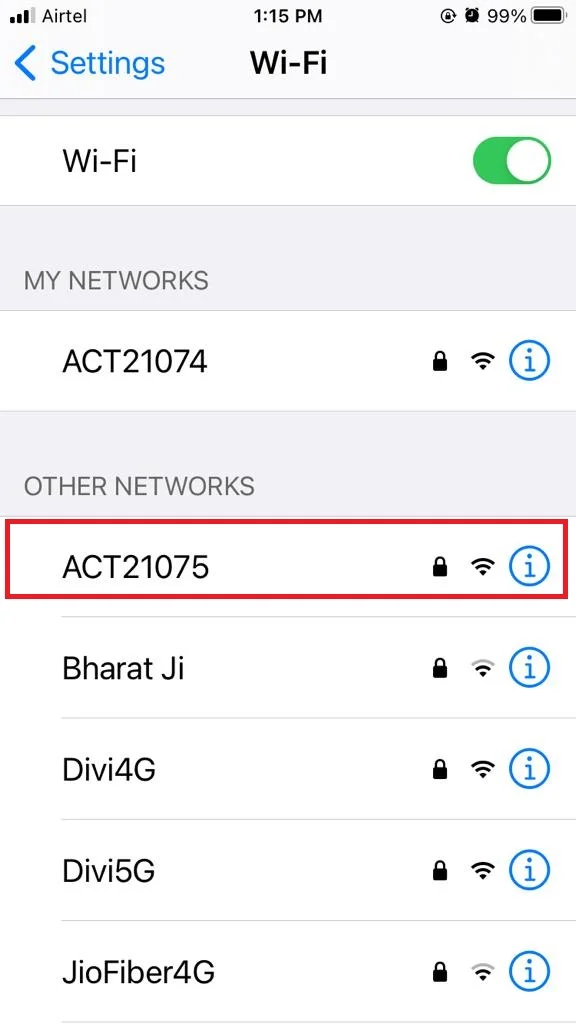
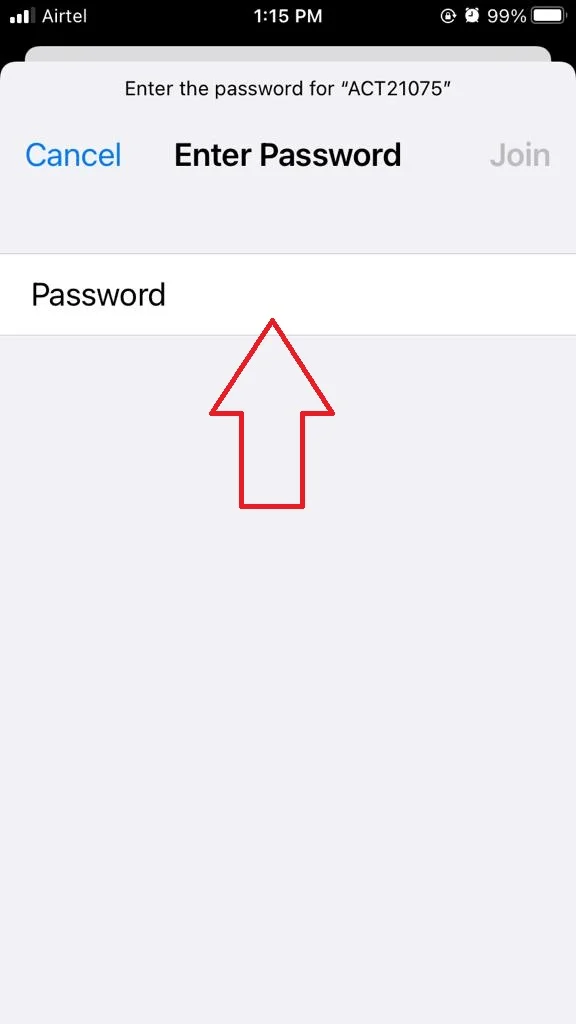
- Now tap on the network name again. Enter the password if needed and try to connect.
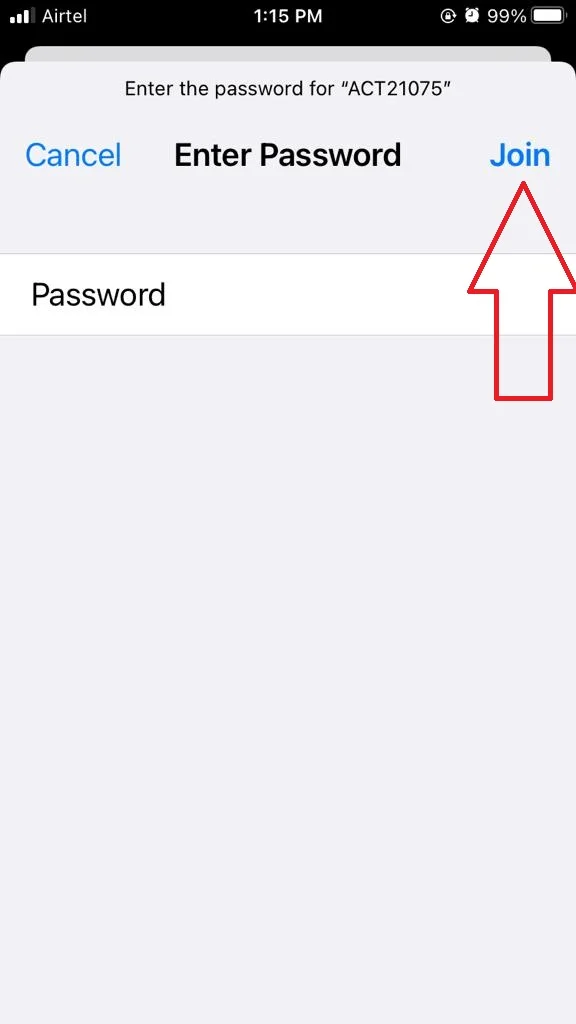
- Tap on Join (at the top right).
5. Update iOS Software to Fix Wi-Fi Not Connecting
Sometimes the Wi-Fi does not work properly if your iOS is incompatible. For this, you need to update the iOS software of your iPhone to the latest version if available. Let’s see how to do this.
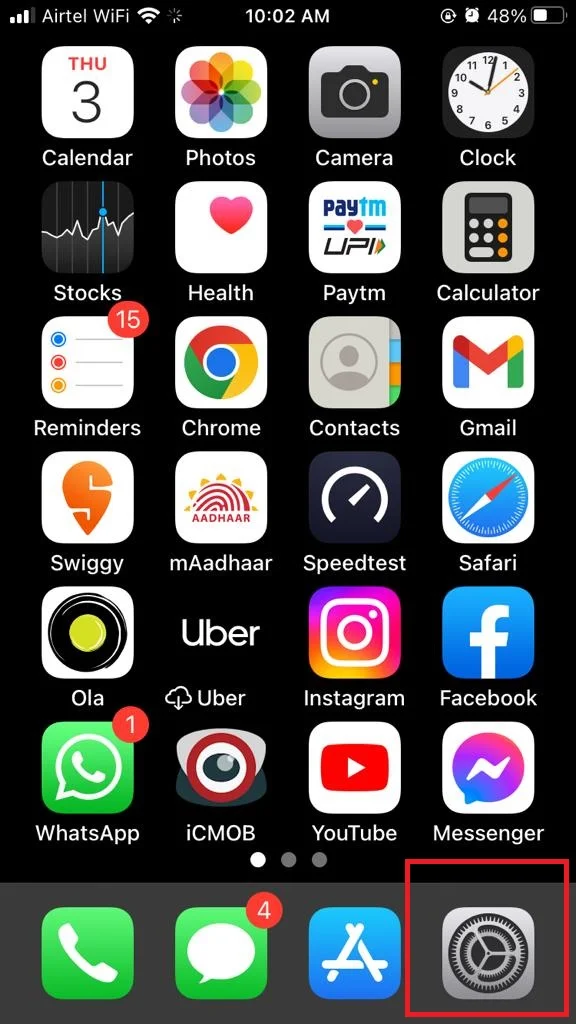
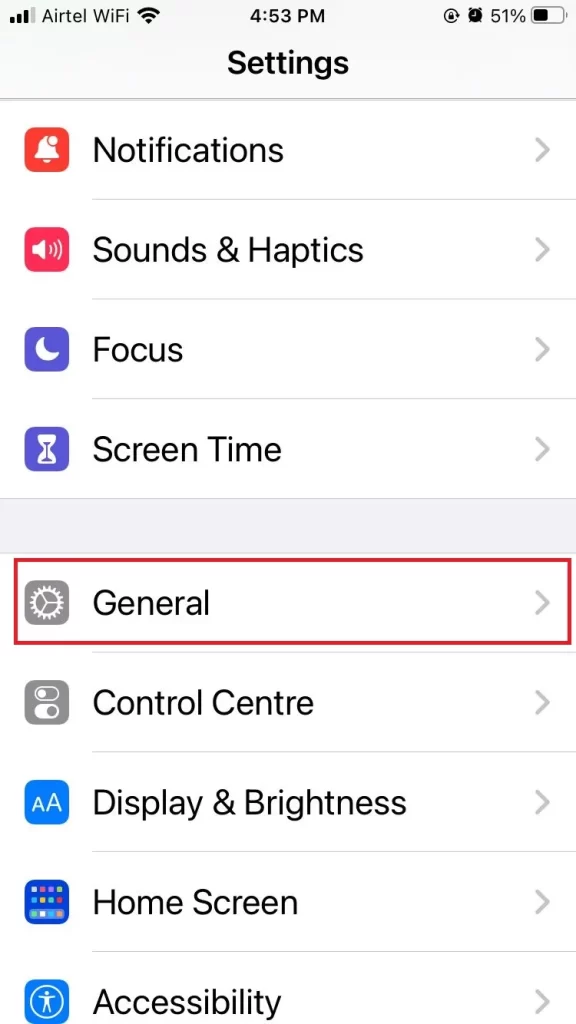
- Tap on the Settings app
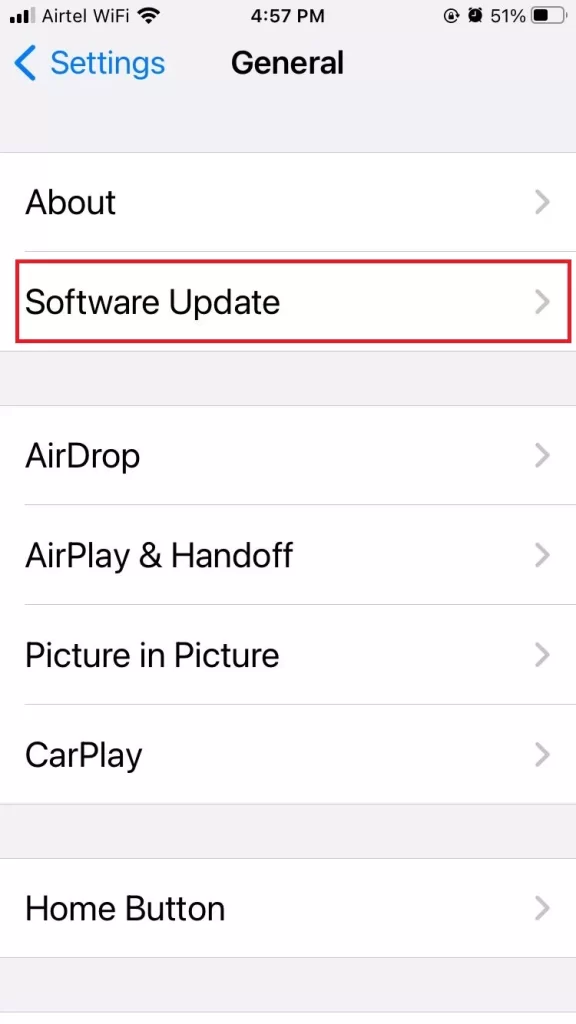
- Tap on General.
- Now tap on Software Update.
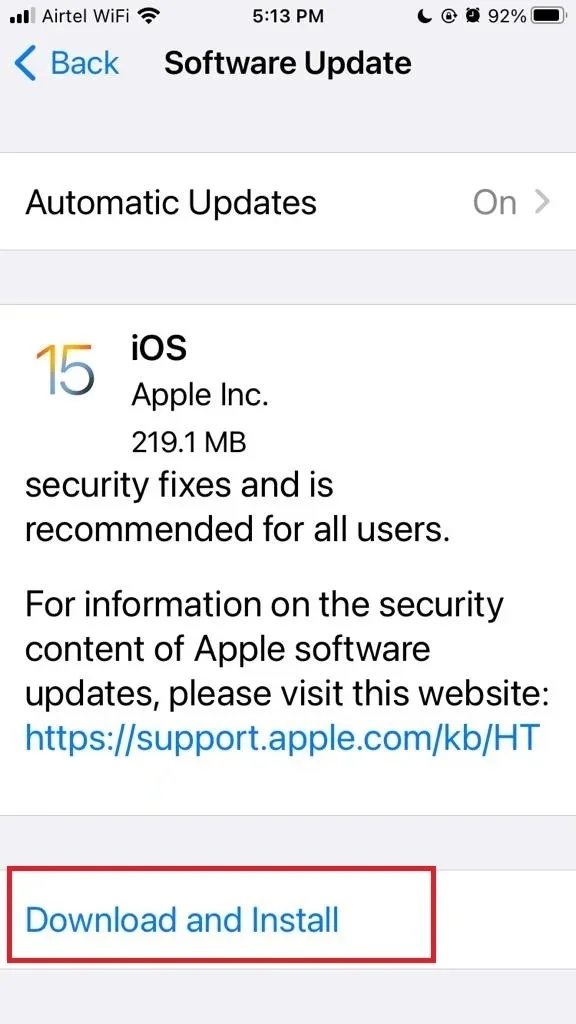
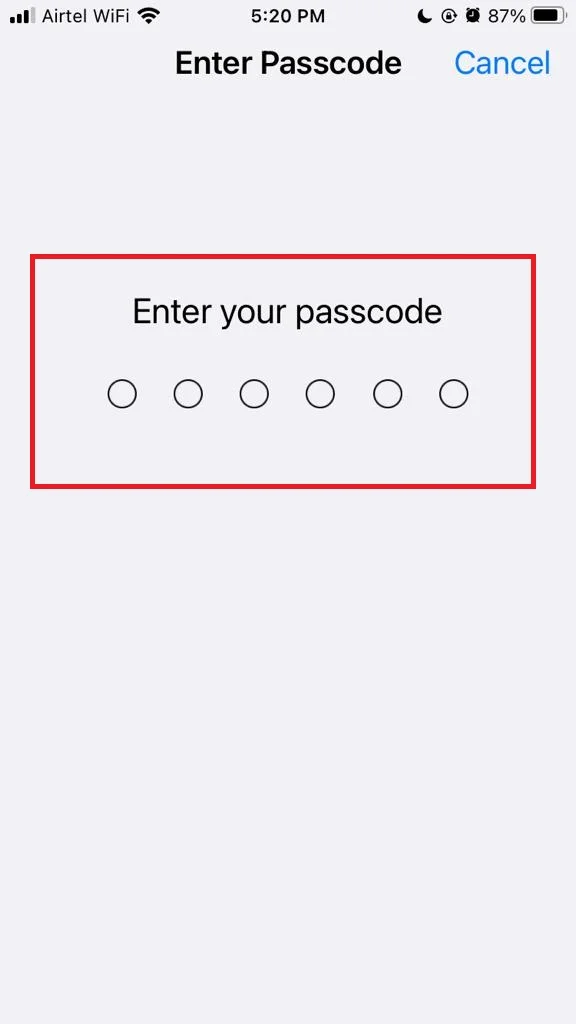
- Tap Download and Install, If the update is available.
For More Details on how to update iOS click on Update iOS. Make sure you are connected to your mobile network.
6. Reset Network Settings to Fix Wi-Fi Not Connecting
If none of the above steps are working, you may need to reset your network settings. This will erase all your saved Wi-Fi networks, passwords, VPN settings, and cellular settings. Let’s see how to do this.
- Tap on the Settings app.
- Tap on General.
- Now tap on Reset.
- Tap on Reset Network Settings.
- Enter your iPhone passcode (if prompted on your screen) and confirm your action.
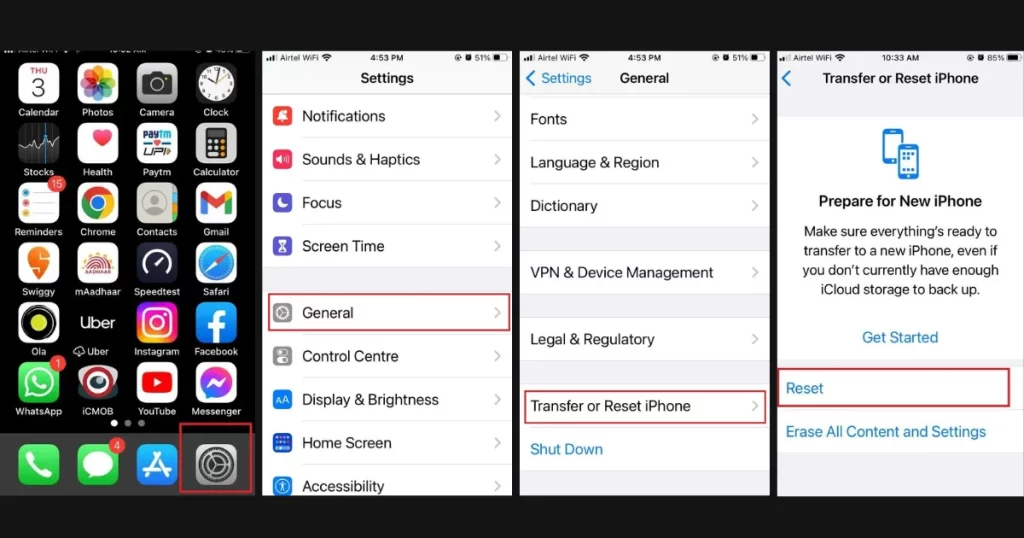
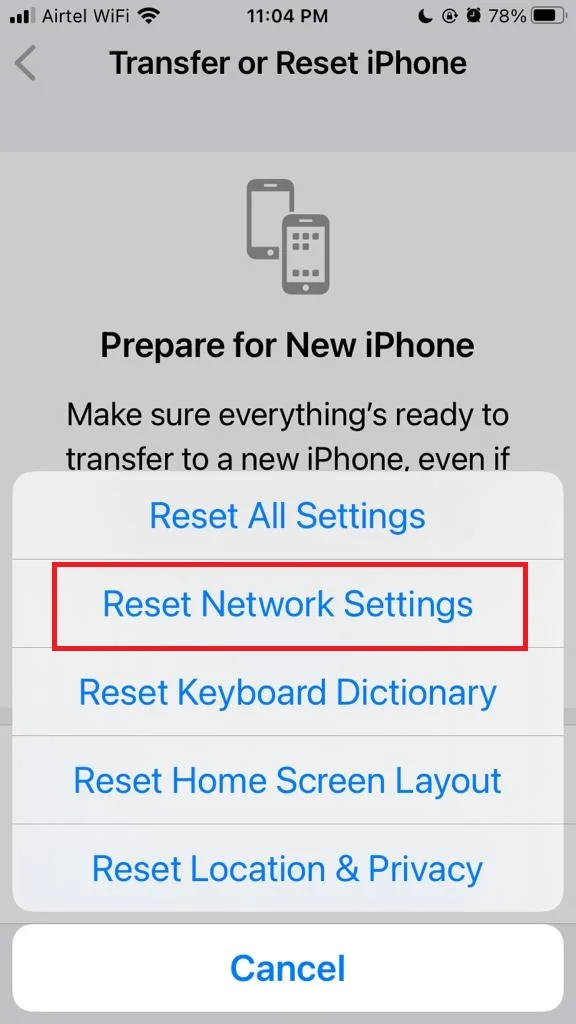
Your iPhone will reboot and reset your network settings. After that, you’ll need to reconnect to your Wi-Fi network and enter the password again. Click on Reset Network Settings to see in details.
7. Use Custom DNS if Possible
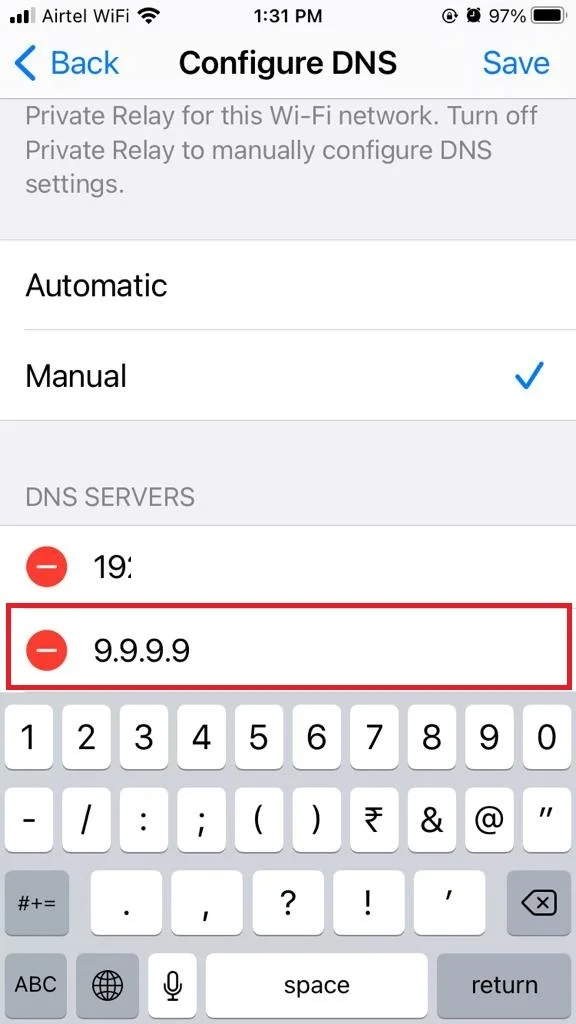
If none of the above solutions work for you then try to change the DNS of your iPhone. After this, you can check whether Wi-Fi is connecting to your iPhone or not. Let’s see how to do this.
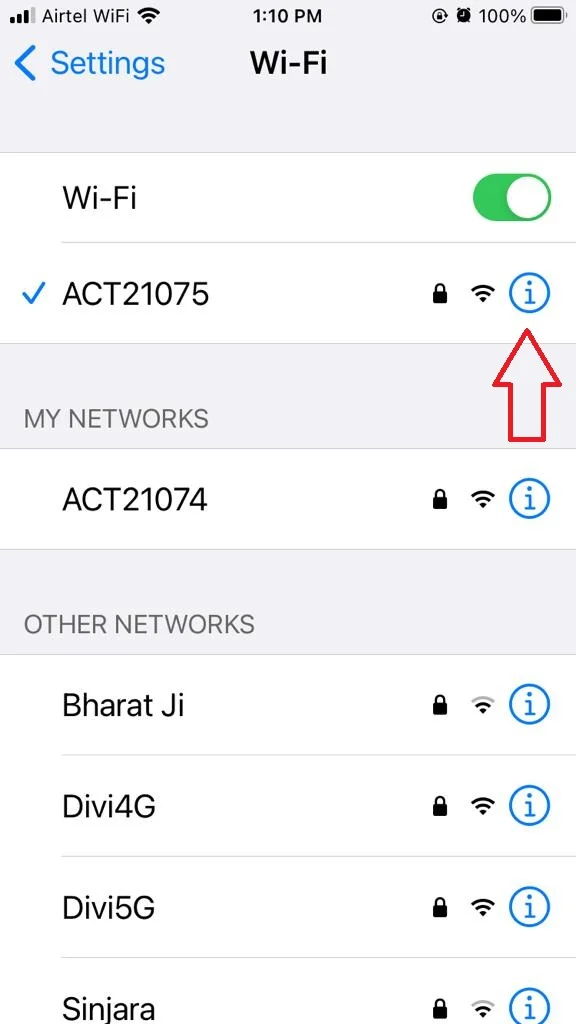
- Tap on the Settings app.
- Tap on Wi-Fi.
- Now tap on the “i” icon next to the network name.
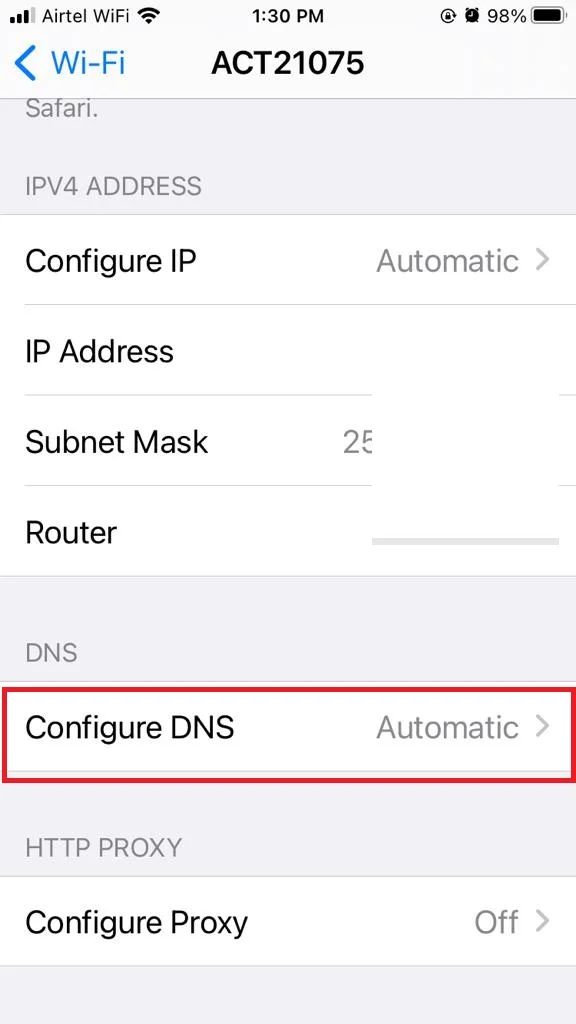
- Scroll Down and tap on Configure DNS.
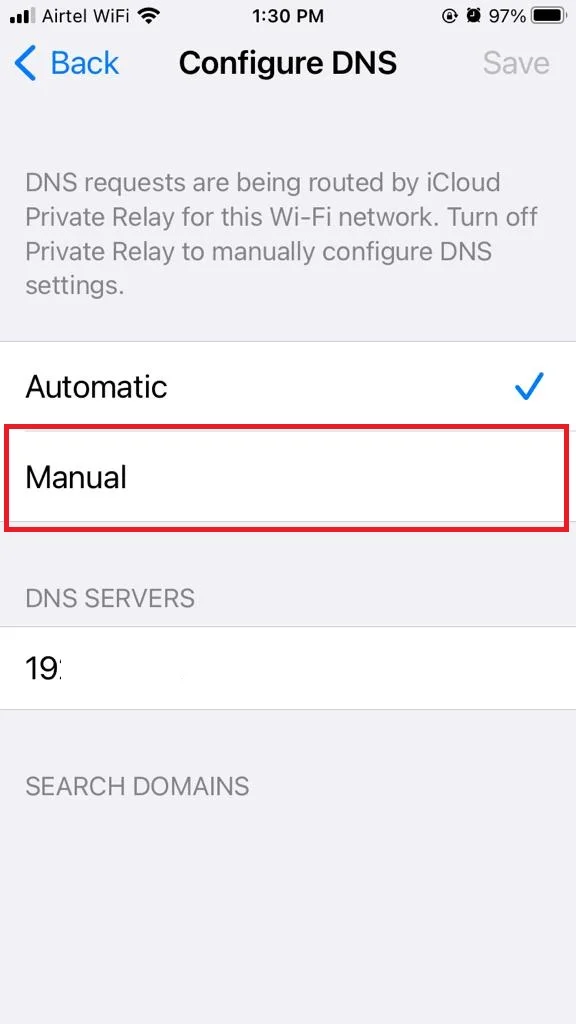
- Tap on Manual.
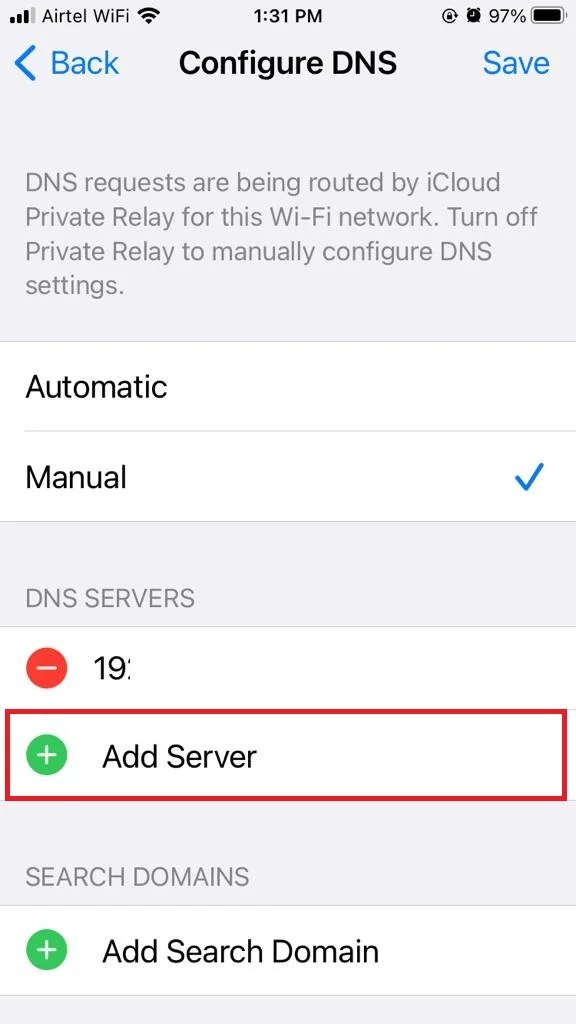
- Now tap on Add Server.
- Type here the DNS server address.
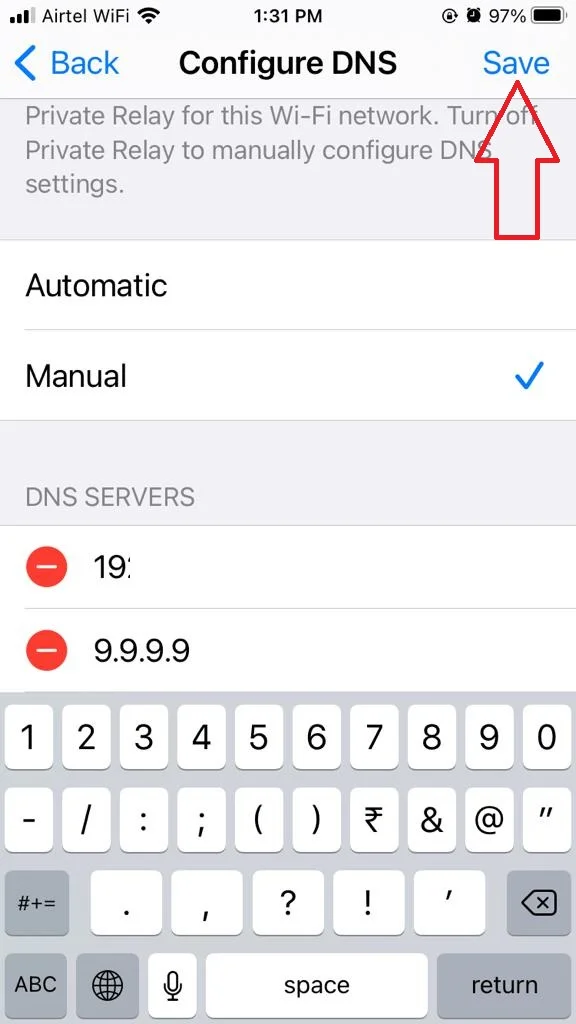
- Now tap on Save (at the top right corner).
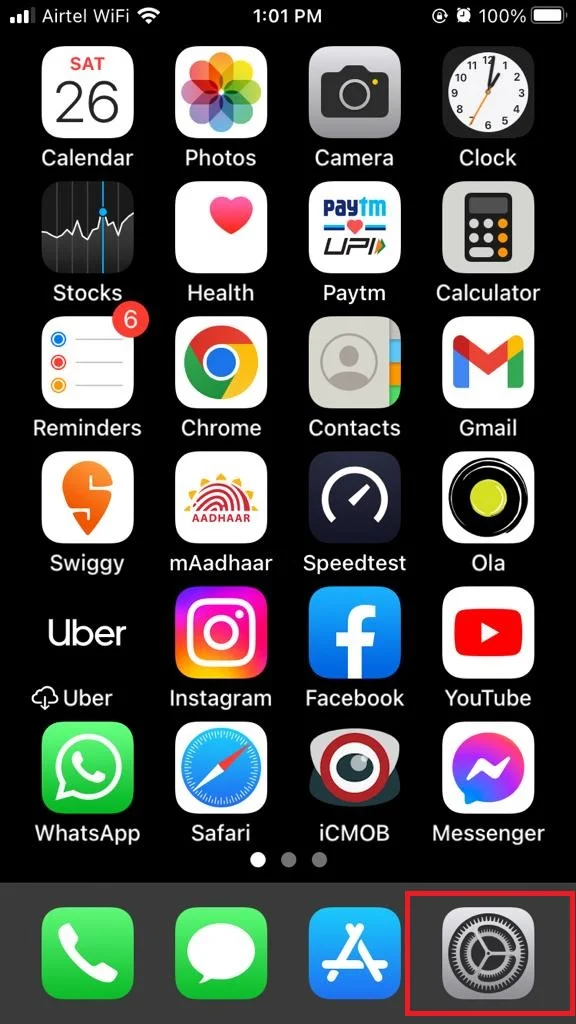
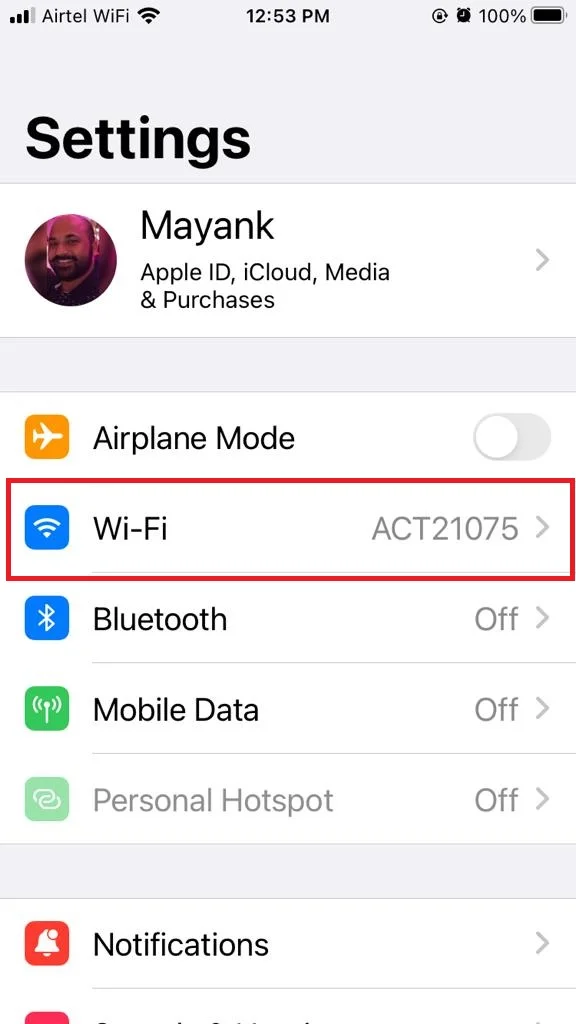
Note: Unless you’re familiar with DNS, don’t mess with this. It’s better to skip this step.
8. Reset All Settings
If none of the above methods work, you may need to reset your all iPhone’s settings. Let’s see how to reset all settings.
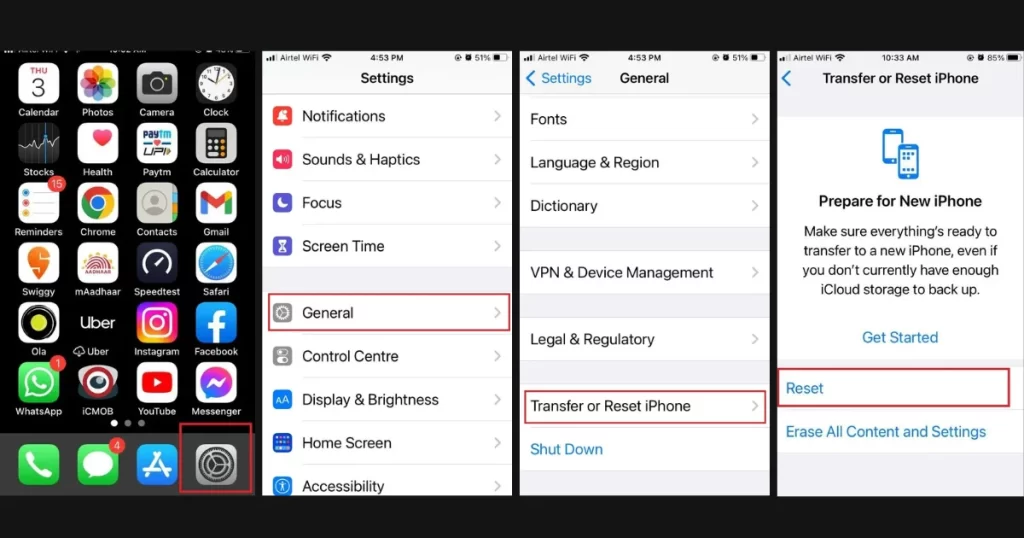
- Tap on the Settings app.
- Tap on General.
- Now tap on Reset.
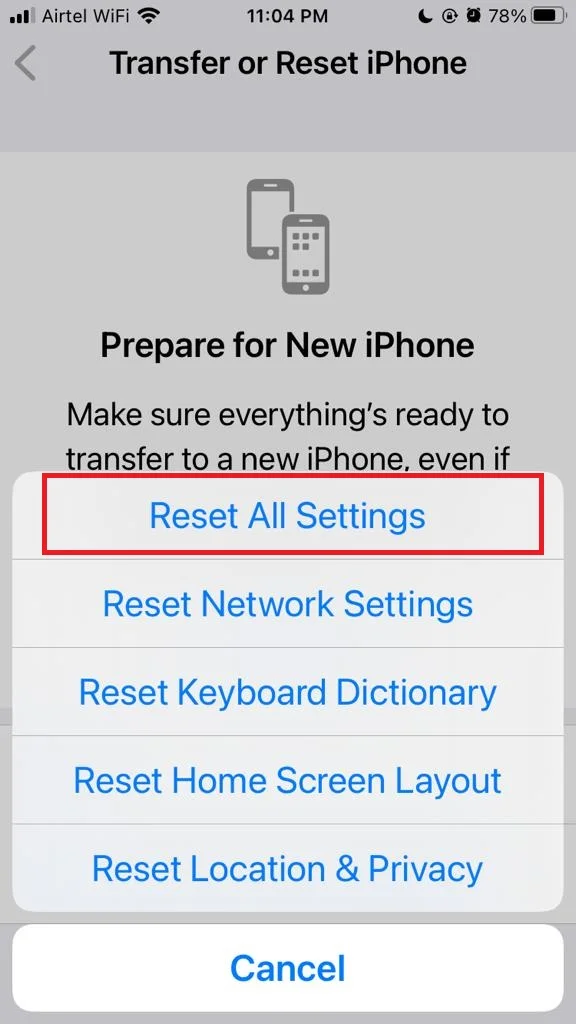
- Tap on Reset All Settings.
- Enter your iPhone passcode, if prompted, to confirm.
For More Details on resetting all settings click on Reset All Settings.
9. Contact Apple Support or Your ISP
If all else fails, you may have a hardware problem with your iPhone or your router. In that case, you should contact Apple support or your internet service provider (ISP) for further assistance. They may be able to diagnose and fix the issue for you or replace your device or router if needed. How to contact Apple Support? Click on Contact Apple Customer Care Support for details.
Conclusion
To sum up, there are several possible reasons why your iPhone may not connect to Wi-Fi, such as incorrect settings, outdated software, or hardware issues. You can try some simple fixes like restarting your device, forgetting and reconnecting to the network, or resetting your network settings. If none of these solutions are working, you may need to contact your service provider or Apple support for further assistance. Hopefully, this guide has helped you solve your Wi-Fi problem and get back online.
Must Read

3 thoughts on “How to Fix Wi-Fi Not Connecting to Your iPhone?”
Comments are closed.