If you’re an Apple user, you probably have an Apple ID that you use to access various services like iCloud, App Store, iTunes, etc. But what if you forget your password or lose access to your account? That’s where a recovery contact comes in the picture. A recovery contact is someone you trust (family and close friends) who can help you reset your password or verify your identity in case of an emergency. In this blog post, we’ll show you how to add a recovery contact for Apple ID on your iPhone and why it’s a good idea to do so. Must ensure that your recovery contact using iOS 15 or above (or iPadOS 15 or above). Let’s see it in detail.
How to Add a Recovery Contact for Apple ID on Your iPhone
Now unlock your iPhone to add a recovery contact for Apple ID on your iPhone.
- Open the Settings app.
- Tap on the Apple ID name (profile photo).
- Then, tap on Password & Security.
- Tap on Account Recovery.
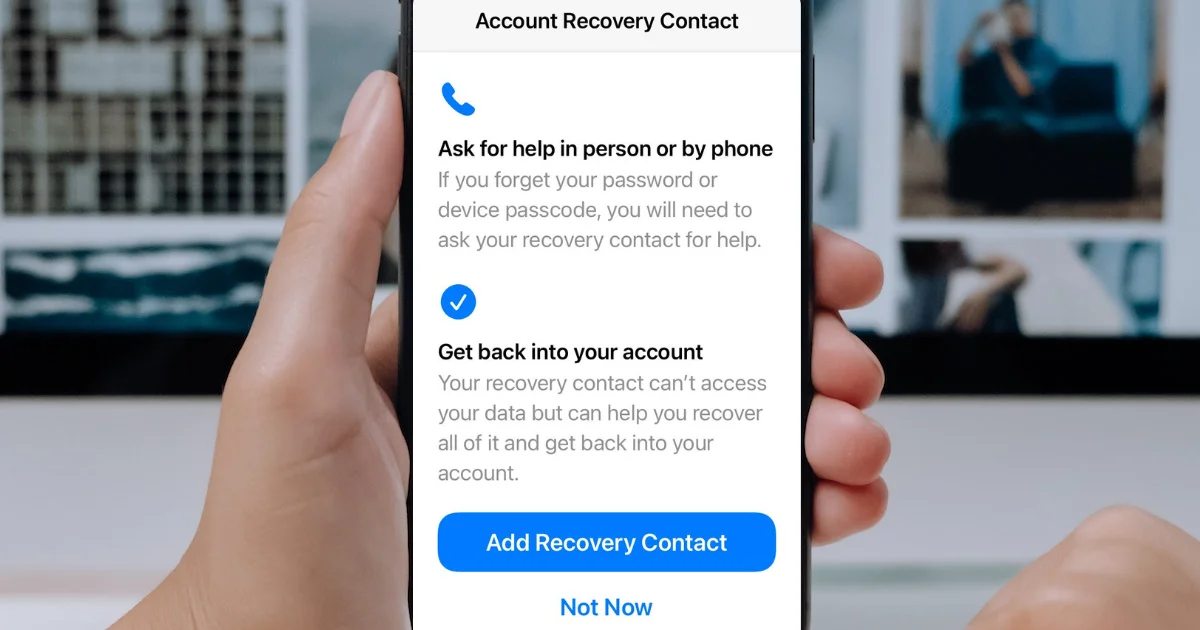
- Tap on Add Recovery Contact.
- Then, tap Add Recovery Contact.
- Write the recovery contact name and tap on Add (top-right).
- Tap on Send. It will send an invitation through the message to your recovery contact.
Now you have successfully added a recovery contact for Apple ID on your iPhone. Once your recovery contact receives this message, they needs to accept it. Once they accept your invitation you can see their name in the RECOVERY ASSISTANCE section on your phone.
It’s important to choose people who are close to you and whom you trust with your personal information. They should also be able to access their phone or email when you need their help.
How to Get Recovery Code as a Recovery Contact on Your iPhone
Someone has added you as a recovery contact for their Apple ID. Now see how to get a recovery code as a recovery contact for Apple ID on your iPhone.
- Open the Settings app.
- Tap on the Apple ID name (profile photo).
- Now tap on Password & Security.
- Tap on Account Recovery.
- Tap on the Apple ID under ACCOUNT RECOVERY FOR.
- Now tap on Get Recovery Code.
- Now share this code with your friend or family member who added you as a recovery contact.
- If you want to remove yourself as a recovery contact for them, tap on Remove below the Get Recovery Code option.
Now you successfully added you as a recovery contact for your close friend or family member.
How to Remove a Recovery Contact for Apple ID on Your iPhone
Once you have successfully regained access to your iCloud account, you have the option to remove your Recovery Contact. This applies particularly if your Recovery Contact is either no longer using an Apple device, operates with a different Apple ID, or using an Android device.
- Open the Settings app.
- Tap on the Apple ID name (profile photo).
- Now tap on Password & Security.
- Tap on Account Recovery.
- Tap on Remove Contact.
- Now again, tap on Remove Contact on the prompted message.
That’s All! Now after regaining access to your iCloud account, you have successfully removed a recovery contact for your Apple ID.
Note: Users can add up to five trusted individuals as account recovery contacts, enabling them to assist in the retrieval of their iCloud account and data when it is required. This includes all their end-to-end encrypted data, regardless of whether Advanced Data Protection is enabled. It’s essential to note that neither Apple nor the recovery contacts possess the necessary information independently to recover the user’s end-to-end encrypted iCloud data.
Conclusion
Adding a recovery contact for Apple ID on your iPhone is an effective way to protect your account and your data. It can save you a lot of hassle and frustration if you ever forget your password or lose access to your account. It also gives you peace of mind knowing that someone you trust can help you out when you need it. So do not wait, add a recovery contact immediately and enjoy the benefits of being an Apple user.
Must Read:
3 thoughts on “How to Add a Recovery Contact for Apple ID on iPhone?”
Comments are closed.