If you want to shoot some stunning videos with your iPhone, you might want to try the slow-motion feature. Slow-motion videos can make ordinary scenes or clips look extraordinary, whether it’s a bird flying, a waterfall splashing, or a balloon popping. In this blog post, we will show you how to record a slow-motion video on an iPhone, and how to edit and share it afterward.
Recording a slow-motion video is all about altering its frame rates. A frame rate for a video is the number of frames your camera captures every second while shooting the video using your iPhone. Let’s see it in detail.
What is a Slow Motion (SLO-MO) Video?
Slow-motion (SLO-MO) video is a video that has been recorded at a high frame rate and then slowed down to a normal or lower frame rate when played back. iPhone can record slow-motion videos at 120 fps and 240 fps. SLO-MO video will look slower than normal because it has a higher frame rate than normal.
How to Record a Slow-Motion Video on an iPhone
To add slow-motion to the earlier recorded video on your iPhone, we can use three easy methods. Let’s look at it in detail.
Use the Photos App to Record a Slow-Motion Video
If you already recorded a video at high fps (120 or 240) using your iPhone, and want to make it a slo-mo video, you can do it very easily using the iPhone’s Photos app. Let’s see how to do this.
- Open the Photos App.
- Tap on the video you want to make in SLO-MO.
- Tap Edit (top right).
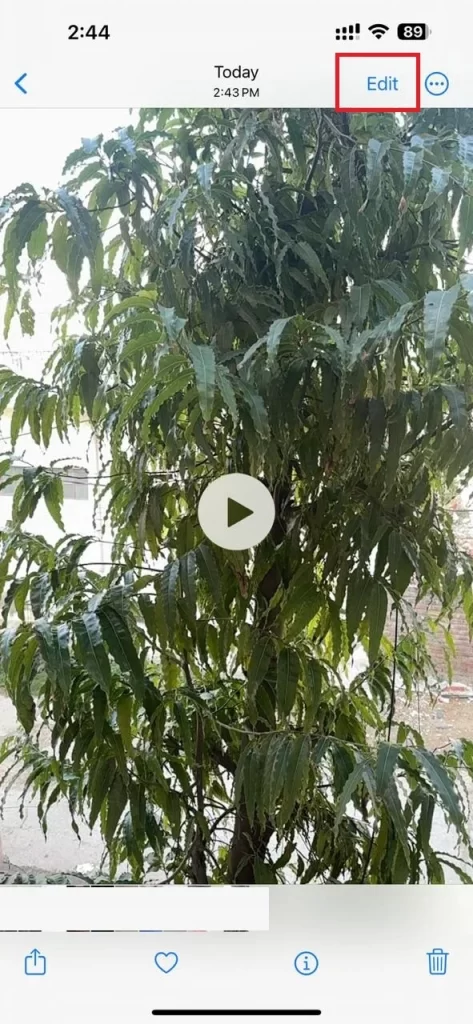
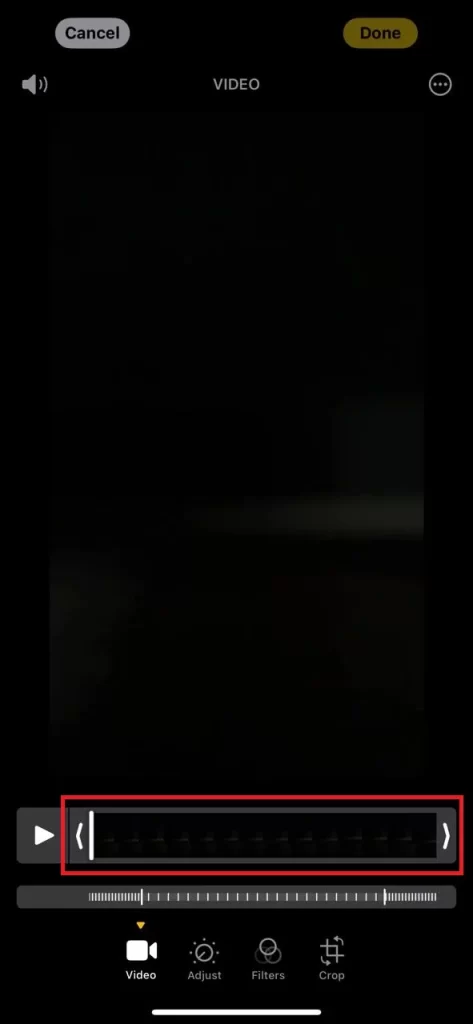
- Then, drag the handles to fix the part of the video you want to do in slow motion.
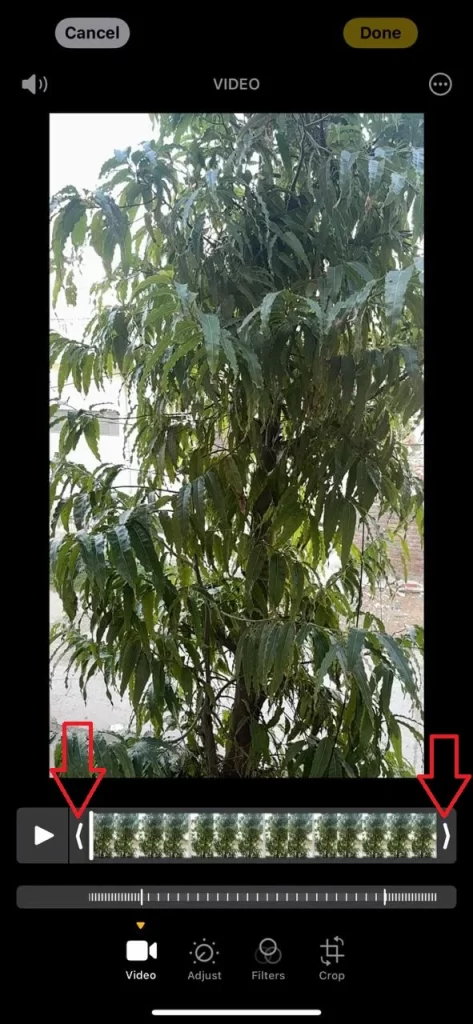
- Tap and hold the handle further for more precise editing. You can also swipe left or right to adjust the handle precisely and leave it when you are done with it.
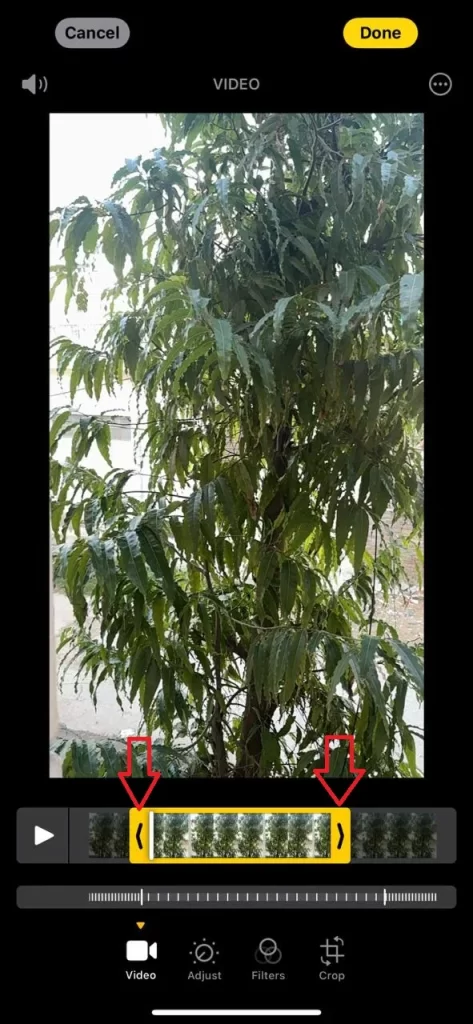
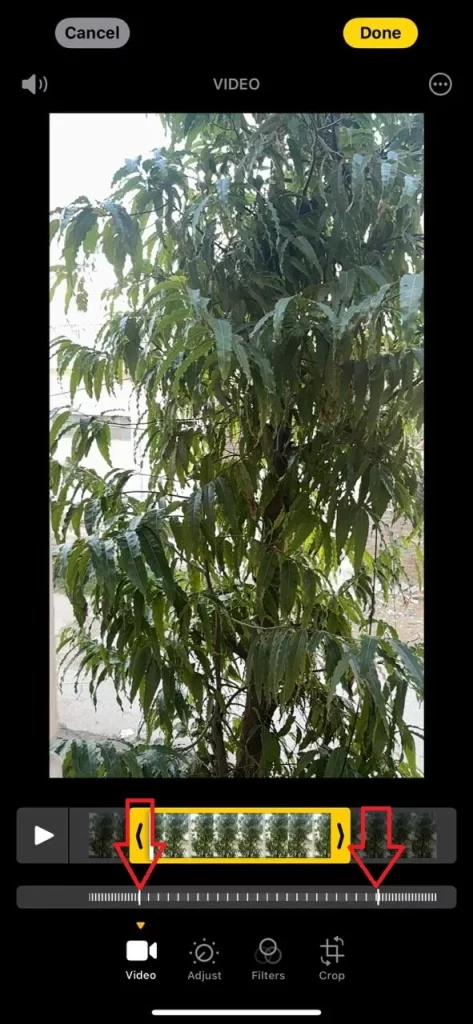
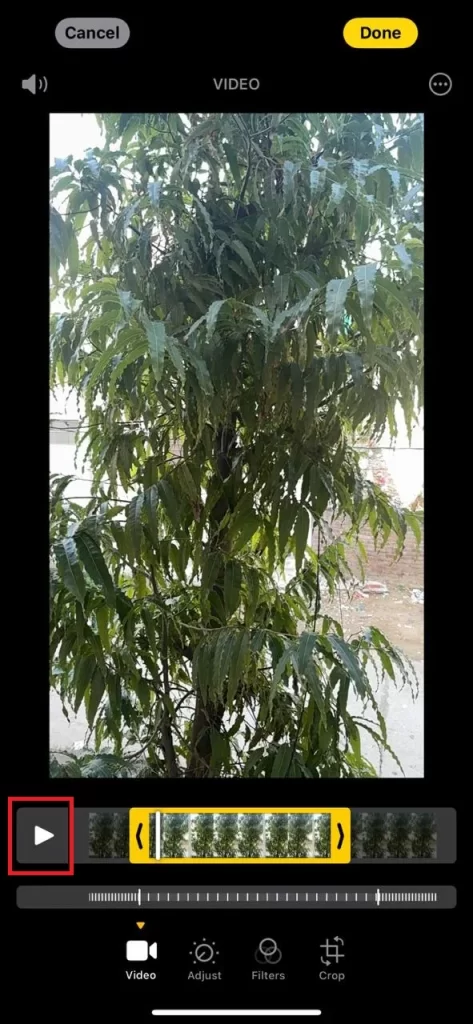
- Tap the play button to see the preview of the slo-mo video.
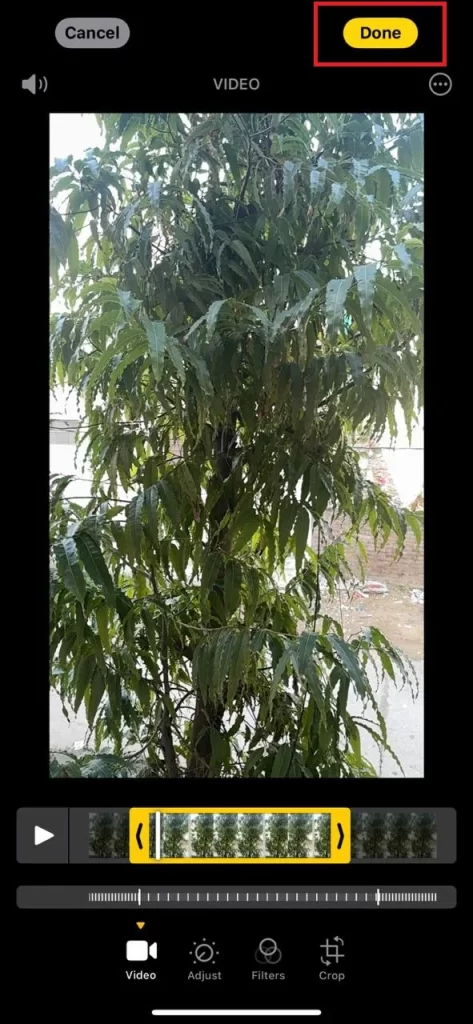
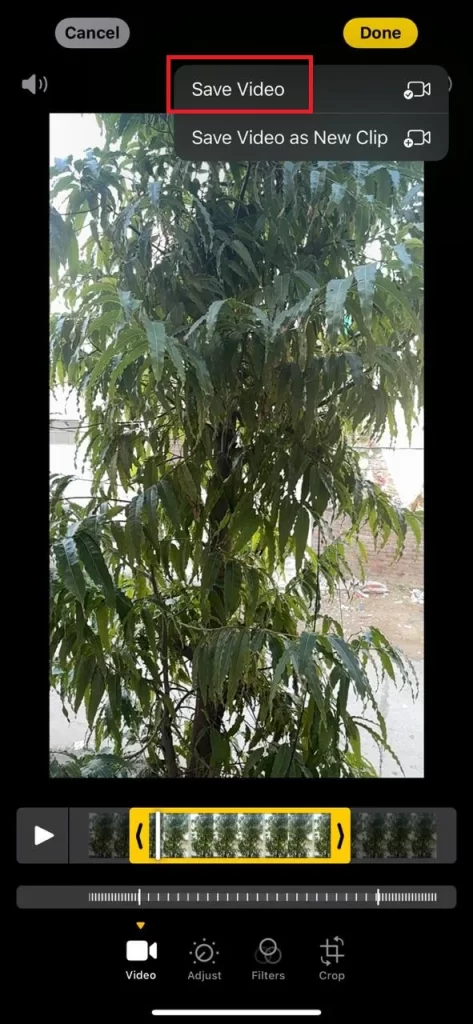
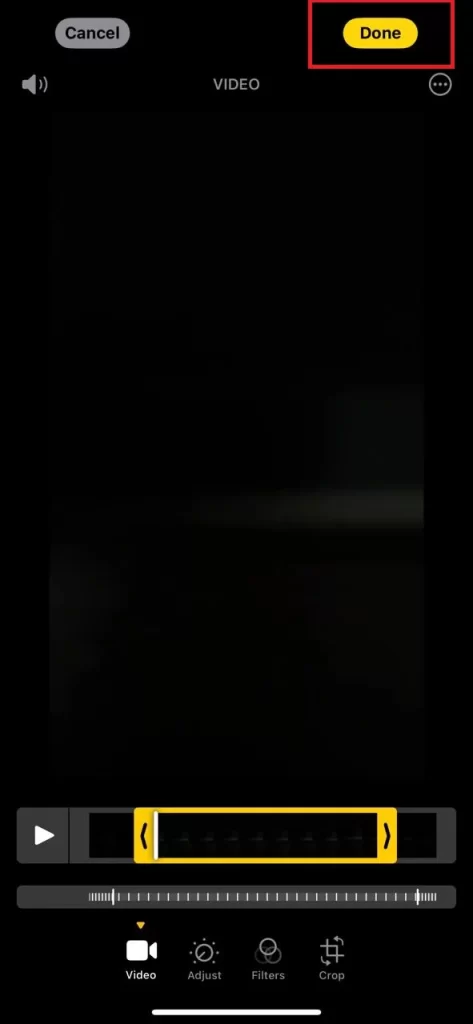
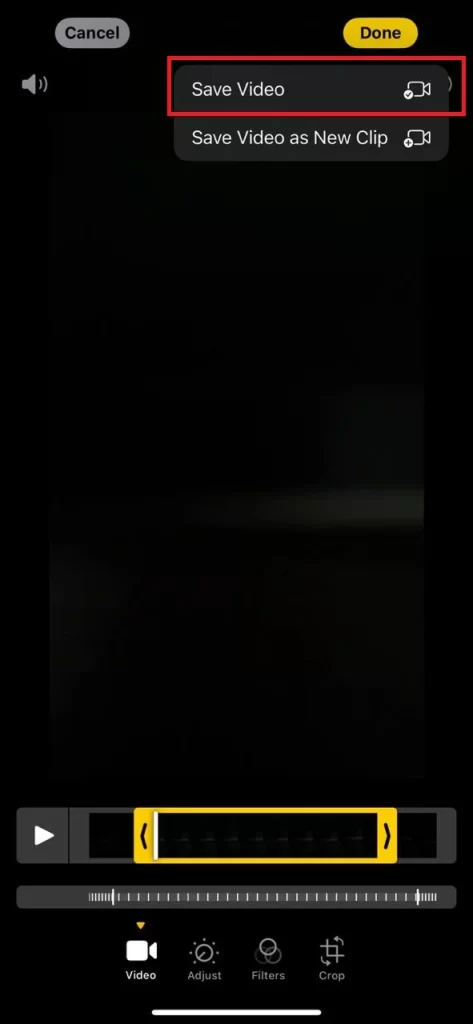
- Then, tap on Done (top right), then Save Video to save the video on your iPhone if you are fully satisfied with the video.
That’s it! You have successfully recorded a slow-motion video on your iPhone.
Use iMovie App
Another option to make a slow-motion video on your iPhone is to use the iMovie app. Let’s see how to do this.
- Install the iMovie App on your iPhone and tap to open it.
- Tap Continue (if you opening the iMovie app for the first time).
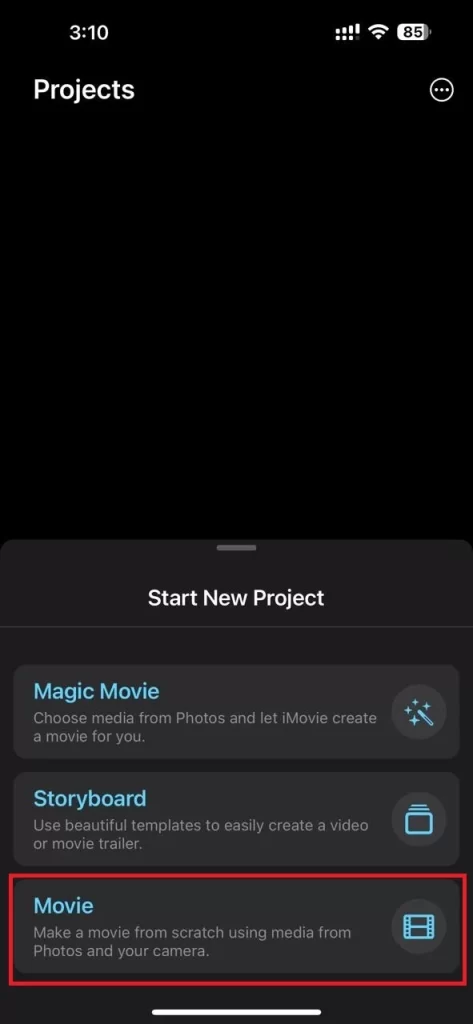
- Tap Movie (at the bottom).
- Then, tap the video you want to make it in slo-mo.
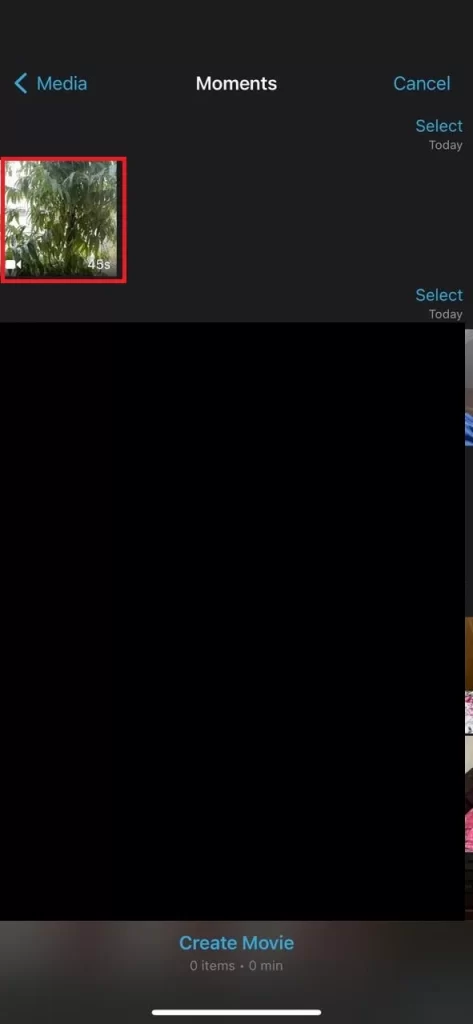
- Tap Create Movie at the bottom of the screen.
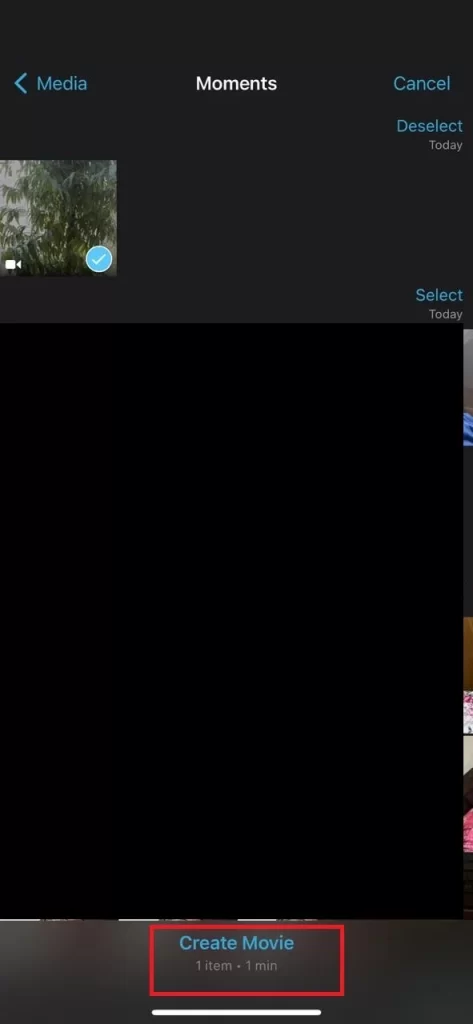
- Then, pinch using your two fingers to zoom out the timeline.
- Now tap the video on the timeline to select it.
- Tap on the speed tool icon (at the bottom).
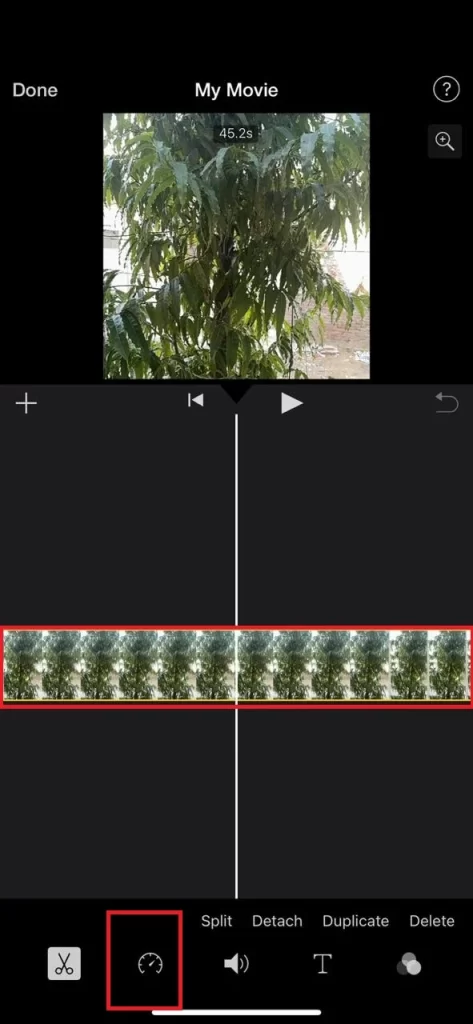
- If this video is shot through the SLO-MO feature of the iPhone, it will automatically select a part of the video clip when you tap on the speed tool icon otherwise it will select the entire video.
- Now adjust the speed while holding and dragging the sliders left or right.
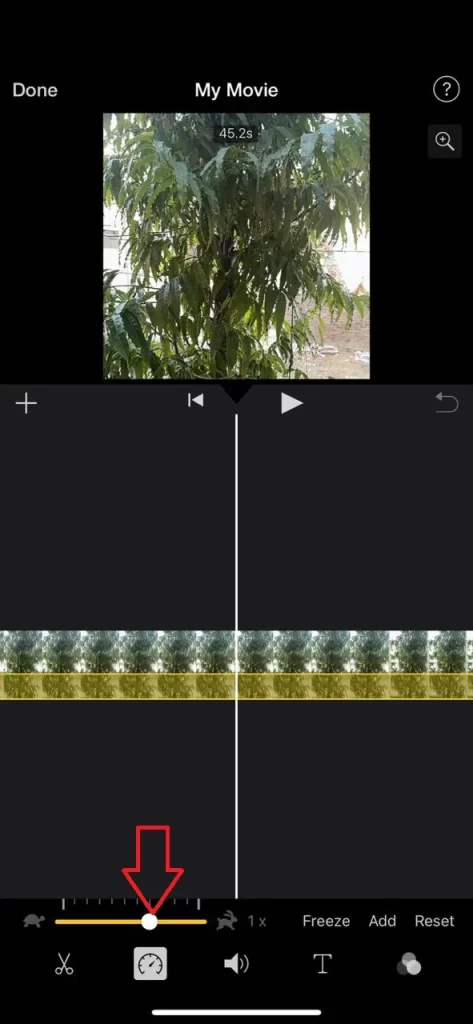
- Tap on the clip’s other part to select it.
- Now, drag the handle to the left or right to adjust its speed.
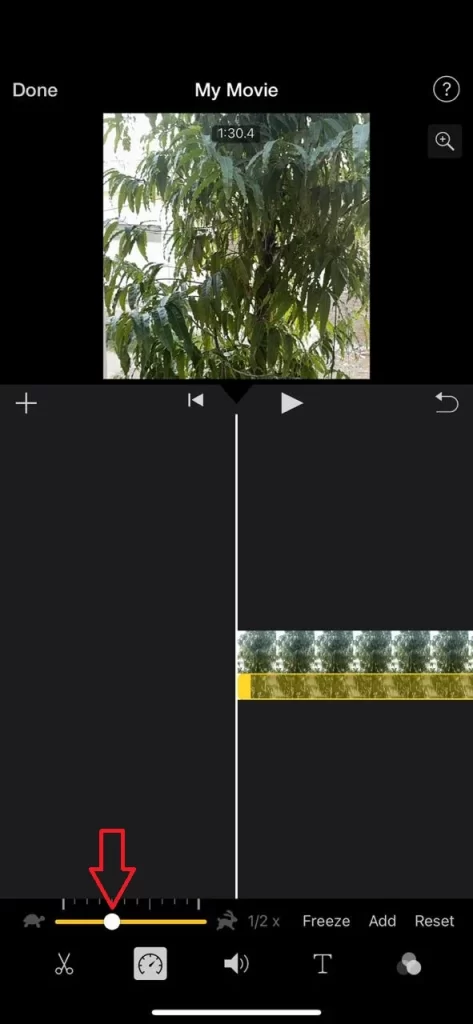
- Now, tap on the Play/Pause button to see the preview of your video.
- If you captured your video in the vertical orientation, tap and hold the video preview using your two fingers and swipe it clockwise to make it fit into the screen, otherwise, you will end up with a square-cropped video.
- Tap Done (top left).
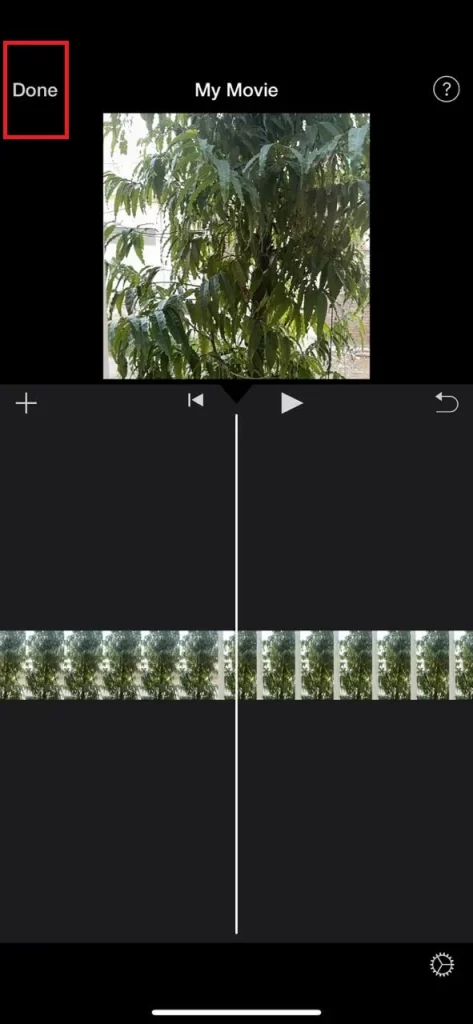
- If you want to share it, tap on the share icon at the bottom of the screen.
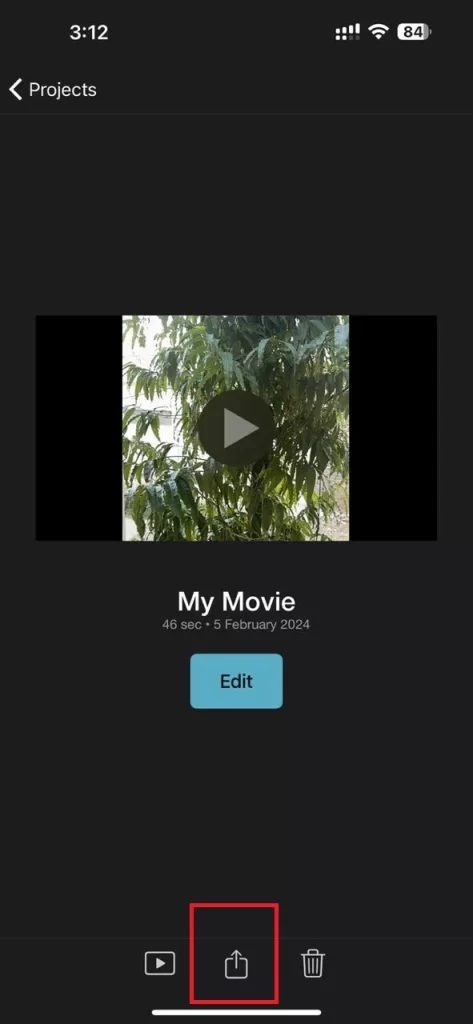
- Tap Share Video.
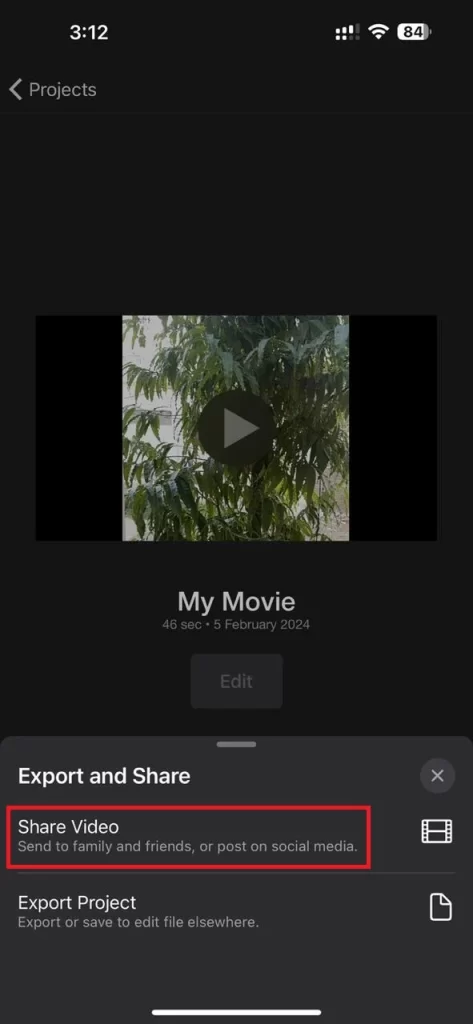
- Tap Save Video to save it on your iPhone Photos library.
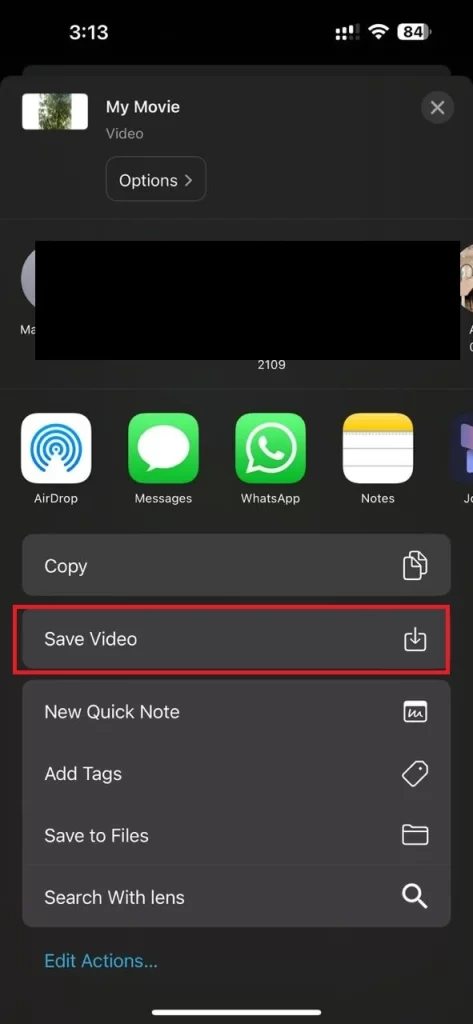
- Then, wait a moment to get your video exported. Tap OK. Now your slo-mo video will be saved to the Photos library.
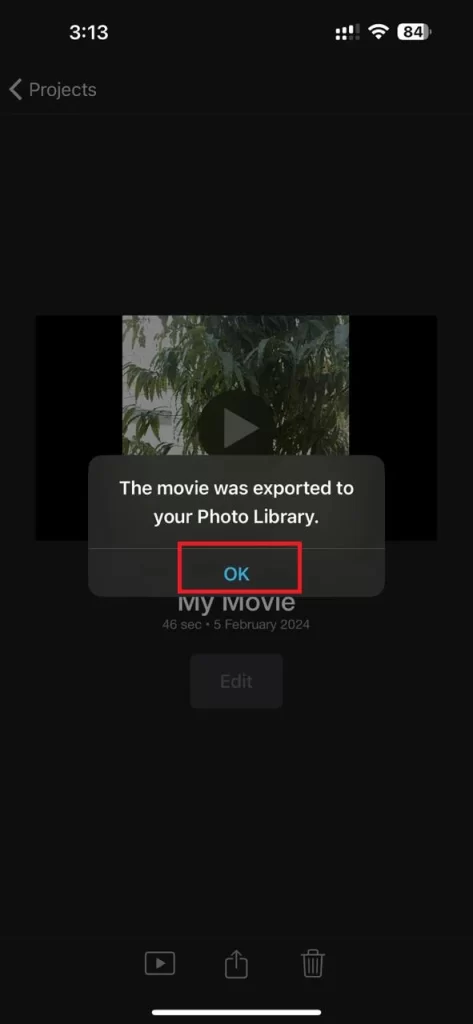
That’s it! You have successfully recorded a slow-motion video using the iMovie app on your iPhone.
How to Record a Slow-Motion Video Using a Camera App
To record slow-motion video using a camera app, follow the below steps:
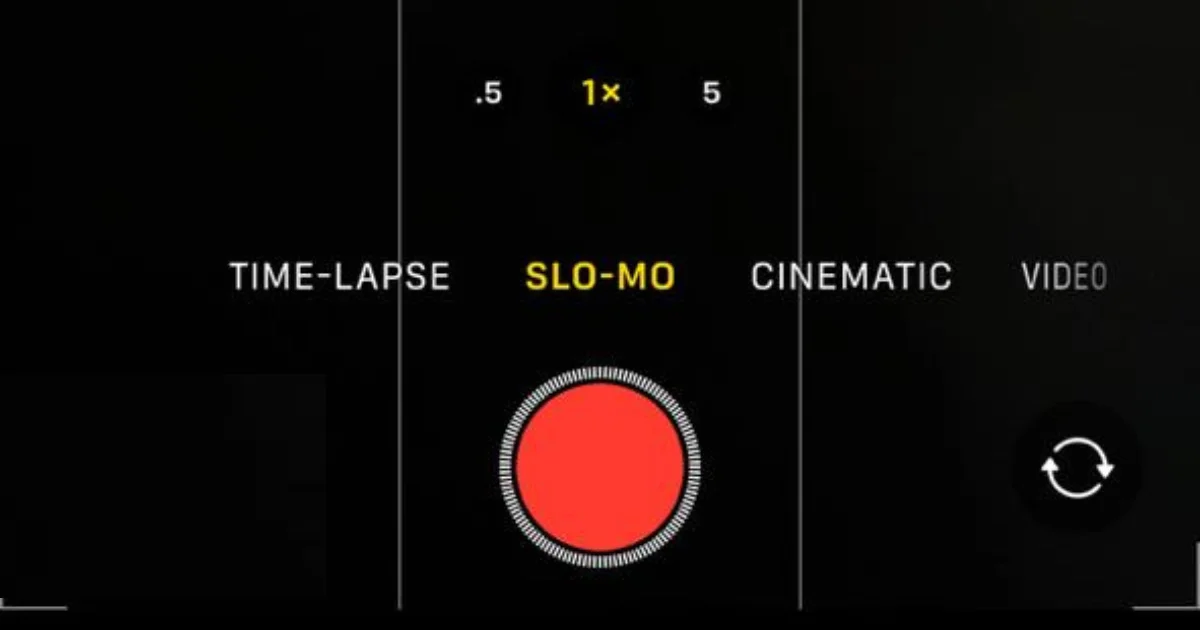
- Open the Camera App.
- Swipe to the Slo-mo mode.
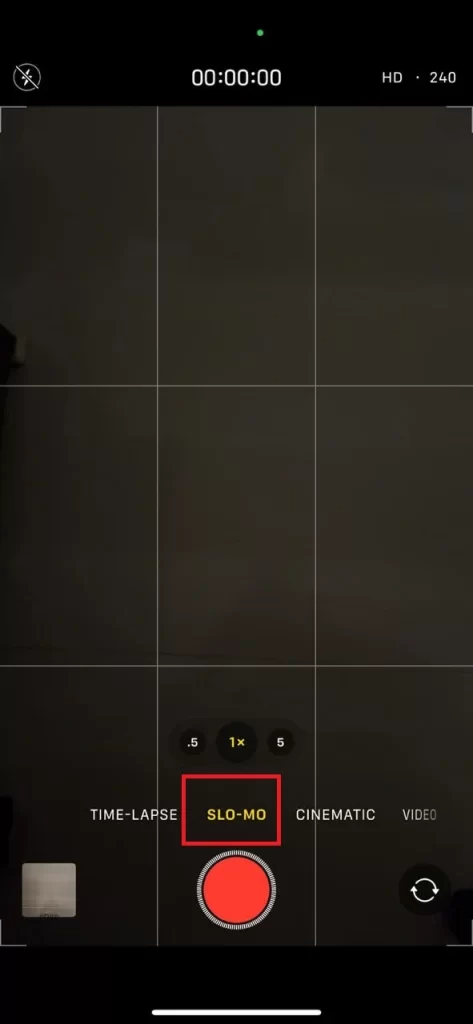
- Tap the recording button to start your recording video.
- Tap the recording button again to stop your recording video.
- Now see the preview of your video by tapping the thumbnail in the bottom left corner.
- To edit your video, tap the Edit button at the bottom.
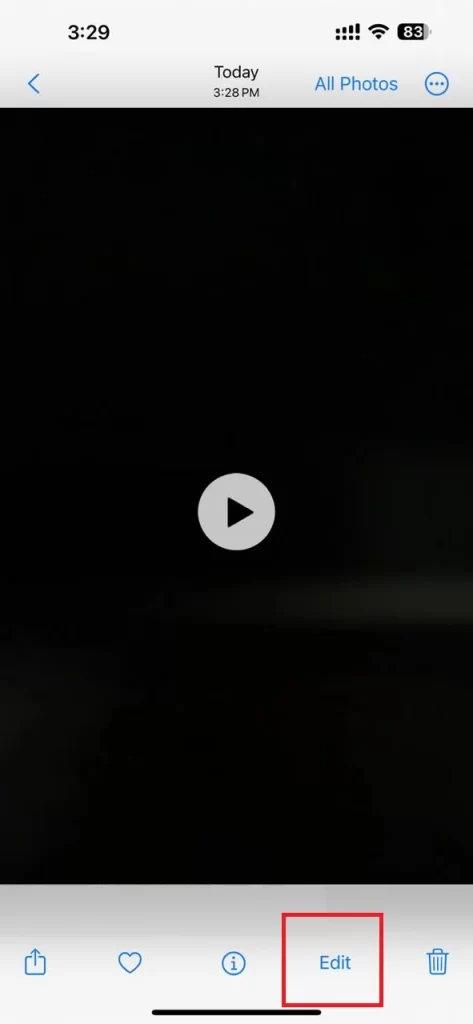
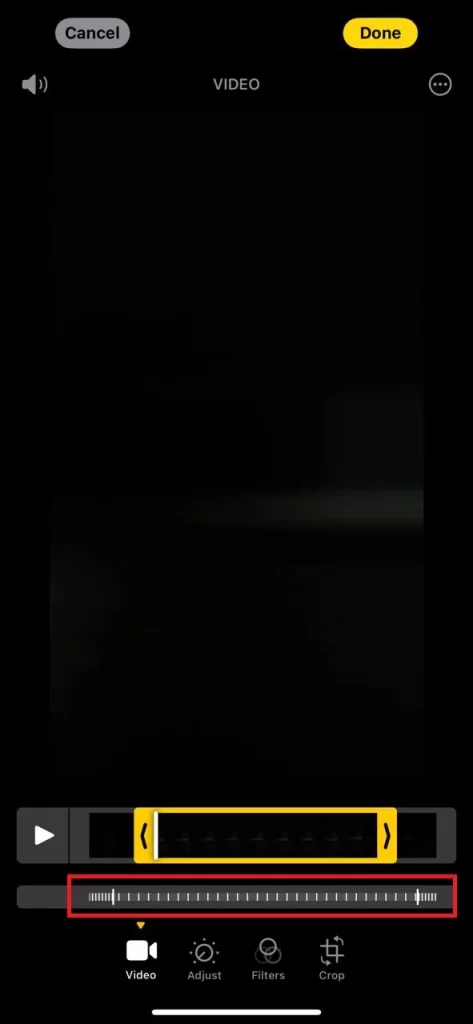
- Now, you can adjust your video’s start and end points by dragging the yellow handles on the timeline. You can also change the speed of your video by dragging the white vertical bars on the timeline. The sections between the bars will play in slow motion, while the sections outside the bars will play at normal speed. You can add or remove bars by tapping on the timeline.
- To save your changes, tap Done, then, Save Video at the top right corner. You can also revert to the original video by tapping again on Edit at the top right corner then Revert then Revert to Original at the bottom of the screen.
- To share your video, tap the Share button in the bottom left corner. You can choose from various options, such as Messages, Mail, AirDrop, or social media apps. You can also save your video to your Photos app or iCloud Drive.
That’s it! You have successfully recorded and edited a slow-motion video using the iPhone’s Camera app.
Conclusion
Recording a slow-motion video on an iPhone is a simple and fun way to capture amazing moments. You can use the Camera app to record new SLO-MO videos or Photos and the iMovie app to make SLO-MO videos for earlier captured videos. With these easy steps mentioned above in this blog post, you can create your slow-motion masterpiece in no time.
Must Read

1 thought on “How to Record a Slow-Motion Video on an iPhone?”
Comments are closed.