
Airplane mode is a feature that allows you to turn off the wireless communication functions of your device, such as Wi-Fi, Bluetooth, cellular data, and GPS. This can help you save battery power, avoid interference with airplane equipment, or comply with certain regulations or policies. In this blog post, we will show you how to enable or disable airplane mode on Windows 11, the latest operating system from Microsoft. Depending on your preference and convenience, there are several ways to do this. Let’s see each in detail.
1. Enable or Disable Airplane Mode by Using Quick Settings
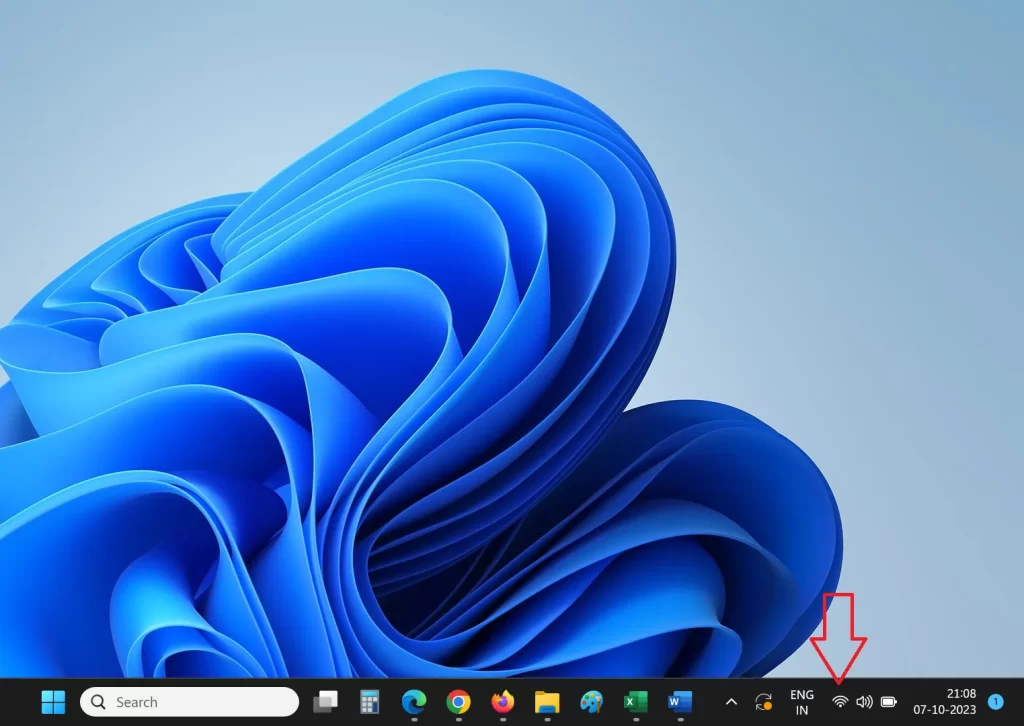
One of the easiest ways to enable or disable airplane mode on Windows 11 is to use the Quick Settings menu, which you can access from the taskbar. Let’s see how to do this.
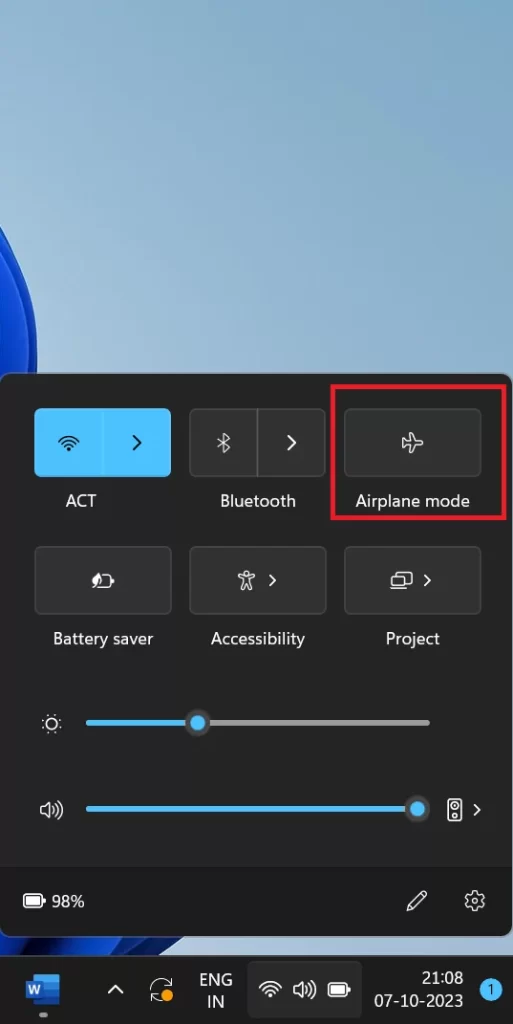
- Click on the Wi-Fi icon (or Volume icon or Battery icon) in the lower right corner of the taskbar. This will open the Quick Settings menu in the lower right corner.
- Click on the airplane icon to enable airplane mode.
- To disable the airplane mode, click on the airplane mode again.
2. Enable or Disable Airplane Mode by Using the Settings Menu
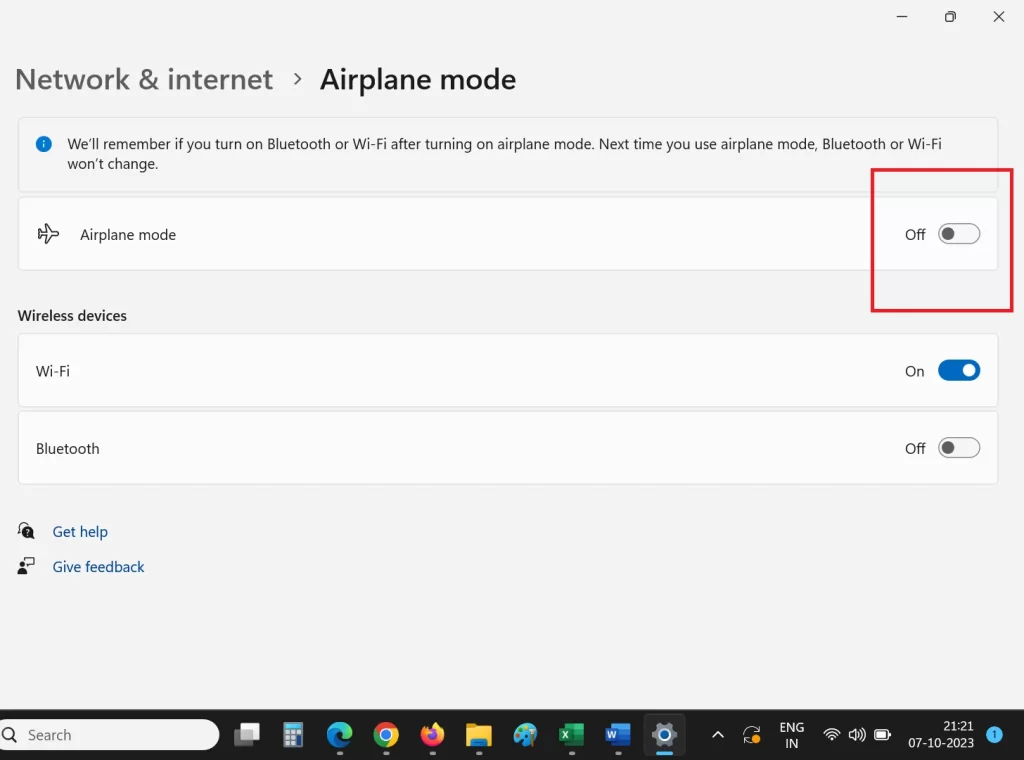
Another way to enable or disable airplane mode on Windows 11 is to use the Settings app, which gives you more control over your network settings. Here are the steps:
- Click on the Start button on the lower left corner of the taskbar, and then click on the Settings icon. Or press the Window icon + I from the keyboard to open the Settings menu.
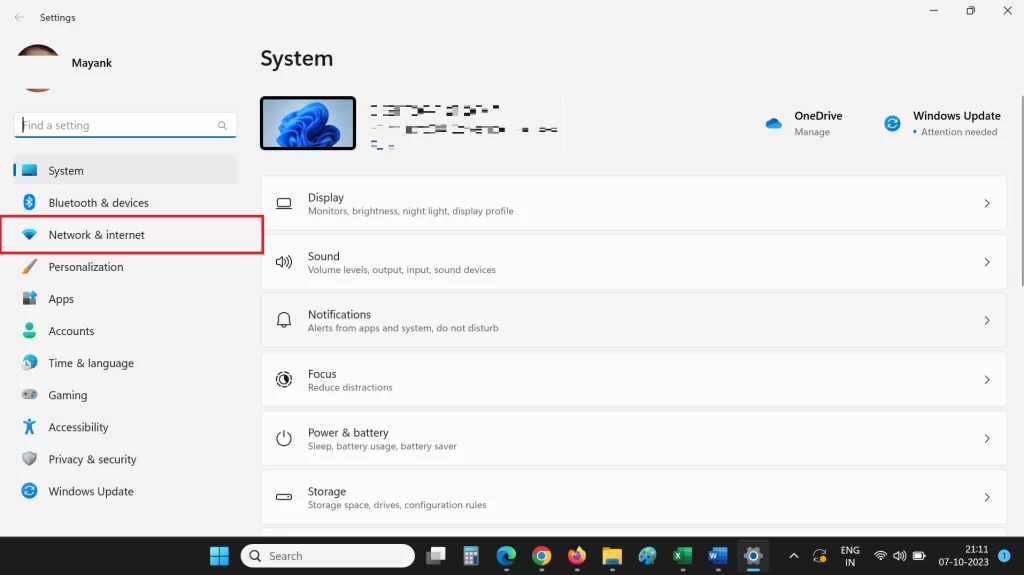
- In the Settings, click on Network & internet on the left sidebar.
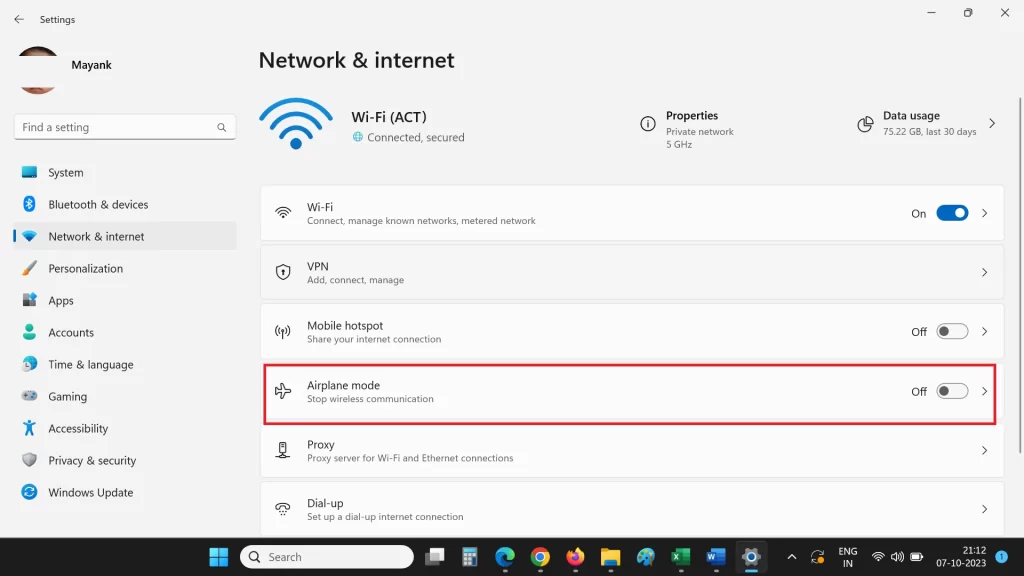
- On the right pane, click on Airplane mode.
- Enable the toggle switch for Airplane mode to turn it on. It will immediately disable the toggles for Wi-Fi and Bluetooth but if required, you can also enable Wi-Fi and Bluetooth to use it in Airplane Mode.
- To disable the airplane mode, turn off the toggle switch for Airplane mode.
3. Use the Keyboard Shortcut
A third way to enable or disable airplane mode on Windows 11 is to use a keyboard shortcut, which is useful if you want to do it quickly without using your mouse. Here are the steps:
- Press and hold the Fn key (Function Key) and then press the PrtScn key (or F12 ). This will toggle airplane mode on. You will see a notification on the lower right corner of the screen.
- To disable Airplane Mode, press and hold again the Fn key (Function Key) and then press the PrtScn key (or F12 ).
Note that this keyboard shortcut may vary depending on your device model and manufacturer. Check your device (laptop or PC) manual or website for more information.
Using the Wi-Fi icon From the Login Screen
The fourth and last easy step to enable or disable airplane mode on Windows 11 is to use the Wi-Fi icon before logging into your Windows PC or Laptop. Here are the steps:
- Click on the Wi-Fi icon on the lock screen.
- Click on Airplane mode and airplane mode for the device will be turned on.
- To disable it, again click on Airplane mode.
That’s it! You successfully enabled or disabled the Airplane mode by using different easy methods. There are also more methods to do this but these are the best and easy to understand.
Conclusion
Airplane mode is a useful feature that lets you turn off the wireless communication functions of your device. You can enable or disable it on Windows 11 using different methods, such as the Quick Settings menu, the Settings app, or a keyboard shortcut. We hope this blog post has helped you learn how to do it easily and effectively.
Must Read
1 thought on “How to Enable or Disable Airplane Mode on Windows 11 PC?”
Comments are closed.