
If you have an iPhone and a PC, you might wonder how to transfer your photos from one device to another. There are several ways to do this, depending on your preferences and needs. In this blog post, we will show you how to transfer your iPhone images to your PC using different methods, such as iCloud, iTunes, USB Lightning Cable, and Bluetooth.
How to Transfer Your iPhone Images to Your PC Using iCloud
iCloud is a cloud storage service that allows you to sync your photos and other data across your Apple devices. This is the easiest way to transfer your images to a PC from iCloud service. Once you enable iCloud storage on your iPhone, all images will be automatically stored there in a very secure way and easy to access on any PC (Personal Computer). Let’s see in detail how to use iCloud to transfer your iPhone images to your PC.
- Make sure you are using Windows 10 or Windows 11 PC.
- Download and install iCloud for Windows 10 or 11.
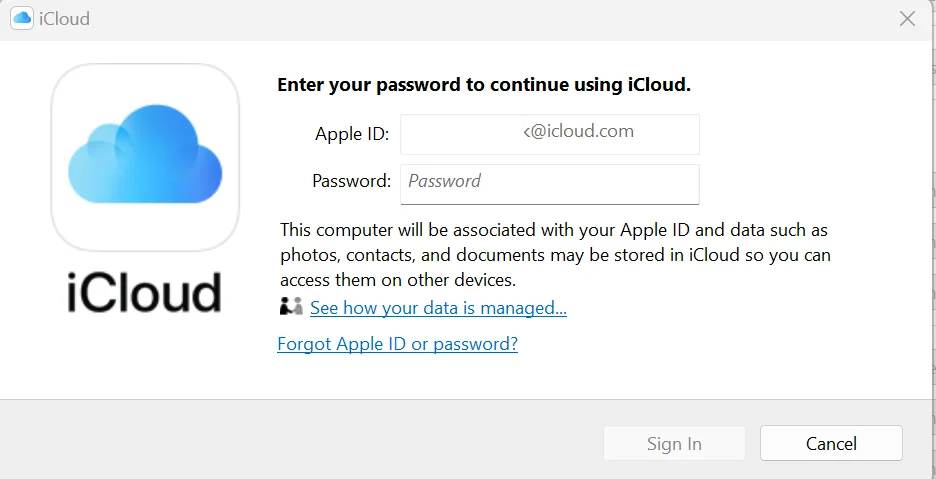
- Log in to iCloud using Apple ID and Password.
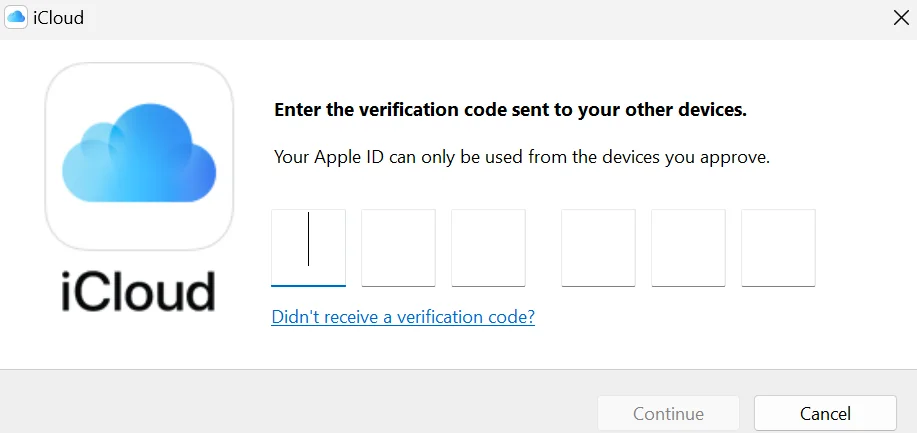
- Follow the on-screen instructions on the iPhone (i.e., Tap Allow on the iPhone and enter the verification code sent to the iPhone on the PC)
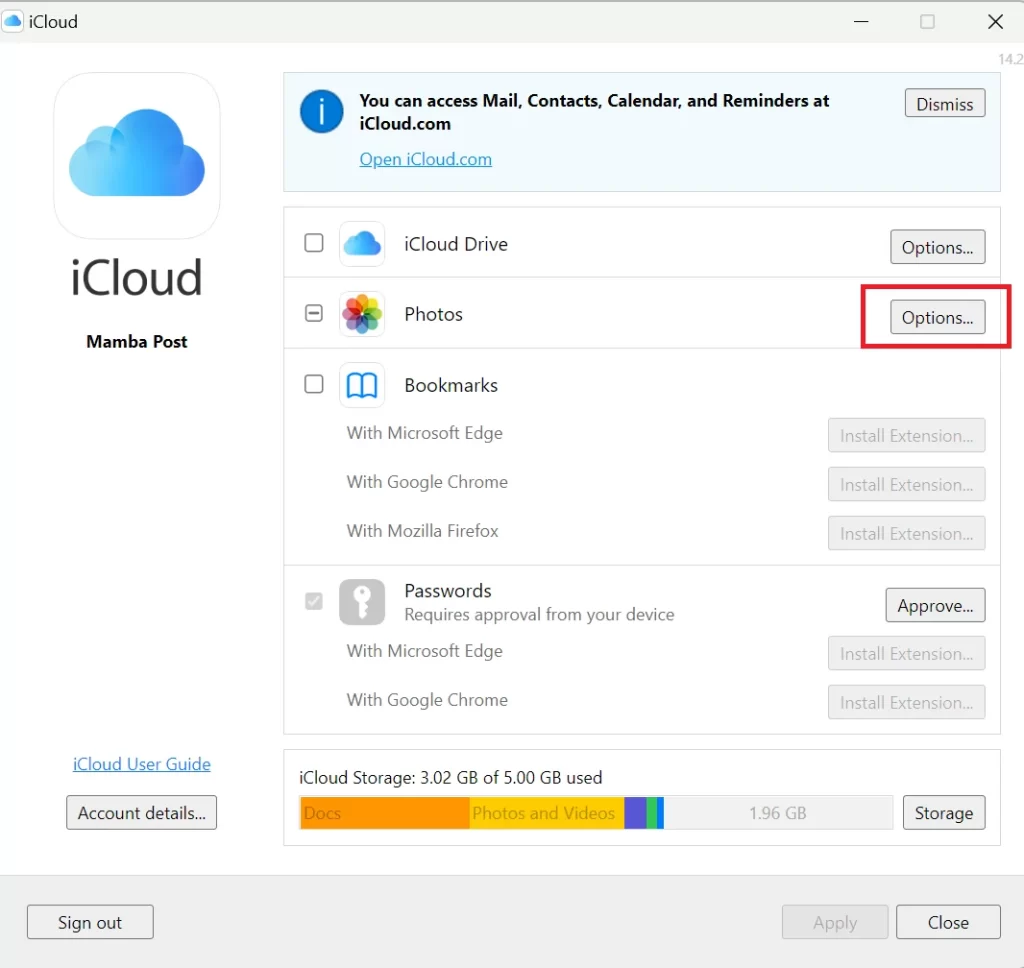
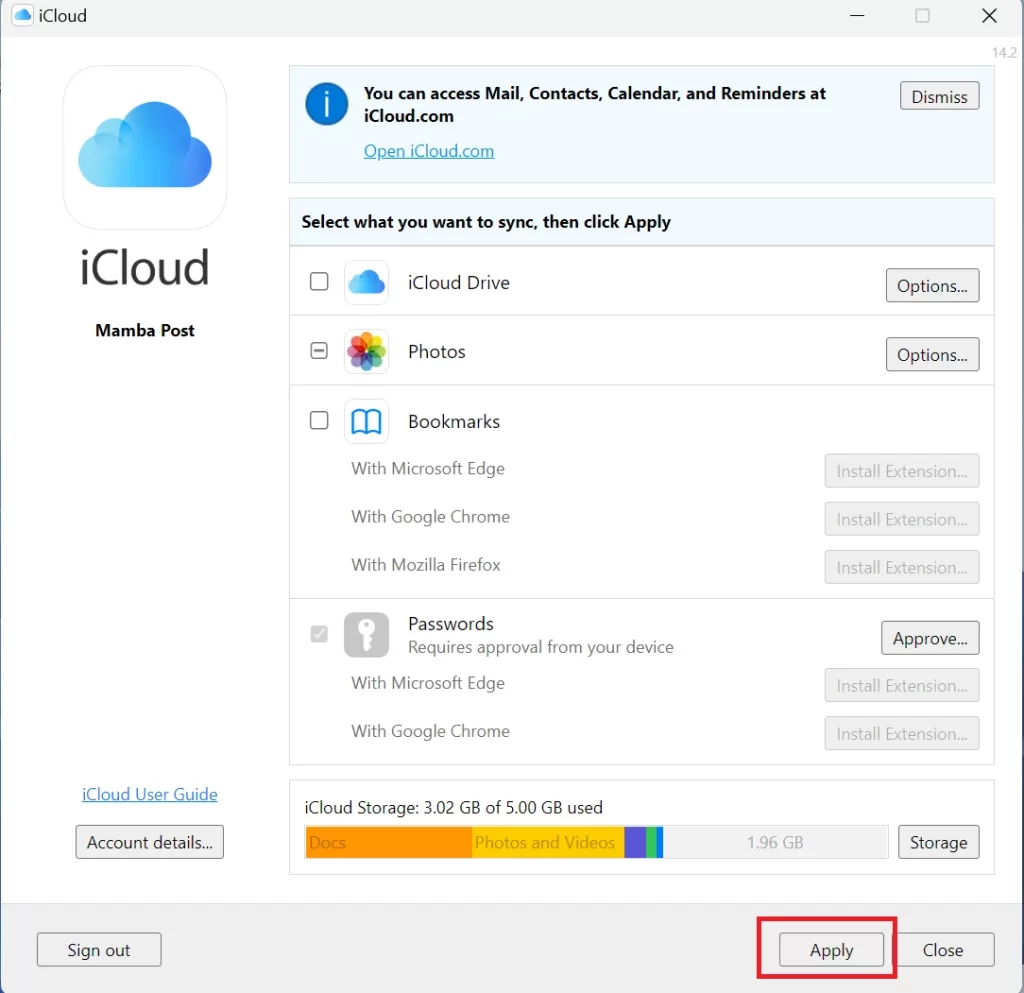
- Click on Options next to Photos.
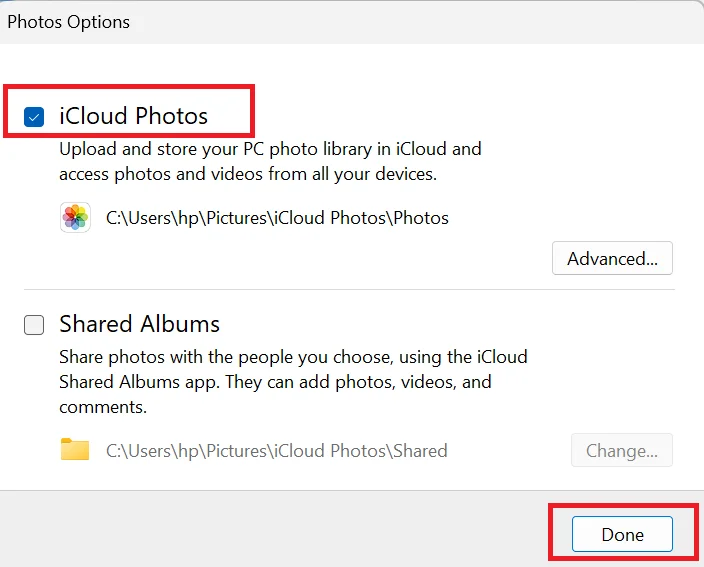
- Click on iCloud Photo. Here you will see the location where your images will be downloaded.
- Then, click Done and then Apply. Now your Images from iCloud start downloading.
How to Transfer Your iPhone Images to Your PC Using iTunes
iTunes is a media management software that allows you to sync your music, videos, podcasts, and photos between your iPhone and PC.
- Make sure you have the latest version of iTunes Software installed on your Windows PC.
- Connect your iPhone to your PC using the USB Lightening cable.
- You might need to unlock your iPhone before moving forward.
- Tap on Trust or Allow on your iPhone if the “Trust This Computer”message is prompted. Now your PC can access your iPhone. To transfer iCloud images to your iPhone, you must first download it on your iPhone, otherwise, it will not transfer.
- Since your iPhone is now connected to your PC, click on Photos App. If you using a Mac, link the iPhone through a USB Lightening cable, and click on the Photos App.
- Move to Import. If you don’t find the Import screen, click on the iPhone’s name on the left-hand sidebar.
- Select from Import Selected or Import All New Photos.
- Now your all-selected images or all new images will be copied and transferred to your PC or Mac.
How to Transfer Your iPhone Images to Your PC Directly
You can also transfer your iPhone images to your PC directly without using the iCloud App or iTunes. Let’s see in detail.
- Connect your iPhone to your Windows PC with a USB Lightning cable.
- Tap on Allow on iPhone for message Allow this device to access photos and videos.
- Open File Explorer on your Windows PC (10 or 11).
- Click on your device name (Apple iPhone) in the left-hand sidebar.
- Click on the DCIM folder. Here you see more sub-folder names too. The default folder for images is 100APPLE, 101APPLE, 102APPLE, and so on.
- Copy (Don’t move) them and paste them to your preferred location on PC or Mac. If you move, it will be removed from your iPhone.
Transfer Images Using Bluetooth
This is another way to transfer images to your PC. Earlier versions of the iPhone don’t have this feature but now it is available.
- Enable Bluetooth on your iPhone. Go to the Settings App, tap Bluetooth, and turn on the toggle switch for Bluetooth.
- Turn on the Bluetooth on your Windows PC and connect it to your iPhone. Enter a one-time password if asked.
- Once connected, transfer the images in the same way as you did on “How to Transfer Your iPhone Images to Your PC Directly”.
That’s it! You successfully transfer your iPhone images to your PC using iCloud, iTunes, USB Lightning cable, and Bluetooth.
Conclusion
In summary, there are several ways to transfer your iPhone images to your PC, depending on your preferences and needs. You can use iCloud, iTunes, a USB lightning cable, or Bluetooth to sync your photos wirelessly or with a cable. Alternatively, you can use File Explorer or the Photos app on Windows to import your photos manually. Whichever method you choose, you can enjoy viewing and editing your iPhone images on your PC with ease.
Must Read
1 thought on “How to Transfer Your iPhone Images to Your PC?”
Comments are closed.