If you’re a fan of shooting videos with your iPhone, you might want to know how to change the FPS (frames per second) settings for your camera. FPS is a measure of how many images are captured in one second of video. The higher the FPS, the smoother and more realistic the motion will look. The lower the FPS, the choppier and more jittery the motion will look. Let’s see more detail on how to change FPS for video on iPhone camera while recording.
What is FPS for Video?
The FPS stands for frames per second. It means how many images are captured in one second of video. FPS is directly proportional to the quality of the video. Higher FPS indicates more realistic video. The default FPS setting for the iPhone camera is 30, which is good enough for most situations. However, you might want to change it depending on what kind of video you’re making. For example, if you’re shooting a fast-paced action scene, you might want to increase the FPS to 60 or even 120 to capture every detail of the movement. On the other hand, if you’re going for a cinematic or artistic effect, you might want to lower the FPS to create a more dramatic or stylized look.
How to Change FPS for Video on iPhone Camera
Changing the FPS settings on your iPhone camera is easy and quick. Let’s see how to do it.
- Tap on the Settings App.
- Then, tap on the Camera.
- Now, tap on Record Video.
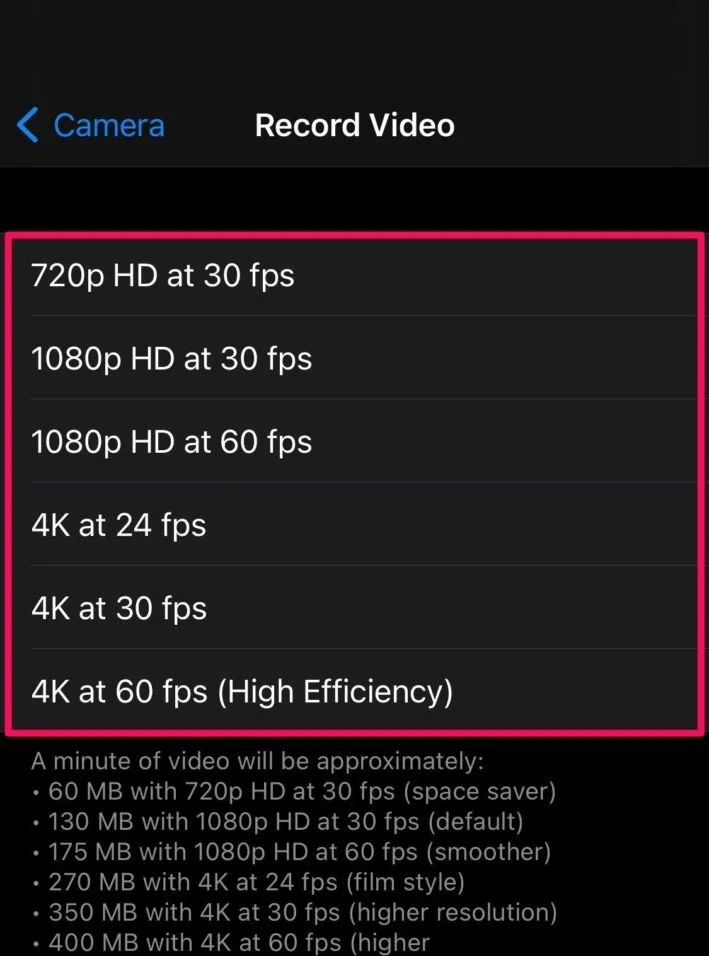
- Here you need to choose the resolution and FPS combination that you want. You can choose from 720p HD at 30 FPS, 1080p HD at 30 or 60 FPS, or 4K at 24, 30, or 60 FPS.
- Now, exit from the Settings app and open the Camera app.
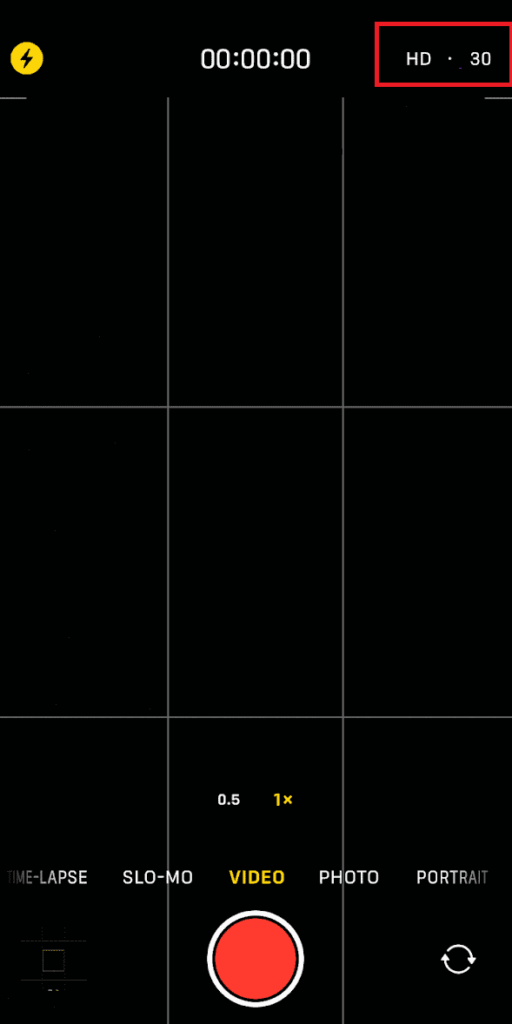
- You should see a label on the top right corner of the screen indicating the resolution and FPS that you selected. You can also change the resolution here by tapping on the resolution at the top right corner of the screen.
- Start recording your video as usual. You can switch between different resolutions and FPS by going back to the top 3 steps and changing them anytime.
That’s it! You’ve just learned how to change the FPS settings for your iPhone camera. Now you can experiment with different effects and styles for your videos.
Note: The higher resolutions and FPS will take up more storage space on your phone. Let’s see the impact on storage for each FPS.
Depending on the quality and speed of your video, you’ll use up more or less storage. For example,
- If you record a video in 720p HD at 30 frames per second (fps), you’ll need about 60MB of storage per minute.
- But if you record video in 1080p HD at 30 fps, that jumps to 130MB per minute.
- If you to record video in 1080p HD at 60 fps, you’ll need 175MB per minute.
- If you record video in 4K at 24 fps, 30 fps, and 60 fps, you’ll need 270MB, 350MB, and 400MB respectively per minute.
How to Change FPS for Slow-Motion Video on iPhone Camera
Let’s see how to change FPS for slow-motion video on your iPhone Camera.
- Tap on the Settings App.
- Then, tap on the Camera.
- Tap on Record Slo-mo.
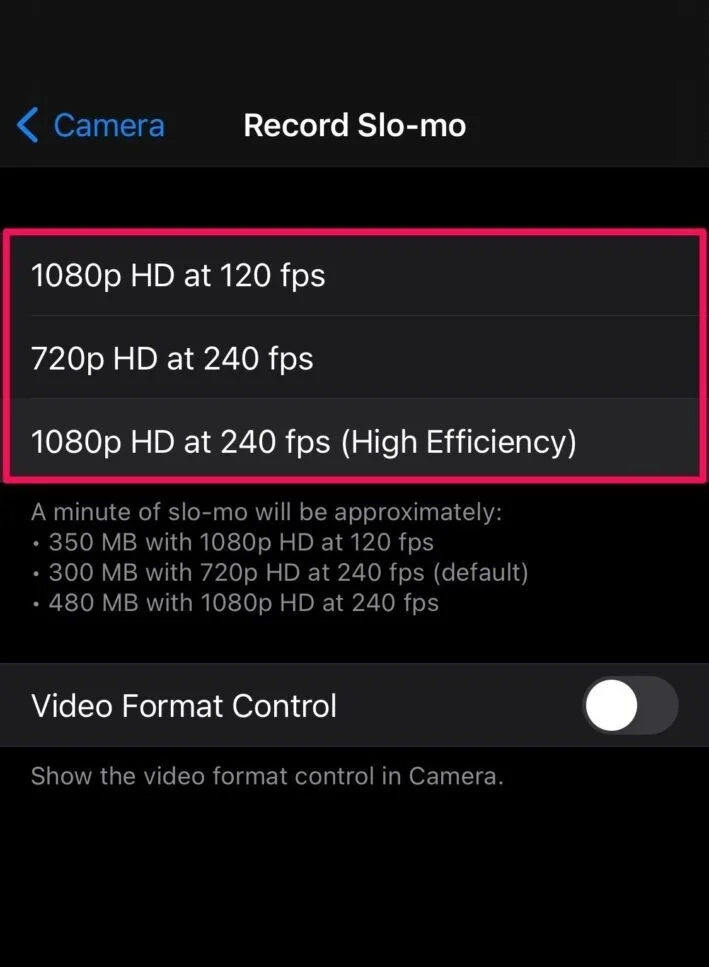
- Now, here you need to choose the resolution and FPS combination that you want. You can choose from 180p HD at 120 FPS, 720p HD at 240 FPS, or 180p HD at 240 FPS.
- Now, exit from the Settings app and open the Camera app.
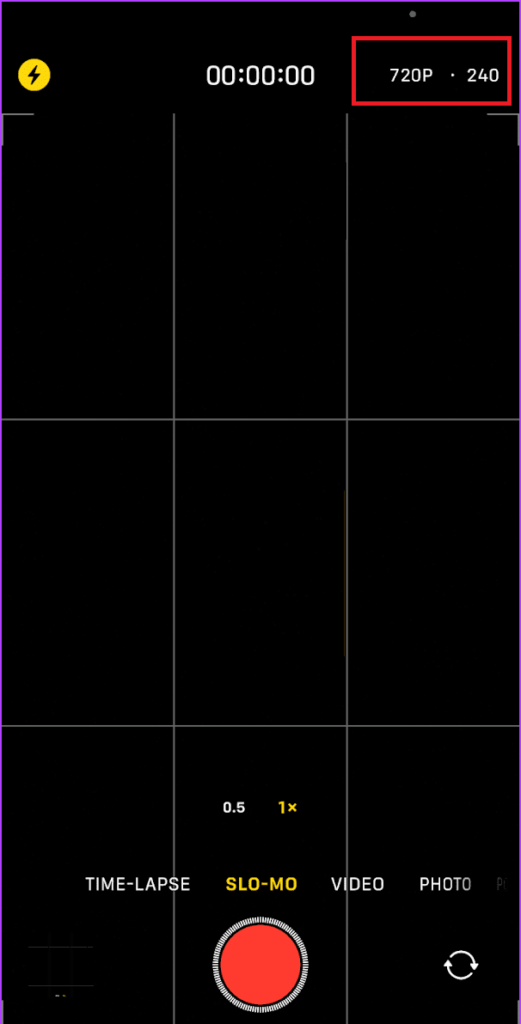
- Select Slo-Mo from the bottom just above the recording button, and you will see a label on the top right corner of the screen indicating the resolution and FPS that you selected. You can also change the resolution here by tapping on the resolution at the top right corner of the screen.
- Start recording your video as usual. You can switch between different resolutions and FPS by going back to the top 3 steps and changing them anytime.
That’s it! You successfully changed the FPS for slow-motion video on the iPhone camera. Now you can experiment with different effects and styles for your videos.
Let’s see how much storage a 1-minute slow-motion video will consume.
- If you record a slow-motion video in 1080p HD at 120 fps, you’ll need about 350MB of storage per minute.
- But if you record slow-motion video in 720p HD at 240 fps, that jumps to 300MB per minute.
- If you to record video in 1080p HD at 240 fps, you’ll need 480MB per minute.
How to Turn on or Turn off Auto FPS for iPhone Video Camera
You need an iPhone 12 or newer to use this feature. If you have an older iPhone, you might see Auto Low Light FPS instead.
If you want to shoot a video in the dark with your iPhone, don’t use 60 fps. Use 30 fps instead. That way, the camera can let in more light for each frame, because it takes fewer frames per second. But if you want to capture something that moves fast, like a car or a bird, then 60 fps is better. It makes the motion look smoother and less choppy than 24 fps or 30 fps.
Your iPhone knows what you’re shooting and changes the frame rate to make it look awesome. Let’s see how to turn this feature on.
- Tap on the Settings App.
- Then, tap on the Camera.
- Now, tap on Record Video.
- Scroll down and tap on Auto FPS option.
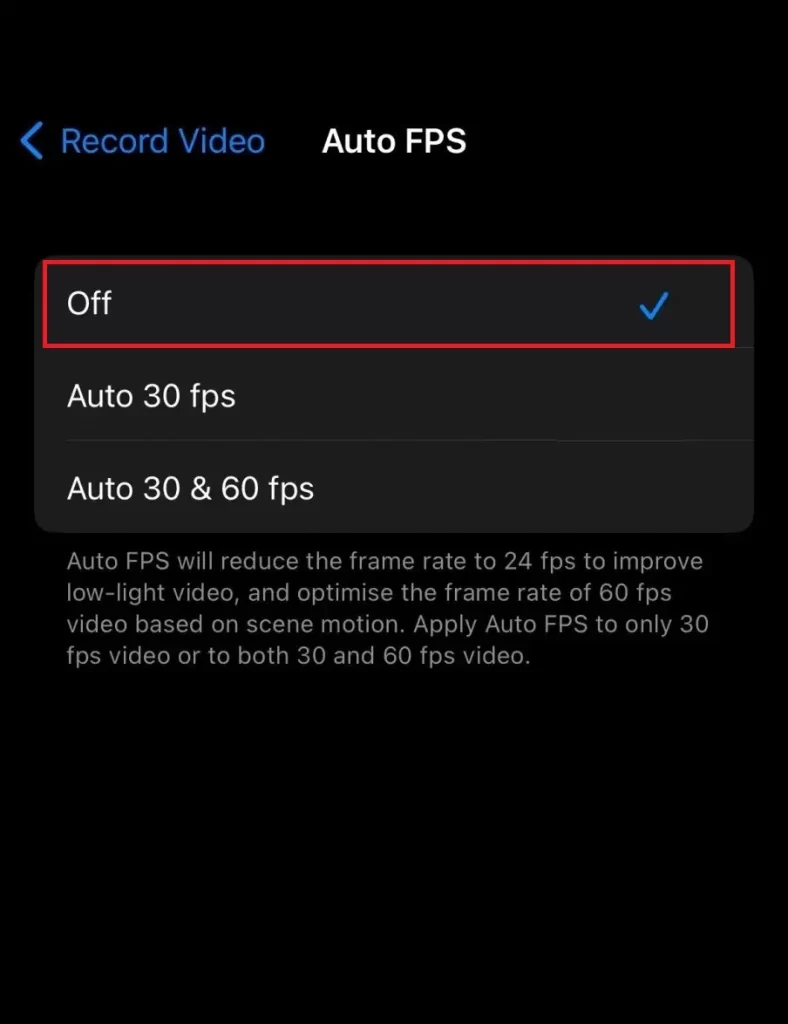
- Tap on your preference (Off or Auto 30 fps or Auto 30 & 60 fps). It’s better to tap on Auto 30 & 60 fps (recommended).
- To turn off Auto FPS, tap on Off instead of Auto 30 fps or Auto 30 & 60 fps.
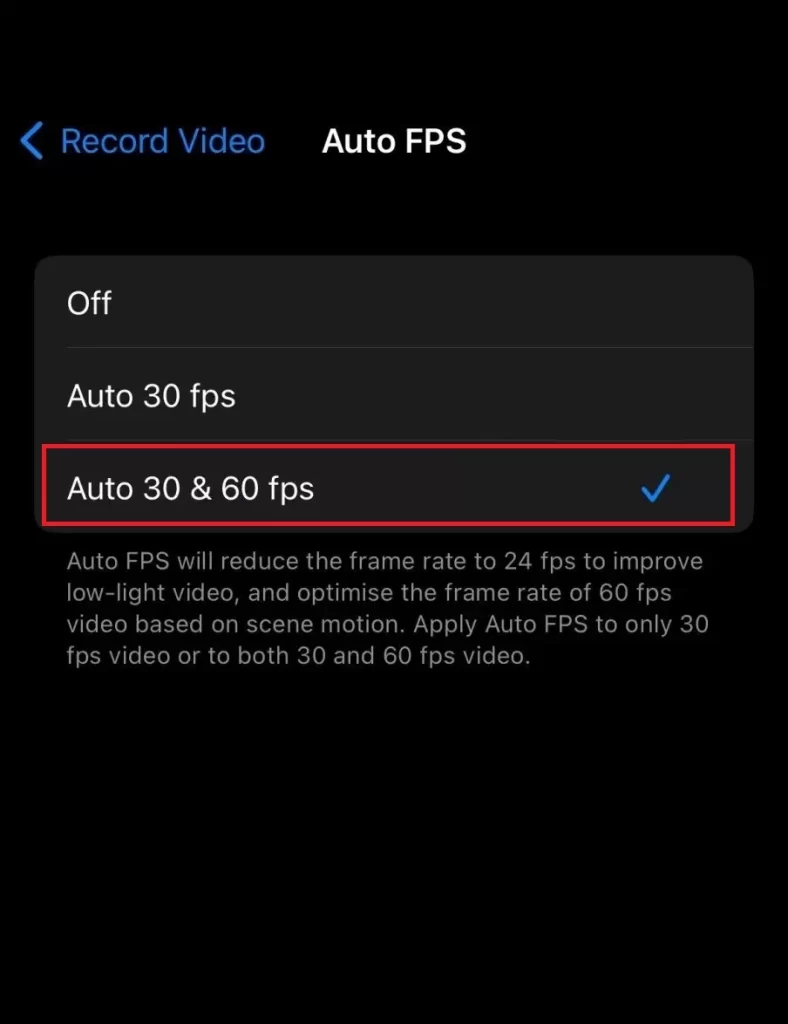
To turn off Auto FPS, tap on Off.
Conclusion
Now, you’ve learned how to change FPS for video on an iPhone camera in this blog post. FPS is an important factor that affects the quality and style of your videos. You can easily adjust it according to your preferences. Whether you want to shoot smooth and realistic videos or create dramatic and artistic effects, you can do it with your iPhone camera. Just remember to check the resolution and FPS settings before you start recording and have fun with your videos.
Must Read
- Action Button iPhone 15 Pro Models
- How to Set iPhone to Vibrate Always or Never
- Copy Image(s) from the iOS File App to the iOS Photos App on the iPhone
Please comment and Contact Us for any discrepancy. Follow MambaPost on Facebook, Twitter and LinkedIn. For the latest Tech News checkout at MambaPost.com.

8 thoughts on “How to Change FPS for Video on iPhone Camera?”
Comments are closed.