Do you want to learn how to disable AirDrop on your iPhone, iPad, or Mac? Maybe you’re tired of getting random photos from strangers, or you just want to save some battery life. No matter what the reason, we’re here to help you out. In this blog post, we’ll show you how to disable AirDrop on iPhone, iPad, and Mac in a few easy steps. Let’s get started!
What is AirDrop and why would you want to disable it?
AirDrop is a feature that lets you share files, photos, videos, contacts, and more with other nearby Apple devices using Bluetooth and Wi-Fi. It’s super convenient when you want to send something to a friend or family member without using email or text messages. You can also use AirDrop to share things from apps like Safari, Photos, Maps, and more.
However, AirDrop can also have some drawbacks. For one thing, it can drain your battery faster if you leave it on all the time. For another, it can expose you to unwanted or inappropriate content from strangers who are in your vicinity. If you don’t want to deal with these issues, you might want to disable AirDrop on your devices.
How to disable AirDrop on iPad & iPhone
To disable AirDrop on your iPhone or iPad, you can follow any of the methods.
1. Disable AirDrop on iPhone and iPad Using Control Center
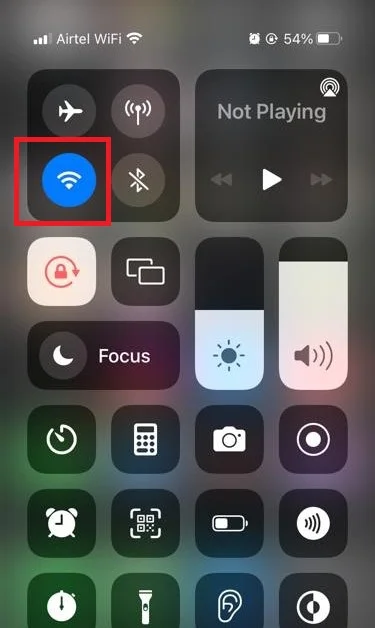
- First, swipe down from the top right corner of your iPhone screen to open the Control Center. If you have an older device with a home button, swipe up from the bottom of your screen instead.
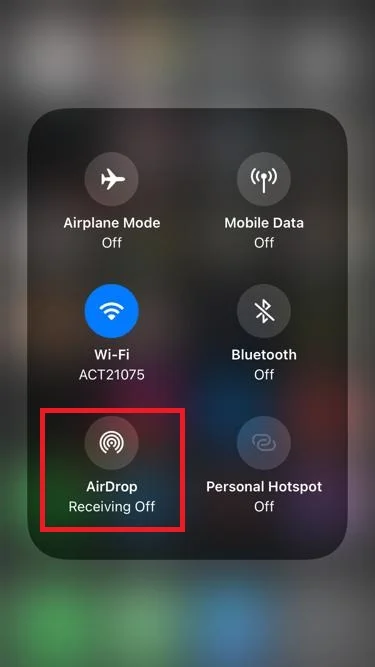
- Tap and hold on the Wi-Fi icon until a menu pops up.
- Now tap on AirDrop.
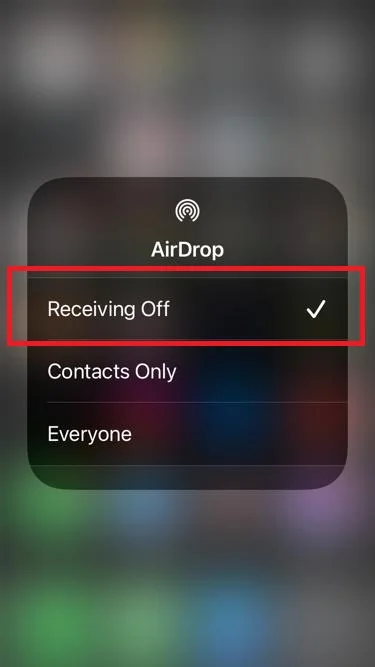
- Finally, tap on Receiving Off to turn off AirDrop completely. You can also choose Contacts Only or Everyone if you want to limit who can send you things via AirDrop.
2. Disable AirDrop on iPhone and iPad Using Settings App
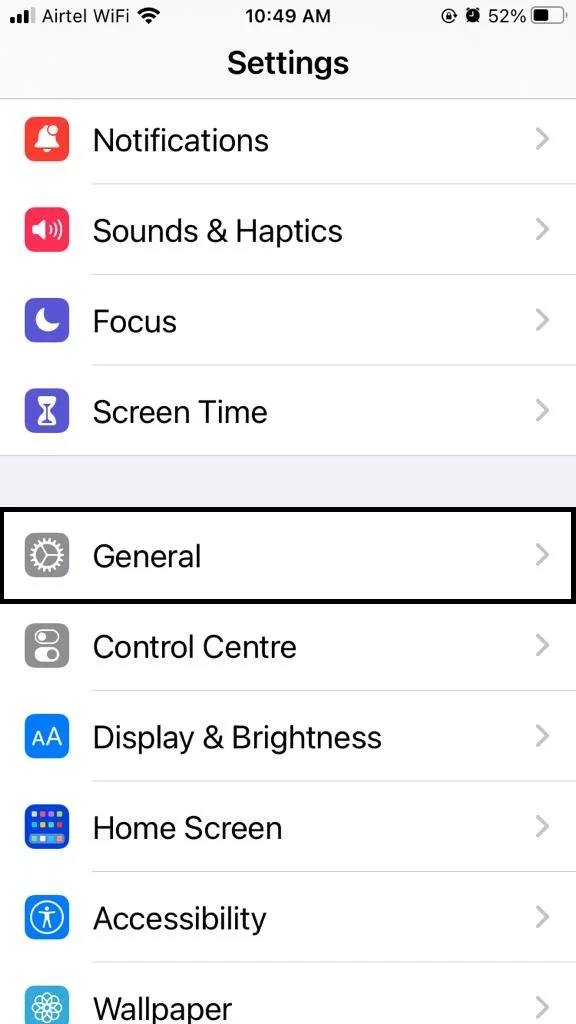
- Tap on the Settings App.
- Tap on General.
- Now tap on AirDrop.
- Tap on Receiving Off.
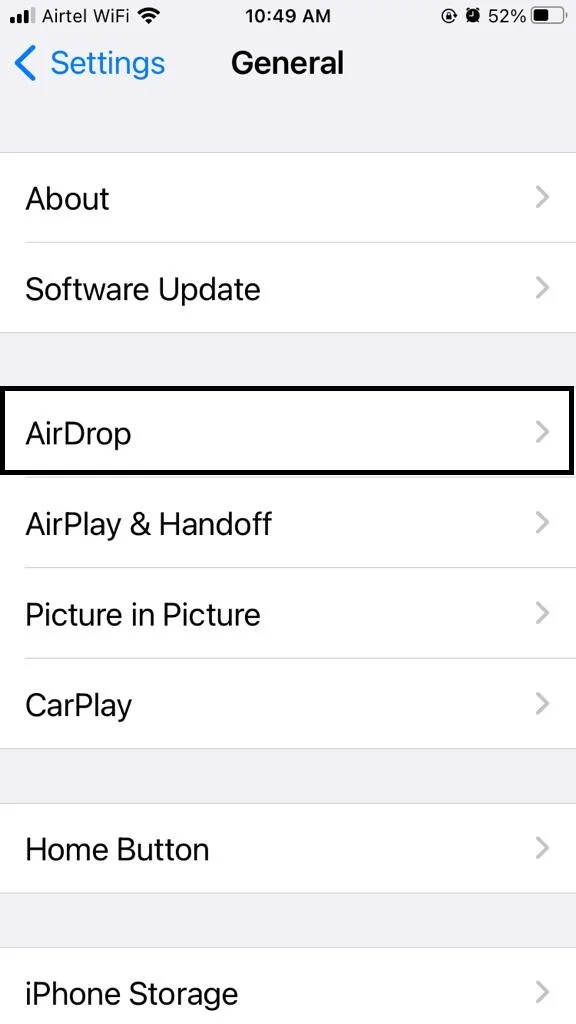
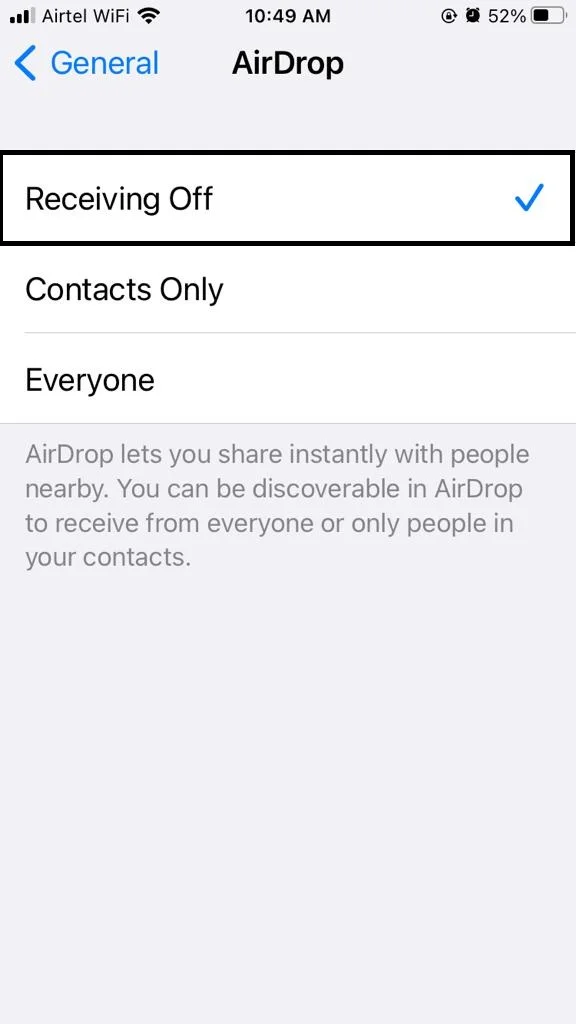
That’s it! You’ve successfully disabled AirDrop on your iPhone or iPad using the Control Center and Settings app. You can always turn it back on using the same steps if you change your mind later.
How to disable AirDrop on Mac
To disable AirDrop on your Mac, you can follow any of the methods.
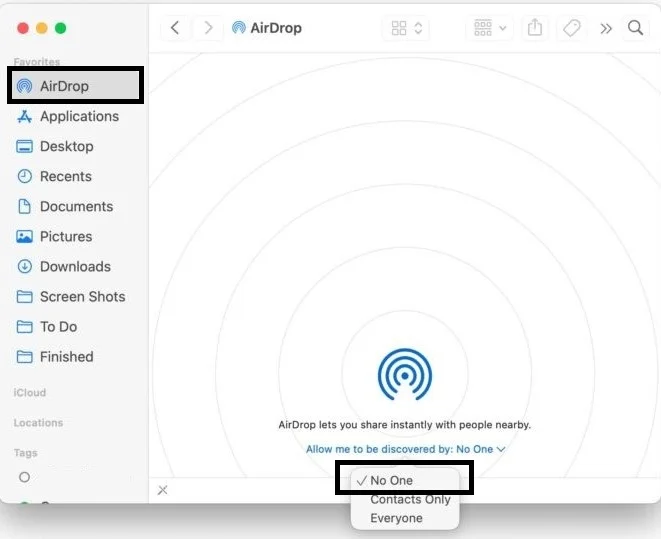
1. Disable AirDrop on Mac Using Finder Icon
- Click on the Finder icon in your dock to open a Finder window.
- Click on Go in the menu bar and select AirDrop or click on AirDrop from the Finder window sidebar.
- Now click on the blue link Allow me to be discovered by at the bottom of the window.
- Finally, click on No One to turn off AirDrop completely. You can also choose Contacts Only or Everyone if you want to limit who can send you things via AirDrop.
2. Disable AirDrop on Mac Using System Settings
- Click on the Apple Logo.
- Click on System Settings.
- Now click on General.
- Click on AirDrop & Handoff.
- Click on the AirDrop drop-down on the right-hand side.
- Now click on No One.
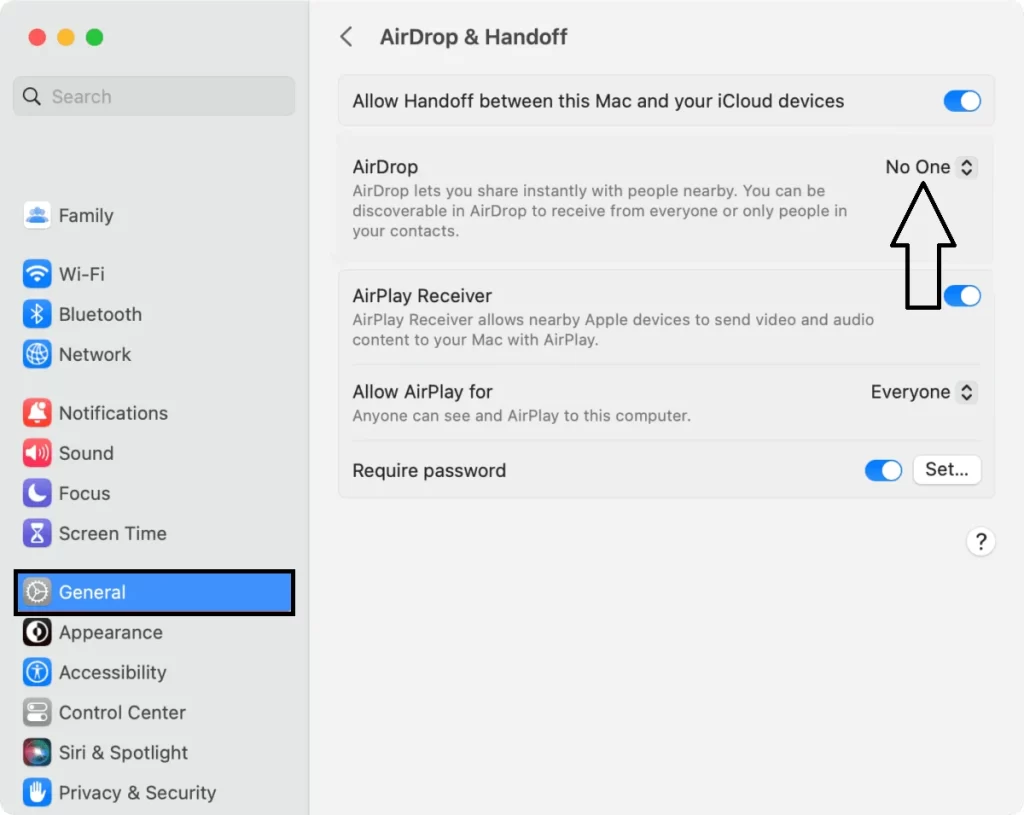
That’s it! You’ve successfully disabled AirDrop on your Mac using the Finder icon and System Settings. You can always turn it back on using the same steps if you change your mind later.
Conclusion
AirDrop is a handy feature that lets you share files and more with other Apple devices nearby. However, it can also cause some problems like battery drain and unwanted content. If you want to disable AirDrop on your iPhone, iPad, or Mac, you can do so easily by following the steps in this blog post. I hope this blog post on Disabling AirDrop was helpful for you.
Must Read
Please comment and Contact Us for any discrepancy. Follow MambaPost on Facebook, Twitter and LinkedIn. For the latest Tech News checkout at MambaPost.com.


6 thoughts on “How to Disable AirDrop on iPhone, iPad, and Mac?”
Comments are closed.