If you use your Facebook Messenger regularly, you might have hundreds or even thousands of messages in your chat history. Some of these messages might be important, personal, or sentimental, and you don’t want to lose them ever. But what if you need to back up your all chat history for safekeeping? Fortunately, there is a simple way to export your Facebook Messenger chat history and save it as a file on your desktop computer or cloud storage (or Google Drive).
The Facebook export feature lets you download all conversations directly to your device (desktop computer or phone) or any cloud storage. You can also select the specific time intervals and specify the HTML or JSON data format before requesting an export. Facebook mandatorily asks login password to export the messenger chat.
In this blog post, we will show you how to export your Facebook Messenger chat history in a few simple steps. For this, you will need a desktop computer (or laptop), a web browser, and your Facebook login credentials. You will also need some patience, as the process might take some time depending on the size of your chat history.
How to Export Your Facebook Messenger Chat History
To download or export your Facebook Messenger chat history on your desktop computer (or laptop), follow the below steps:
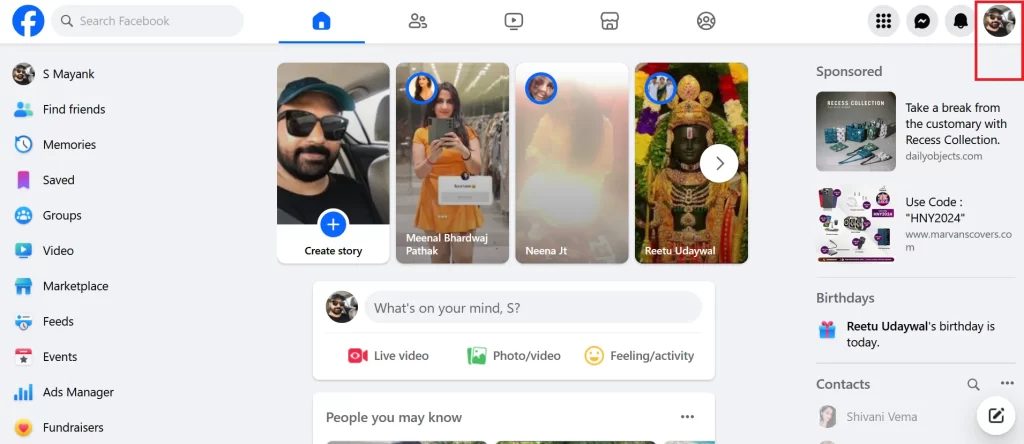
- Open the Facebook account on your desktop computer (use any browser) and log in with your email and password.
- Click on the profile icon (your profile image) at the top right corner of the screen.
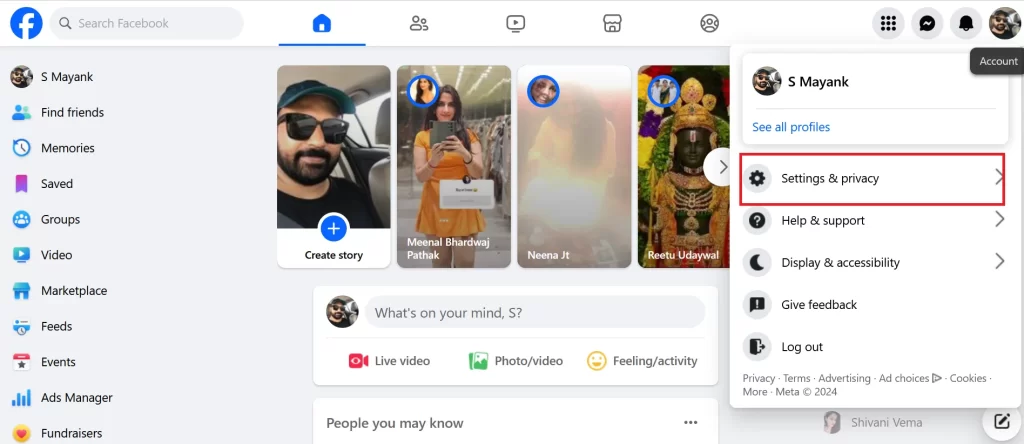
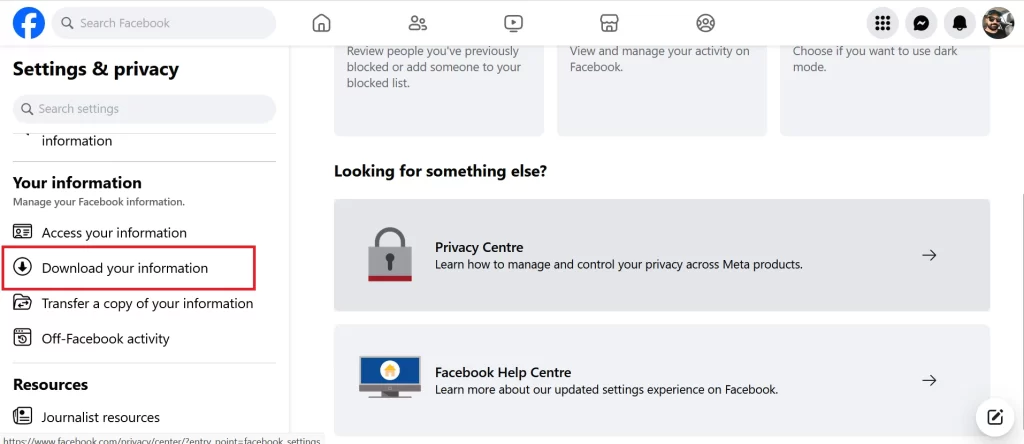
- Click Settings & privacy.
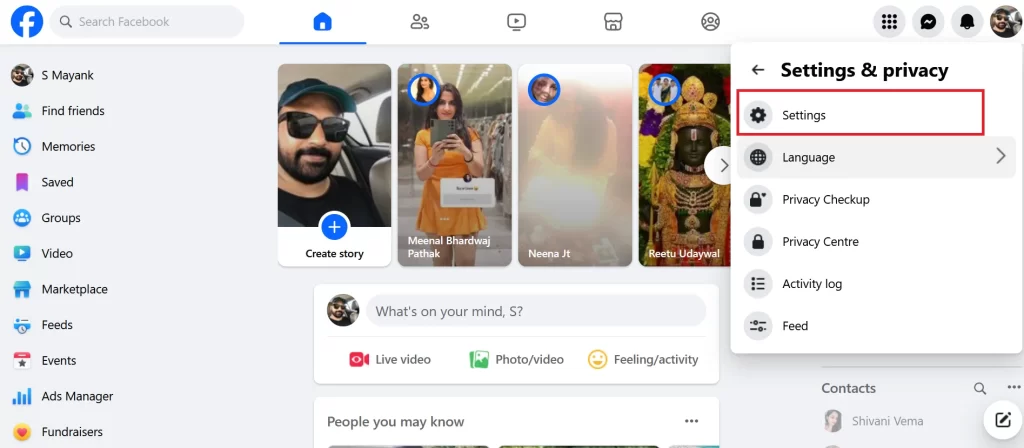
- Then, click Settings.
- Now click on Download your information from the left sidebar.
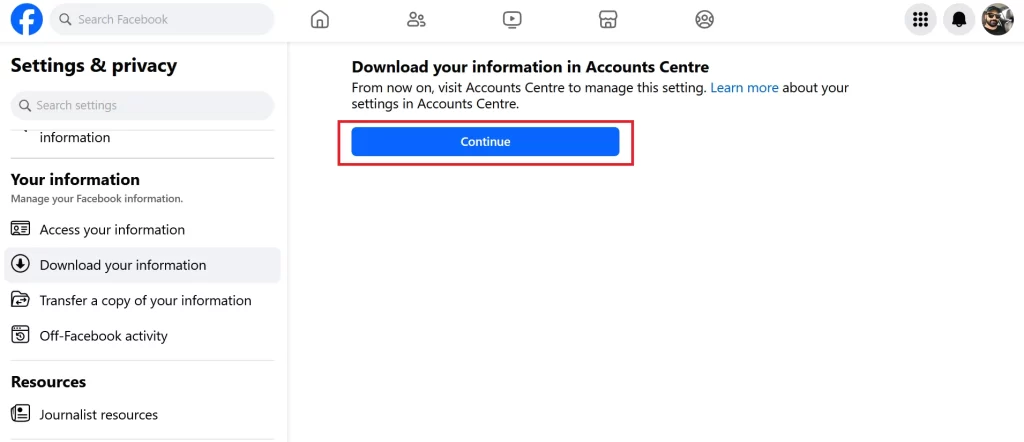
- Then, press Continue.
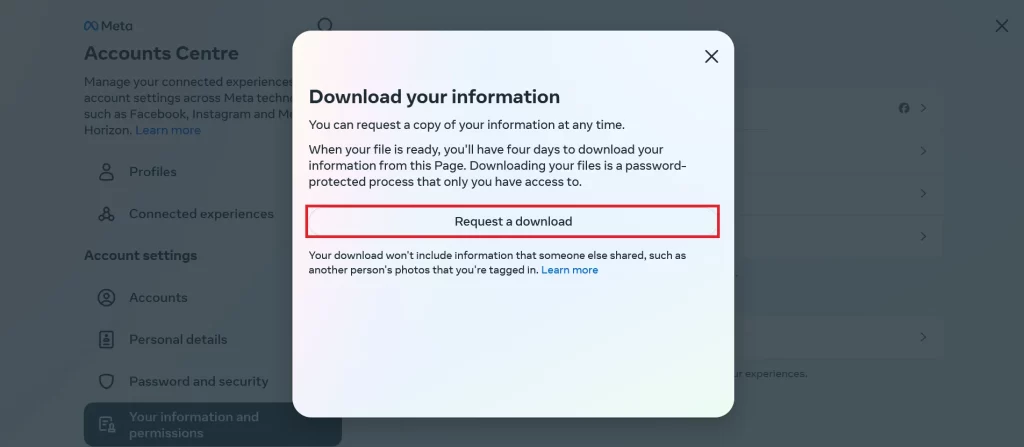
- Click Request a download to place a new export request.
- Click on your Facebook account (if you have multiple accounts). Then, click Next. You can also select your multiple accounts or pages (if you have) to export its data even your Instagram account.
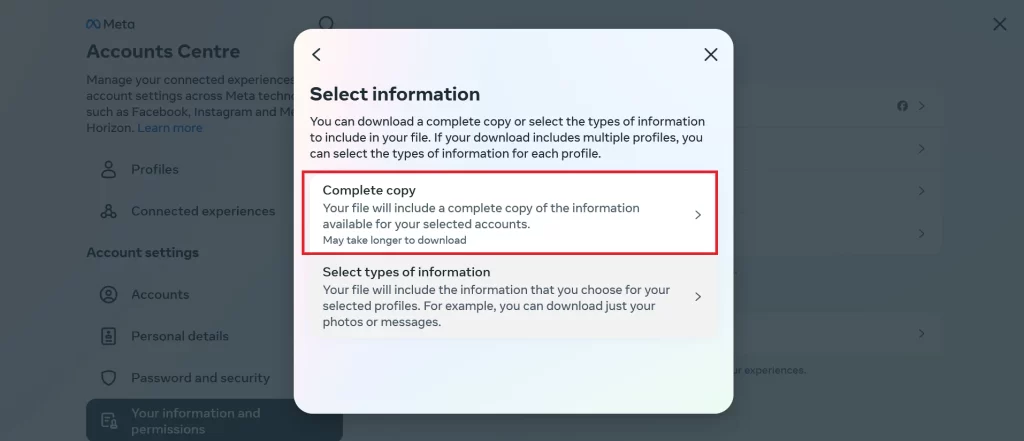
- To Export, click on Complete copy (or Select types of information). Click Next (if you see this option).
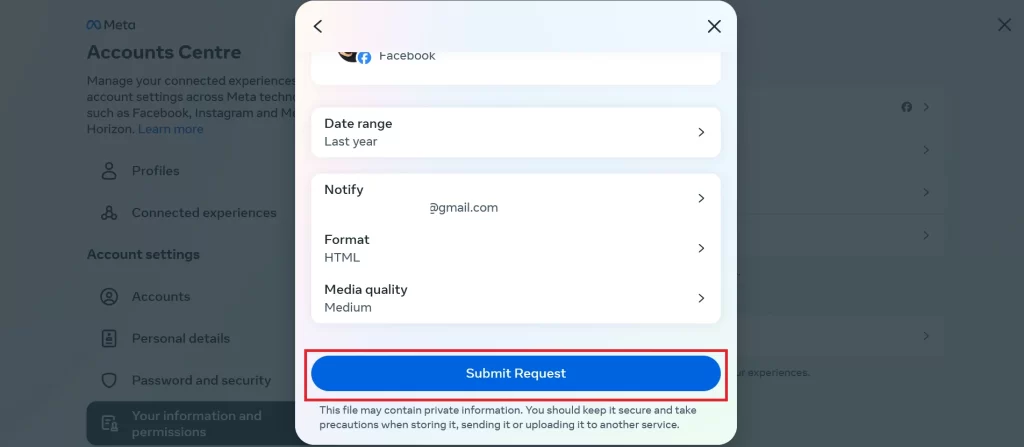
- Select the Date range, Format, and Media quality of your chat history. You can choose to download all of your messages or only specific ones. You can also choose between HTML (recommended) or JSON format (additional app needed to open it), and high, medium, or low media quality. The higher the quality, the larger the file size will be.
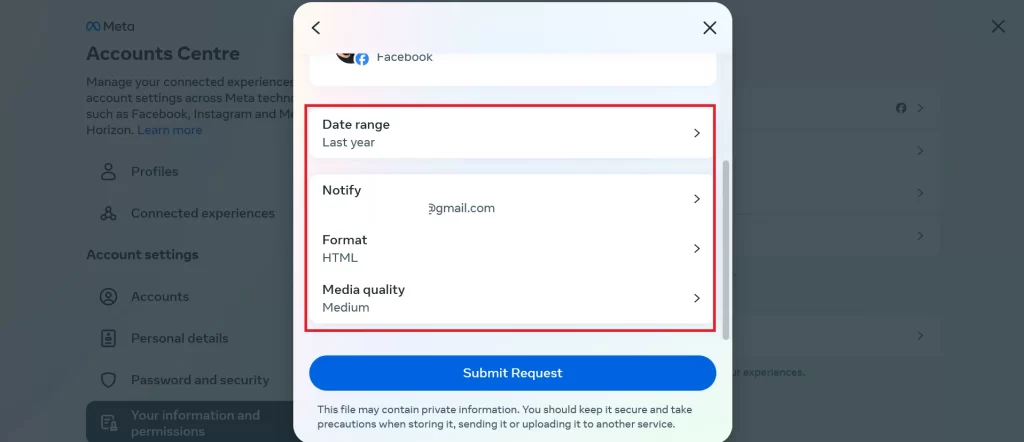
- Finally, click Submit Request.
- If you are using a phone, tap on Transfer to Google Drive. It will export your Facebook account data to Google Drive instead of hosting it on the Facebook server (for downloading later if required).
Note: Depending on the data, you will get an email from Facebook containing a download link to your account data. Click on the link and confirm your identity (by logging in with your Facebook credentials). During this time, you will not be able to request another export request until the first export request is completed. Once a request is processed, you will get 4 days only to download the data.
How to Access Your Facebook Messager Conversation with the Exported Data Downloaded?
To access messenger conversation with the exported data downloaded, follow the below steps:
- First, extract the downloaded ZIP file on your desktop computer.
- Click on the your_activity_across_facebook folder.
- Search for the messages folder and click on it.
- Now click on the your_messages.html (to view all chats from your Facebook account).
- This HTML file contains the clickable message titles for smooth and easy navigation. To open, click on the message link.
- Here you see the entire conversation on your desktop computer including media files if any.
Conclusion
Exporting your chat history is a simple and convenient way to back up your important messenger chat conversations and access them anytime, anywhere. You can choose the data format, time range, and destination of your export file according to your preferences. All you need is a desktop computer, a web browser, and your Facebook login credentials. We hope this blog post has helped you learn how to export your Facebook Messenger chat history and keep it safe for future reference.
Must Read
1 thought on “How to Export Your Facebook Messenger Chat History?”
Comments are closed.