Sometimes you may want to remove the audio from a video you have in your iPhone’s Photos App. Maybe the sound quality is poor, you don’t want to include the background noise, or you don’t want to share your video with audio. Whatever the reason, you can easily remove audio from a video using your iPhone (without using any third-party app). Let’s see how to do this.
How to Remove Audio from a Video Using Your iPhone
If you want to remove audio from a video on your iPhone, you can do it easily using your Photos app. Even if you want to bring it back, that can also be done from your Photos app. Follow the steps below to remove audio from a video using your iPhone:
- Open the Photos App.
- Tap on the video from which you want to remove the audio.
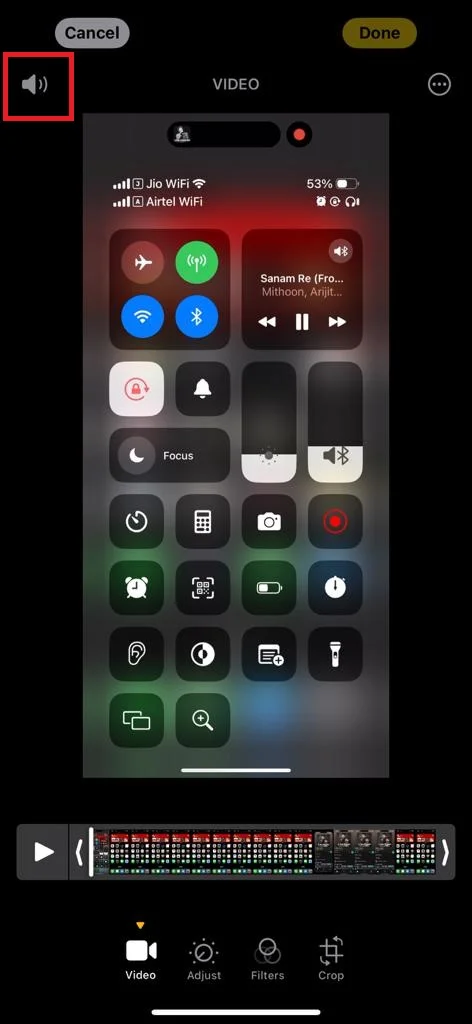
- Now, don’t play the video, and tap on Edit (at the top right).

- Now tap on the speaker icon (at the top left). It is important to remember that this is not a typical mute indicator, it will remove the audio track from the selected video.
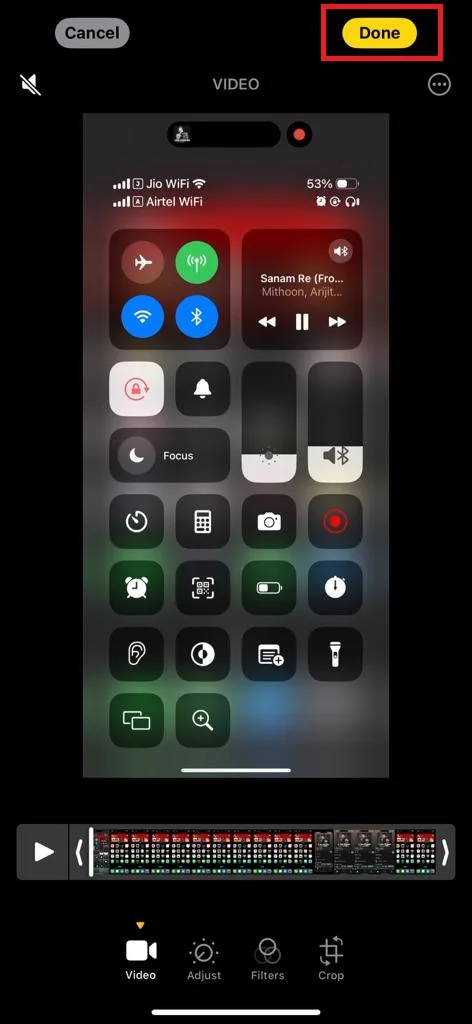
- Perform any other editing option(s) to the video if you want, otherwise tap on Done (at the top right).
That’s it! you successfully removed the audio from a video on your iPhone. Now play the video and you will find that there is no audio in your video. If you share this video then the recipient will also not be able to hear any audio in this video. But what if you want back your original track to the video? Follow the next method.
How to Add Original Audio Back to Video Using Your iPhone
To add the original audio track back to video using your iPhone, follow the below steps:
- Open the Photos App.
- Tap on the video on which you want to add the original audio.
- Tap on the Edit option (at the top right).
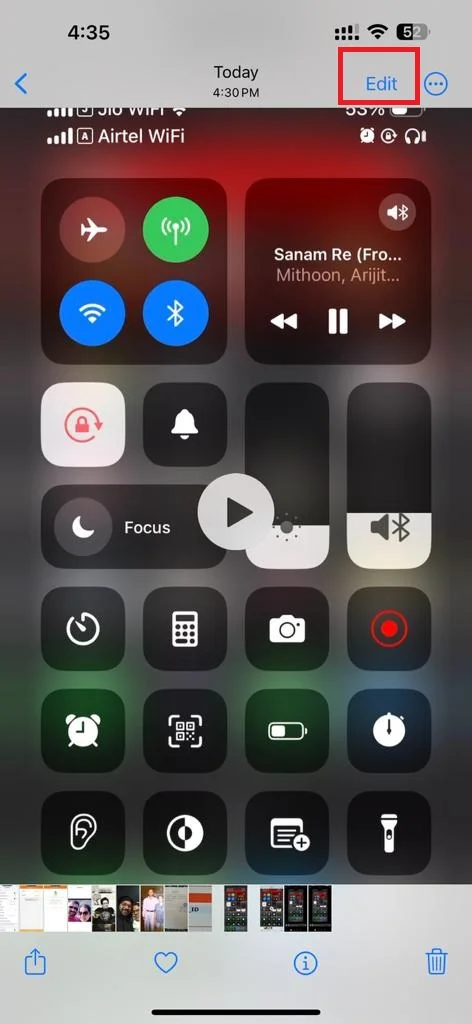
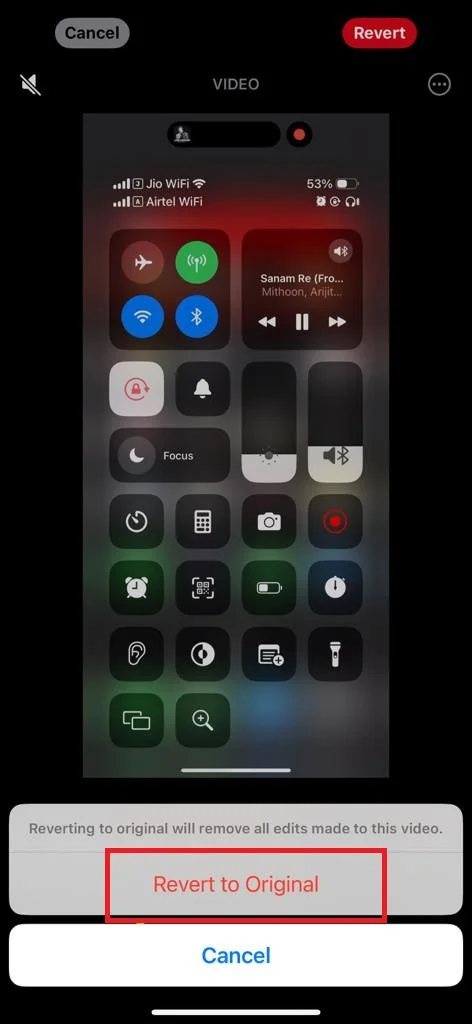
- Finally, tap on the Revert option (at the top right) to revert all the edits on this video.

- Tap Revert to Original to confirm.
That’s it! you successfully added the original audio again into a video on your iPhone. Now play the video and you will find that the original track is back again.
Conclusion
Removing audio from a video using your iPhone’s Photos app, you don’t need any third-party app. This is a very useful feature that can help you edit your important videos according to your preferences and needs. You can also explore other editing options in the Photos app. You can also restore the original audio track if you change your mind anytime. By following these simple steps mentioned above in this blog post, you can make your videos more appealing and professional. Try this method and see how it works best for you.
Must Read
2 thoughts on “How to Remove Audio from a Video Using Your iPhone?”
Comments are closed.