If you want to take better pictures, one of the most important skills you need to learn is how to adjust the exposure on your iPhone camera app. Exposure is the amount of light that reaches your camera sensor, and it affects how bright or dark your photos look. In this blog post, we will show you how to use the exposure control feature in iOS 17, which lets you manually adjust the exposure before you take any picture.
Why Adjust the Exposure?
Sometimes, your iPhone camera may not capture the scene exactly as you see it with your eyes. For example, if you are taking pictures in a high-contrast situation, such as a bright sky and a dark foreground, your iPhone camera may struggle to balance the exposure for both areas (a bright sky and a dark foreground). As a result, you may end up with a picture that is either too bright (overexposed) or too dark (underexposed).
But, by adjusting the exposure manually, you can guide your iPhone camera on how much light you want to let in and make sure that your subject is properly exposed (not overexposed or underexposed). This can make a huge difference in the quality and mood of your pictures.
How to Adjust the Exposure on Your iPhone Camera (iOS 17)
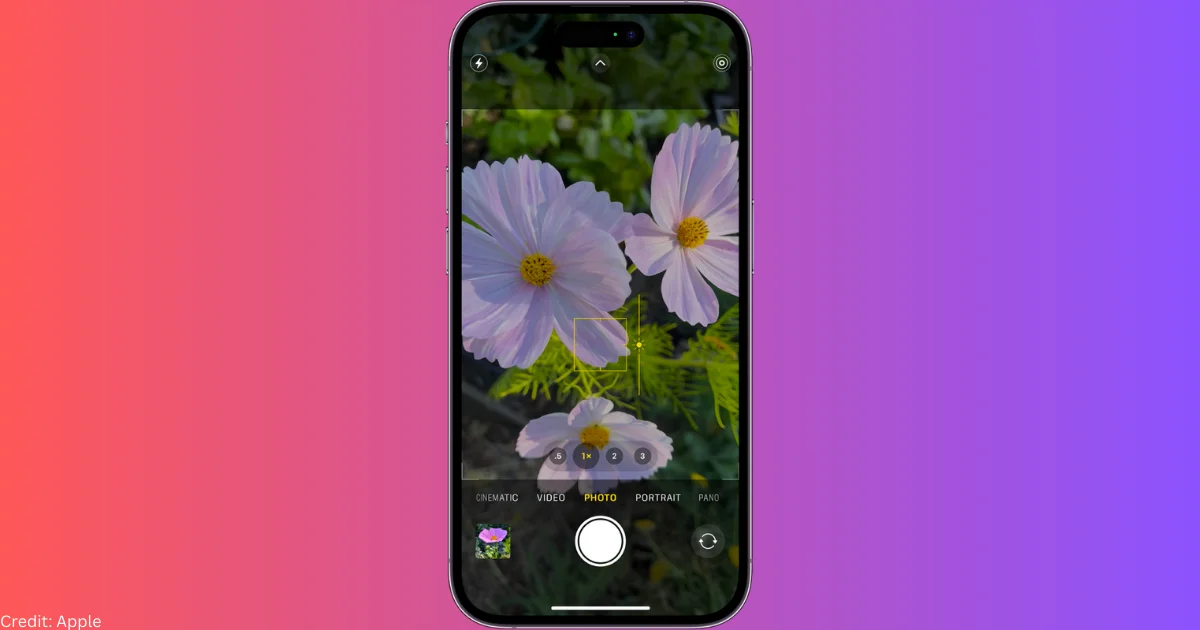
To adjust the exposure on your iPhone camera app, follow these steps:
- Open the Camera App.
- Tap Photo mode and frame your shot.
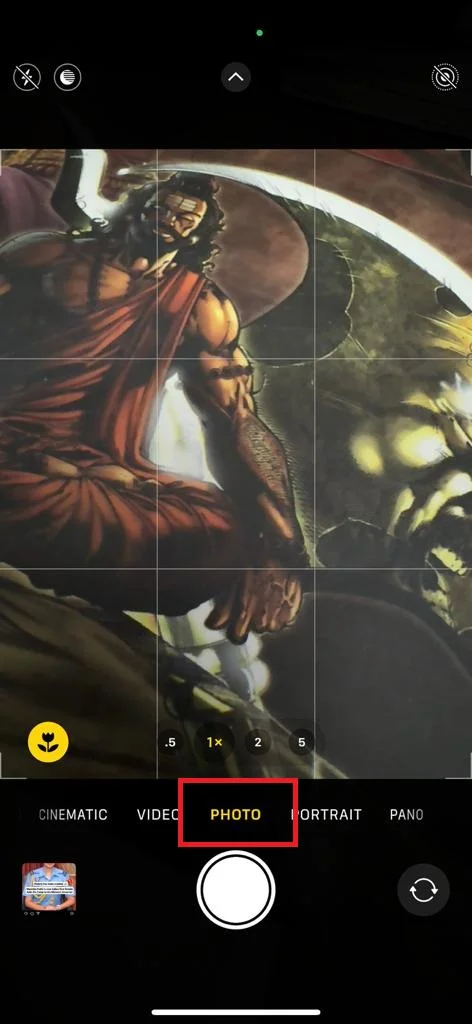
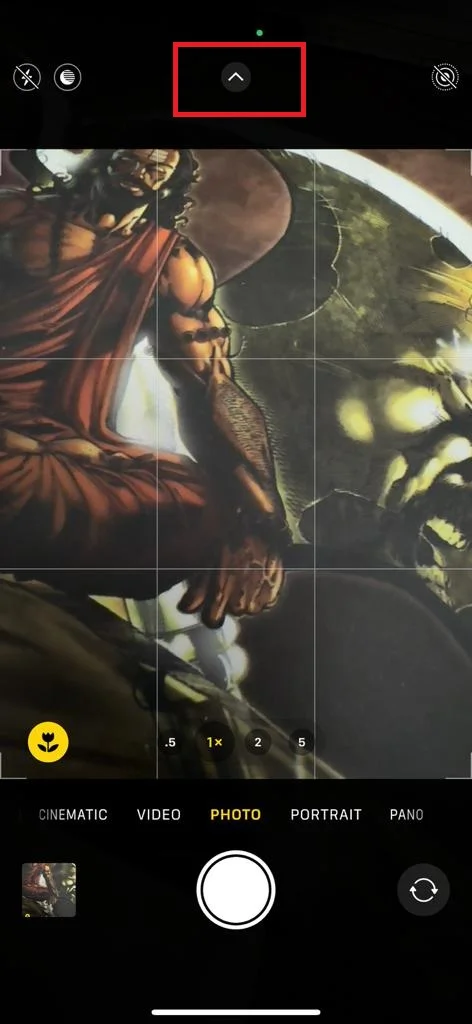
- Tap on the Up Arrow Icon (at the top of the screen).
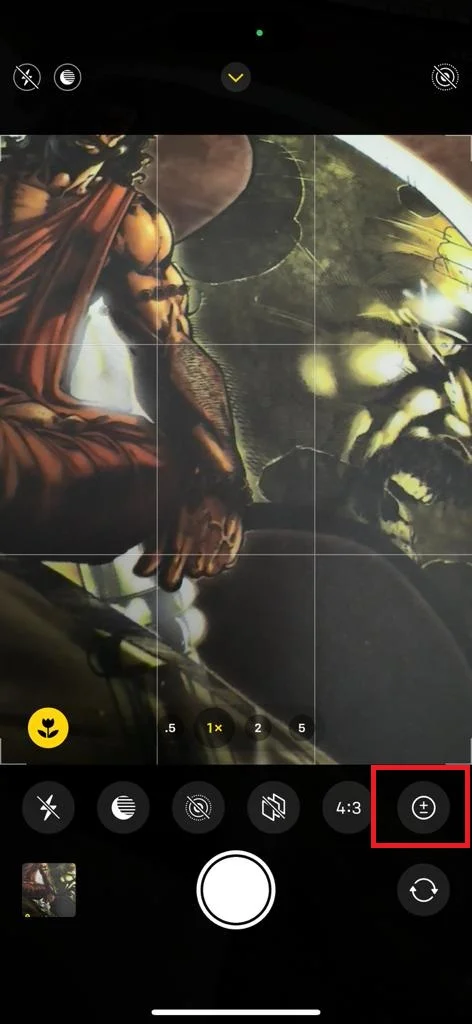
- Then, tap on the Plus-Minus icon (exposure).
- Now adjust the slider according to your needs.
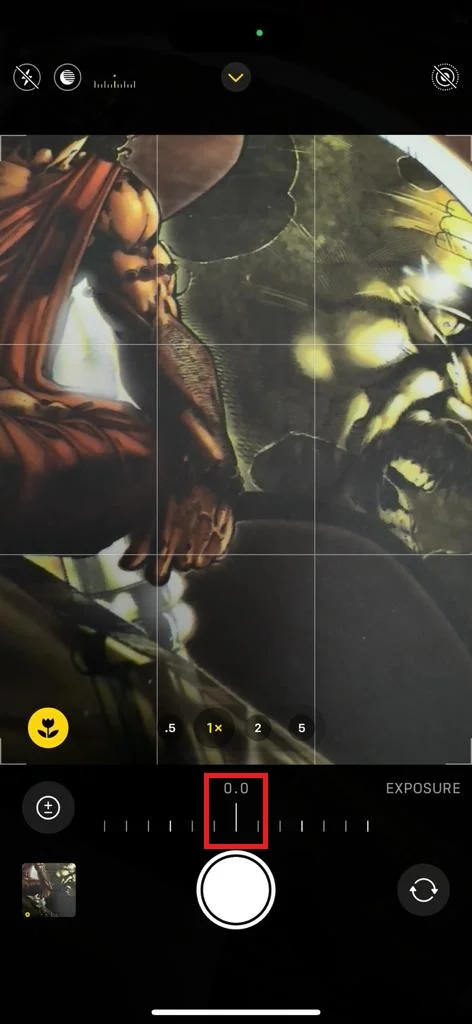
- When you are happy with the exposure, tap the shutter button to take the framed picture.
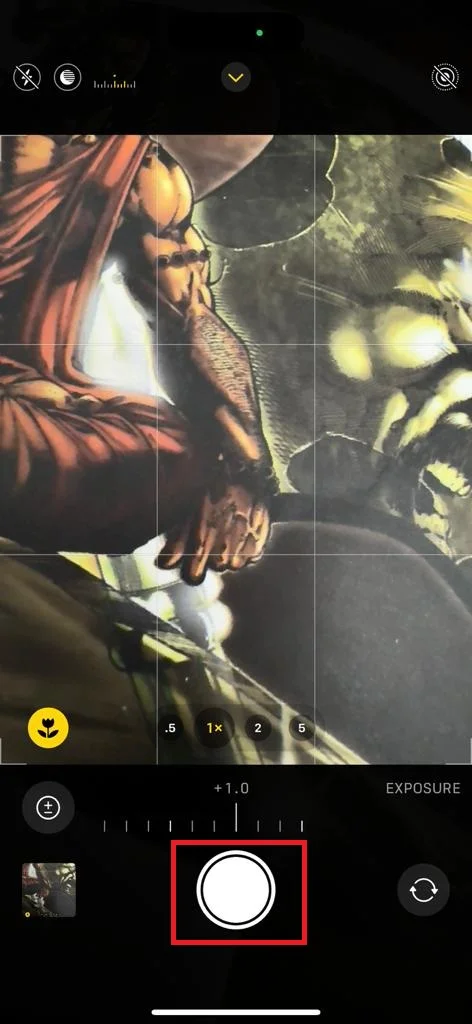
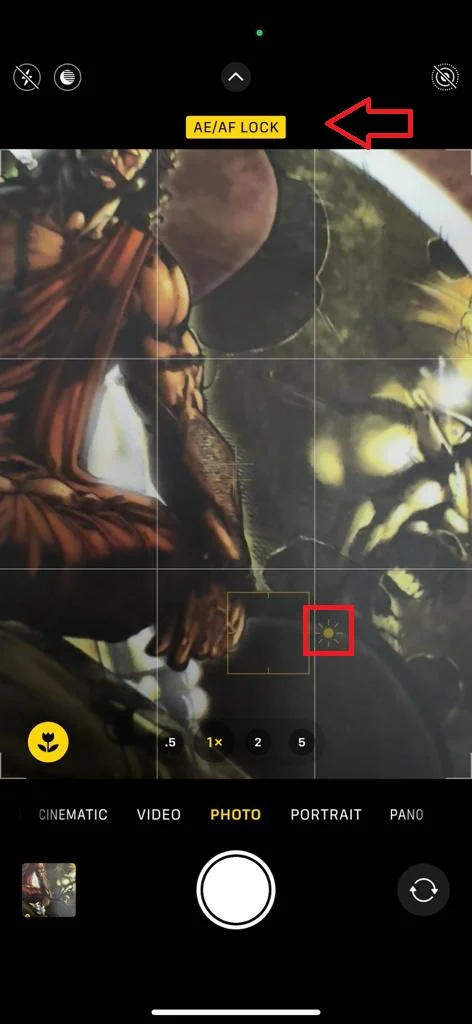
You can also lock the exposure and focus by pressing and holding on the screen until you see AE/AF LOCK at the top. This will prevent the camera from changing the exposure and focus automatically when you move your iPhone. To unlock them, tap anywhere on the screen. Let’s see in more detail.
Lock the Exposure on Your iPhone Camera (iOS 17)
To lock the exposure on your iPhone camera app, follow these steps:
- Open the Camera App.
- Tap Photo mode and frame your shot.
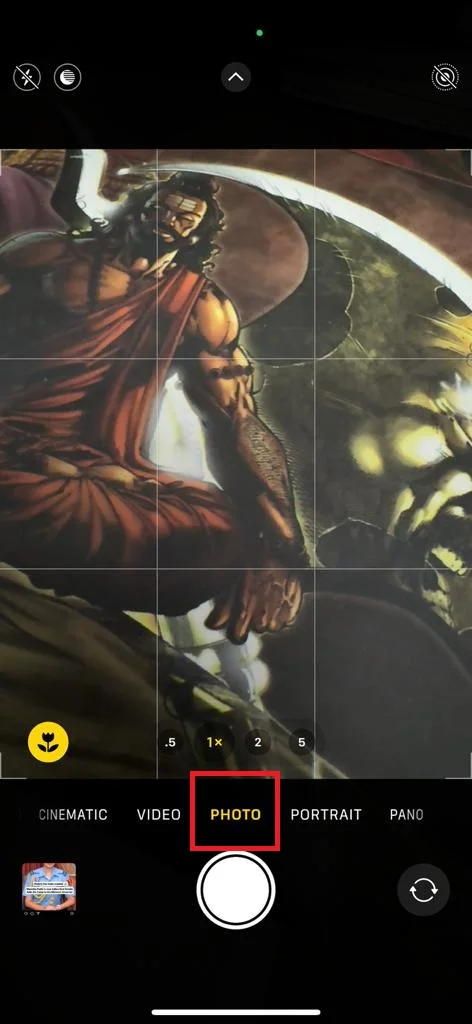
- Tap on the screen to focus on your object or subject.
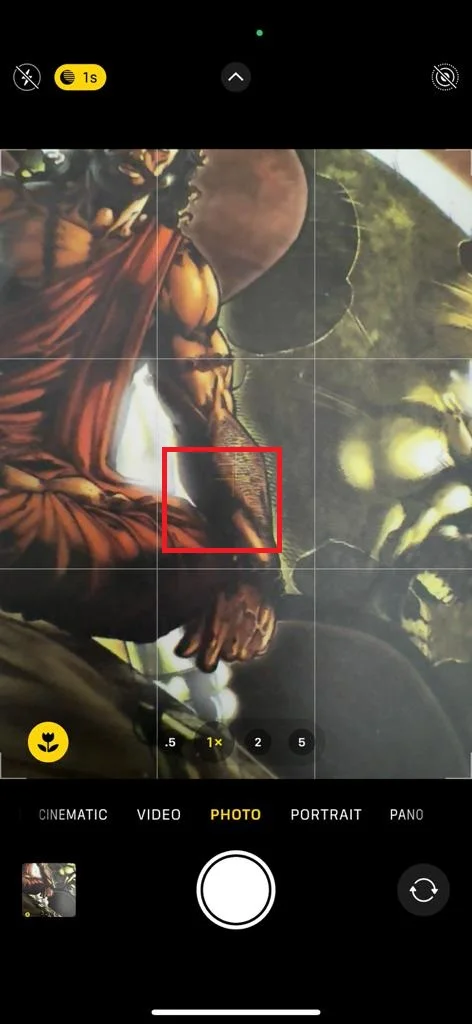
- To lock the focus, you need to press and hold the screen.
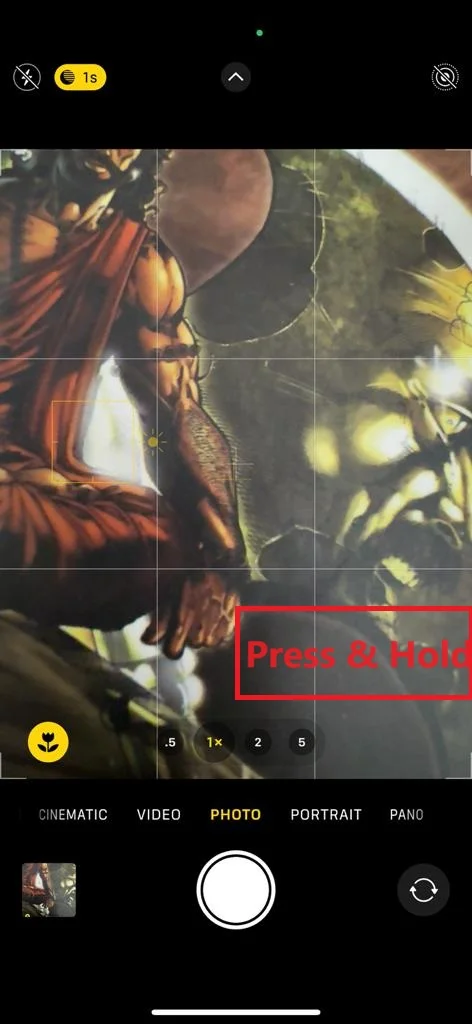
- Now you can see the AE/AF LOCK with a flash of the yellow rectangular box.
- Now you can adjust the camera exposure by dragging the yellow sun icon upwards to make the picture brighter or downward to make the picture darker.
How to Preserve Settings for Exposure Adjustment
If you don’t want to adjust the exposure every time you take a picture in a particular light from your iPhone camera, you can preserve the settings.
To preserve settings for the exposure on your iPhone camera app, follow these steps:
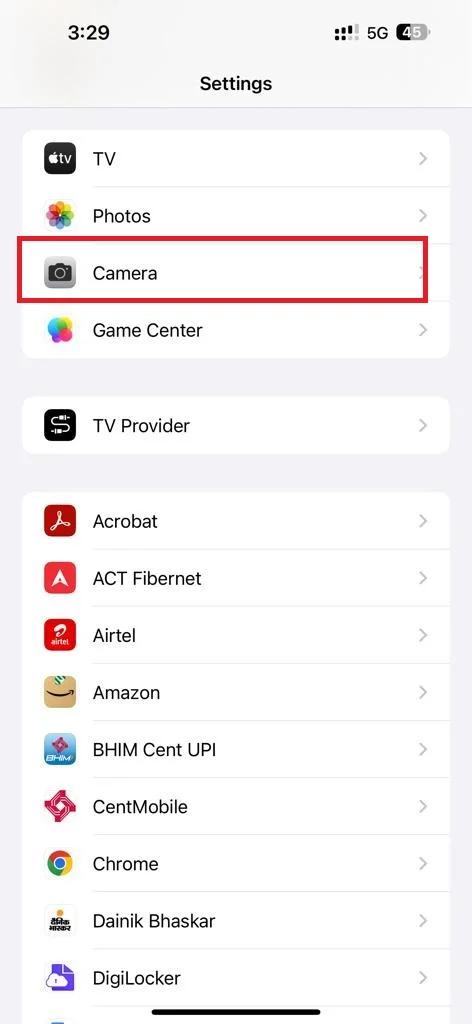
- Tap on the Settings App.
- Tap Camera.
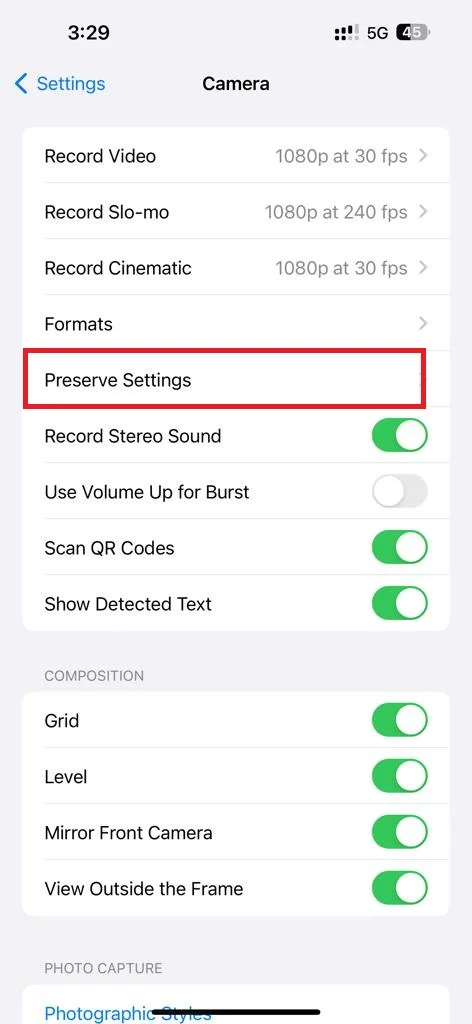
- Then, tap Preserve Settings.
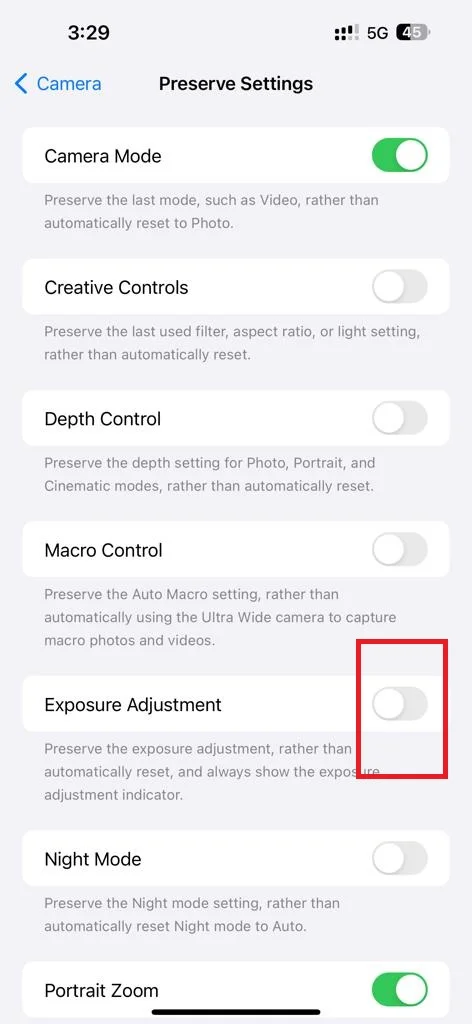
- Enable the toggle switch next to Exposure Adjustment.
How to Adjust Exposure After Taking a Picture
If you want to adjust or change the exposure after taking a picture from your iPhone camera, you can do it with the Photo app.
To change or adjust the exposure of a picture using the Photo app, follow these steps:
- Tap on the Photo App.
- Tap on the image you want to change or adjust the exposure.
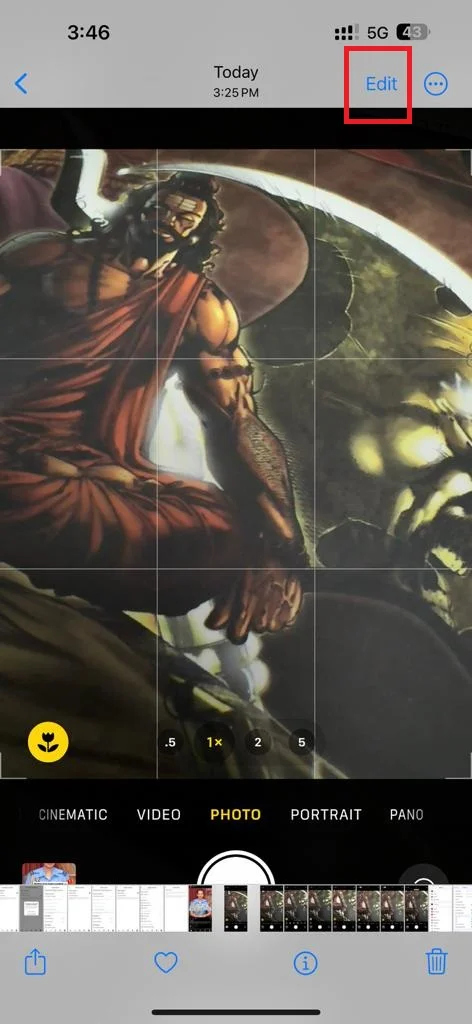
- Then, tap Edit.
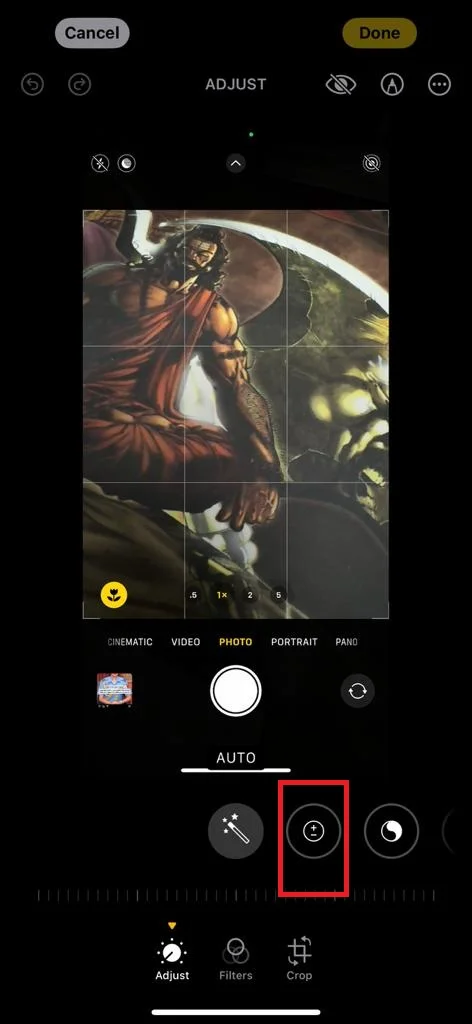
- Tap on the plus-minus exposure icon.
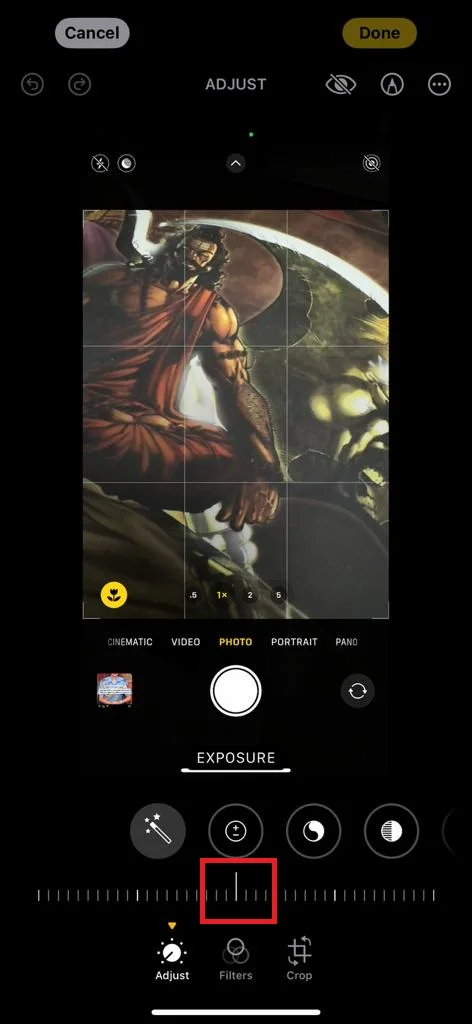
- Move the slider either left or right to change the exposure as per your need.
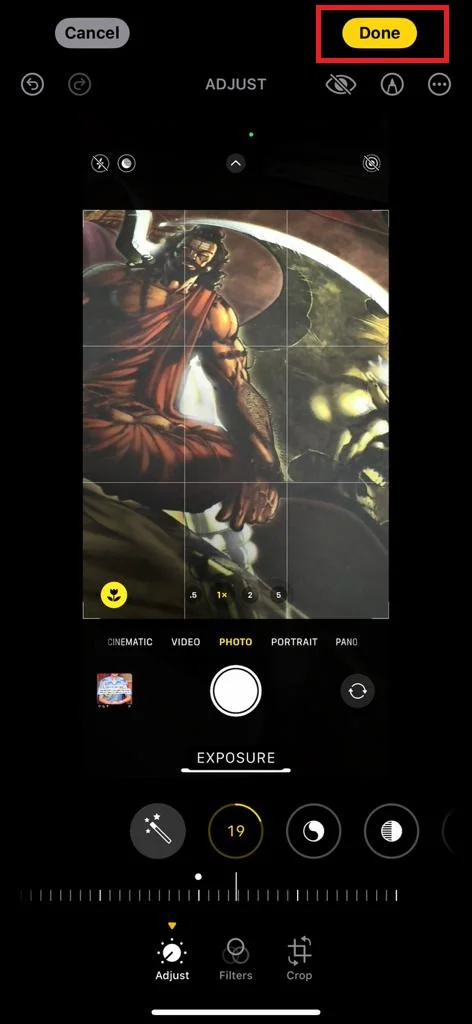
- Finally, tap Done (top right in yellow color).
Conclusion
In conclusion, adjusting the exposure on your iPhone camera running iOS 17 is a simple and effective way to improve your photo quality. You can use the exposure slider to brighten or darken your image before you take it, or you can use the exposure lock to set the exposure for a specific area or light of the scene. By experimenting with different exposure levels, you can capture the mood and details of your object in a better way.
Must Read

1 thought on “How to Adjust the Exposure on Your iPhone Camera (iOS 17)?”
Comments are closed.