
Are you tired of your Windows 11 PC going to sleep mode when you don’t want it to? Do you want to keep your screen on for longer periods without having to touch the mouse or keyboard every few minutes? If so, don’t worry. Many Windows 11 users have complained about the sleep mode settings being too aggressive and interfering with their work or entertainment. Fortunately, there is a way to stop sleep mode in Windows 11 PC and customize it to your preferences. In this blog post, we will tell you how to do that in a few easy steps. Let’s see in detail.
Stop or Prevent Your Windows 11 PC From Going into Sleep Mode
There are two easy ways to stop or prevent your Windows 11 PC from going into sleep mode: using the Settings App and Group Policy Editor. Let’s see each in detail.
1. Use the Windows Setting App to Stop Sleep Mode on Windows 11 PC
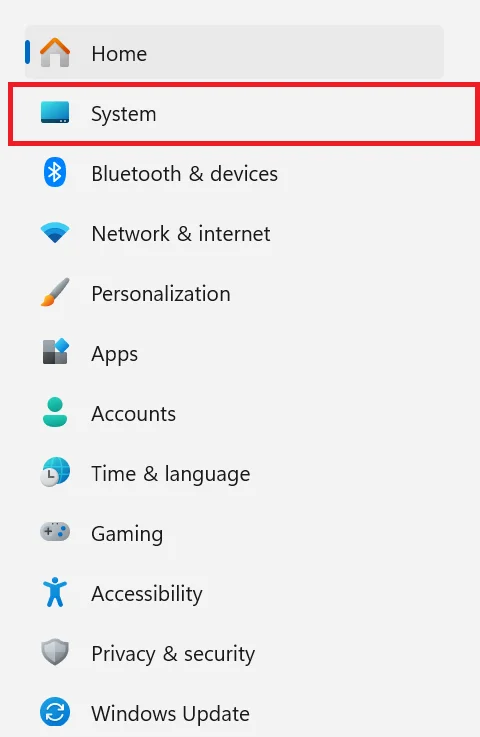
- Open the Settings app. You can do this by clicking on the Start menu and then clicking on the gear icon, or by pressing the Windows + I key on your keyboard.
- In the Settings app, click System (left sidebar).
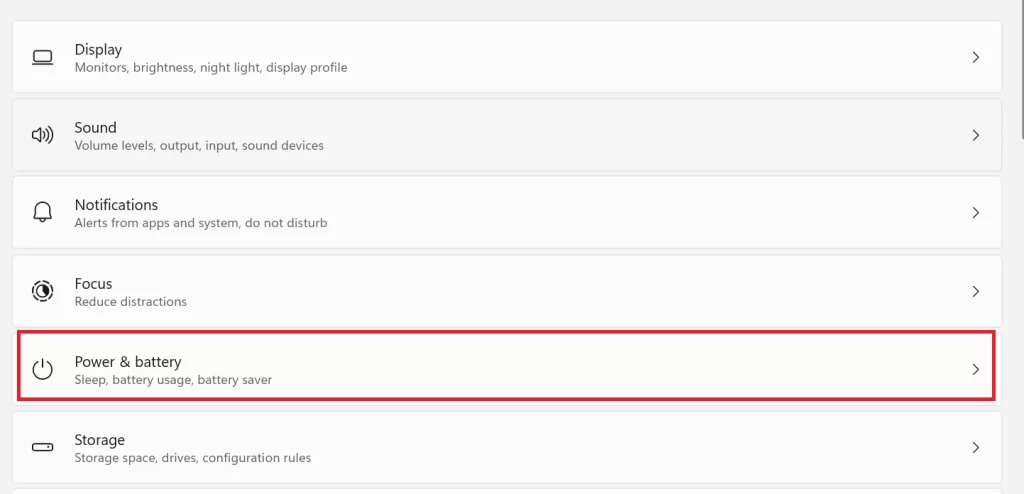
- Then, click on Power & battery in the main window.
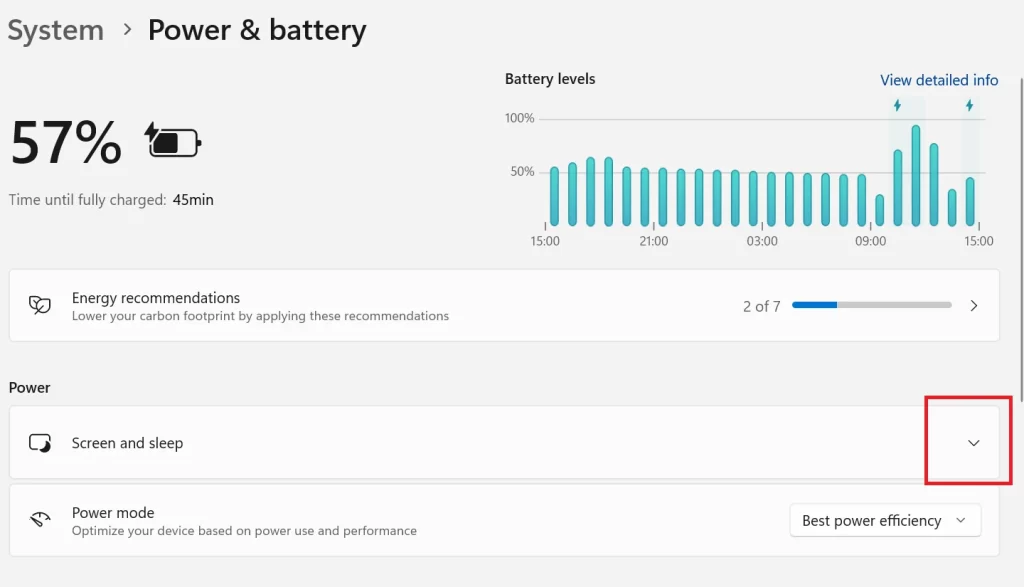
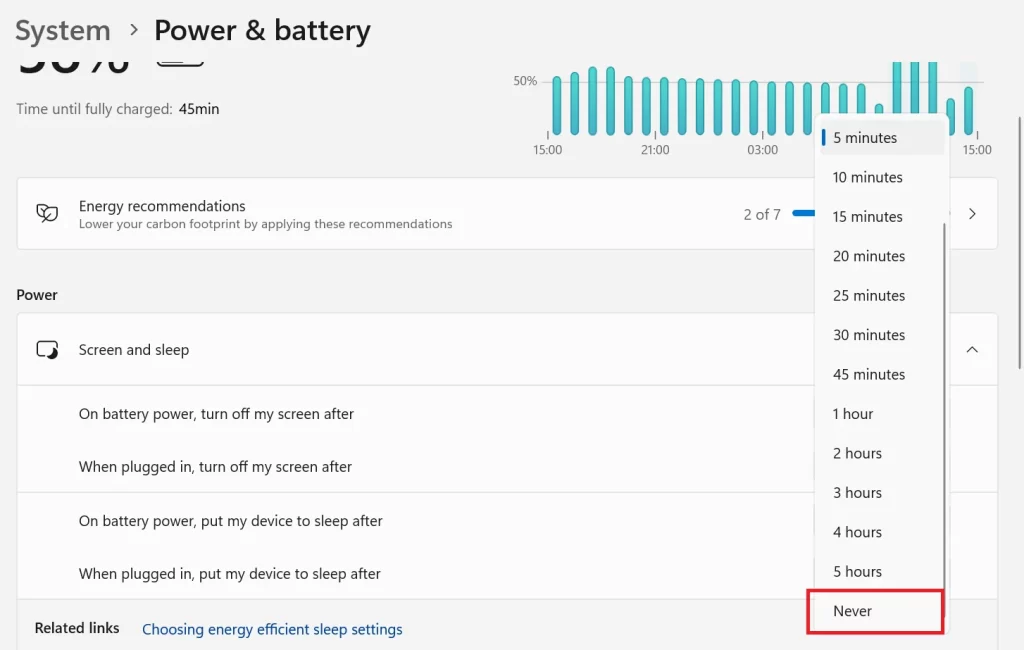
- Then, click the down arrow icon next to Screen and sleep under the section Power.
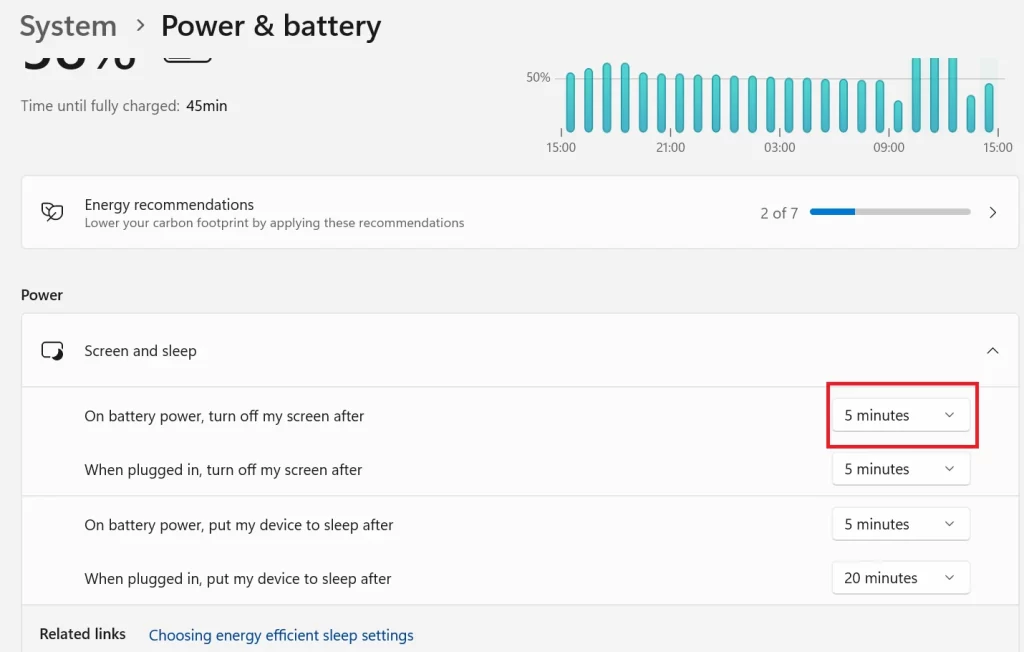
- To stop sleep mode in Windows 11 PC completely, set all options to Never. This will keep your PC awake indefinitely until you manually put it to sleep or shut it down.
2. Use the Group Policy Editor to Stop Sleep Mode on Windows 11 PC
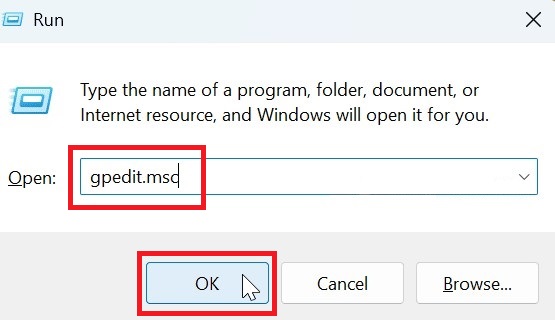
- Open the Run Dialogue windowon your Windows 11 PC. You can do this by pressing the Windows + R key on your keyboard.
- Type gpedit.msc and click on OK or press Enter from the keyboard.
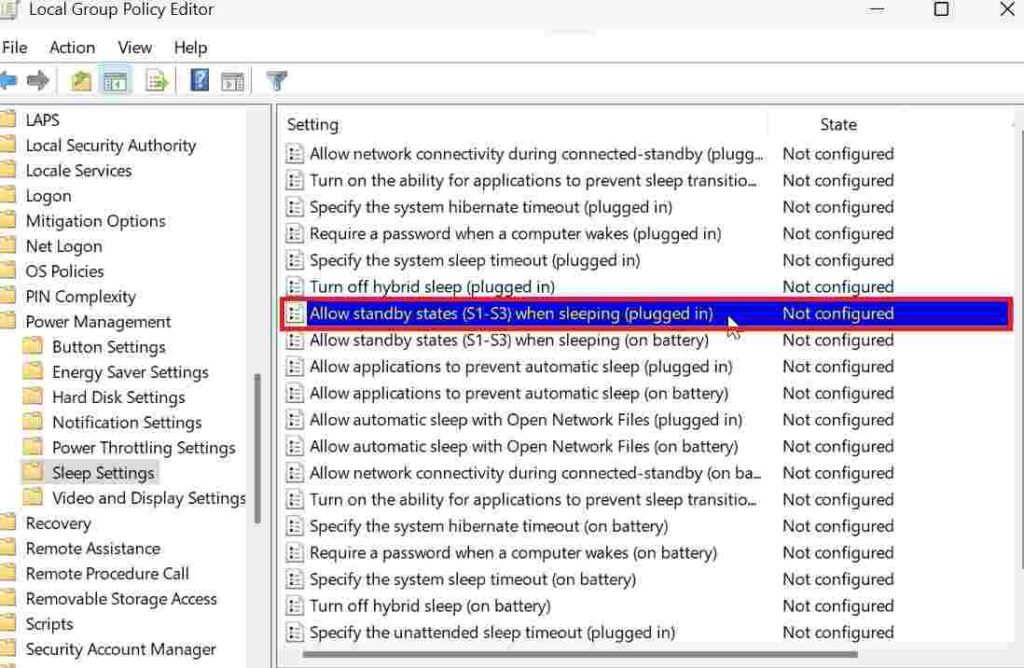
- Now your Group Policy Editor window will be opened. Now navigate to the Computer Configuration > Administrative Templates > System > Power Management > Sleep Settings.
- Now double-click on Allow standby states (S1-S3) when sleeping (plugged in) and click on Enabled, Apply, and OK to save the policy change.
- In the same way, double-click on the Allow standby states (S1-S3) when sleeping (on battery) and click on Enabled, Apply, and OK to save the policy change.
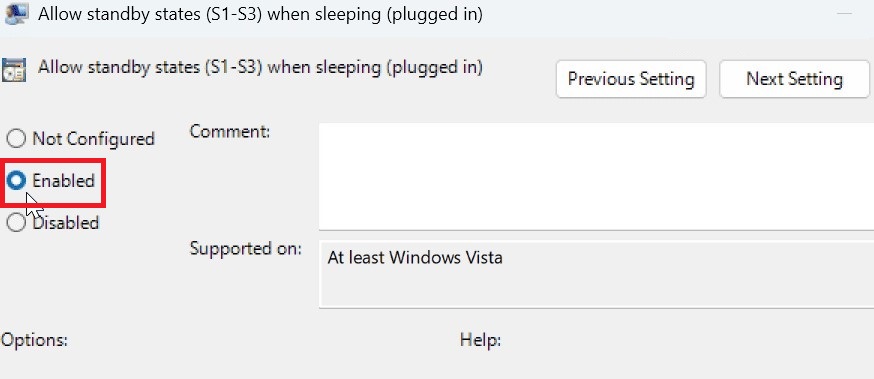
This will keep your PC awake forever until you manually put it to sleep, restart, or shut it down. To revert these settings, go back and set the policies to not configured and save the changes.
Conclusion
In conclusion, now you have successfully learned and stopped sleep mode in Windows 11 PC and customize it to your liking. Now you can enjoy using your PC without worrying about it going to sleep mode unexpectedly. I hope you found this blog post on “how to stop Windows 11 PCs from sleeping” helpful and informative. If you have any questions or feedback regarding this post or on Windows 11 PC, feel free to leave a comment below.
Must Read
2 thoughts on “How to Stop Sleep Mode in Windows 11 PC?”
Comments are closed.