You probably have a lot of apps on your iPhone that contain sensitive or personal information. Maybe you have banking apps, social media apps, or even dating apps that you don’t want anyone else to access. Or maybe you just want to keep some apps away from your kids or your nosy friends. Whatever the reason, you might be wondering how to lock apps on your iPhone.
There are two easy ways to lock apps on your iPhone: using Face ID & Passcode (or Touch ID & Passcode) and Screen Time. Let’s see each in detail.
1. Use Face ID & Passcode to Lock Apps on Your iPhone
This is the most secure and easiest way to lock apps on your iPhone. It was initially introduced with the iPhone model iPhone X. Let’s see how to do this.
- Go to the Settings App.
- Tap Face ID & Passcode.
- Enter your passcode (if prompted). If you have not set up the Face ID earlier, then tap on Set Up Face ID, then, tap Get Started and register your face ID.
- Tap on Others App.
- Enable the toggle switch next to the app(s) name you want to lock with Face ID.
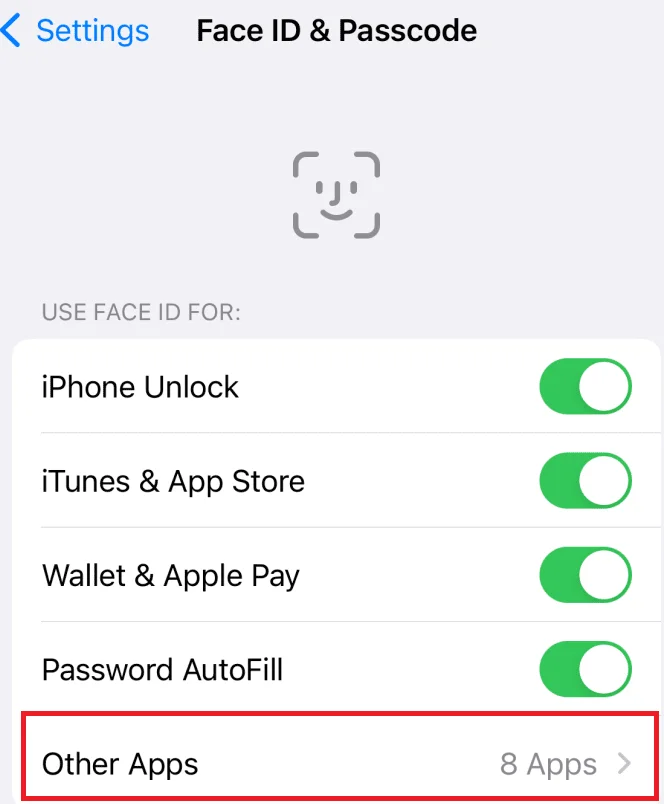
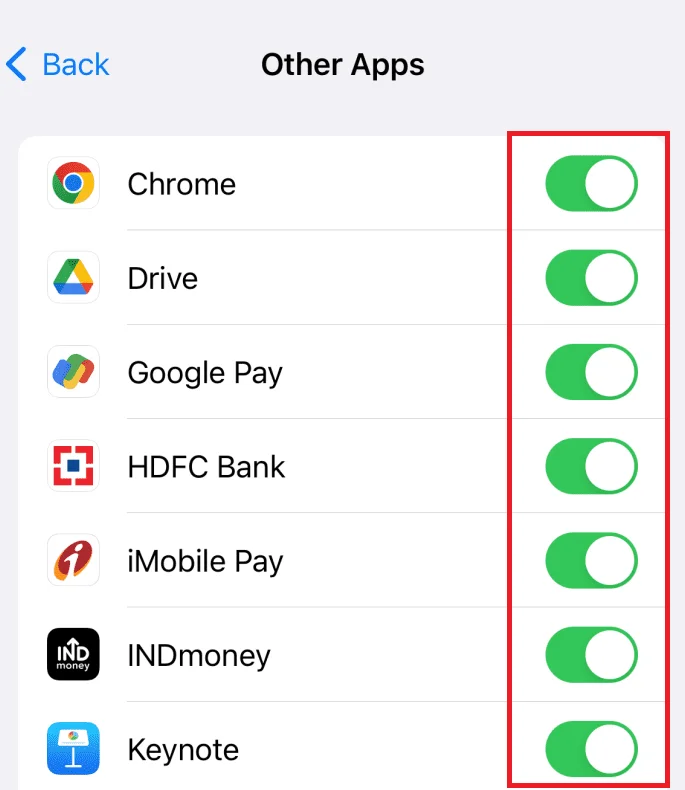
That’s it! You successfully locked the app on your iPhone using Face ID.
2. Use Screen Time to Lock Apps on Your iPhone
Screen Time is a feature that Apple introduced in iOS 12 to help users manage their time and usage on their devices. It also has a useful option to set app limits and restrictions, which can be used to lock apps on your iPhone. Let’s see how to do it.
- Go to the Settings App.
- Tap Screen Time.
- Tap Content & Privacy Restrictions.
- Then, tap Allowed Apps.
- Enable the toggle switch next to the app(s) name that you want to restrict.
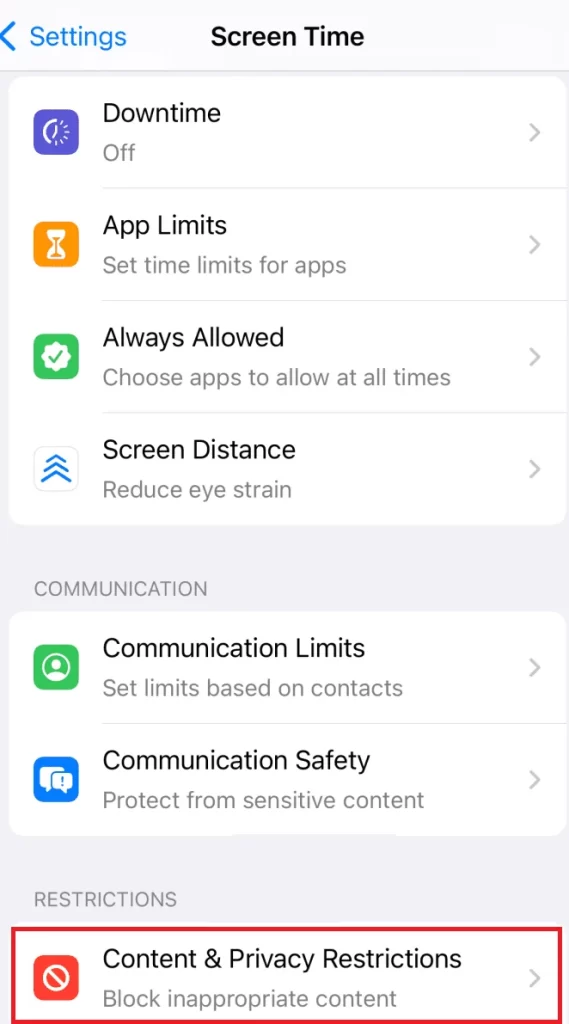
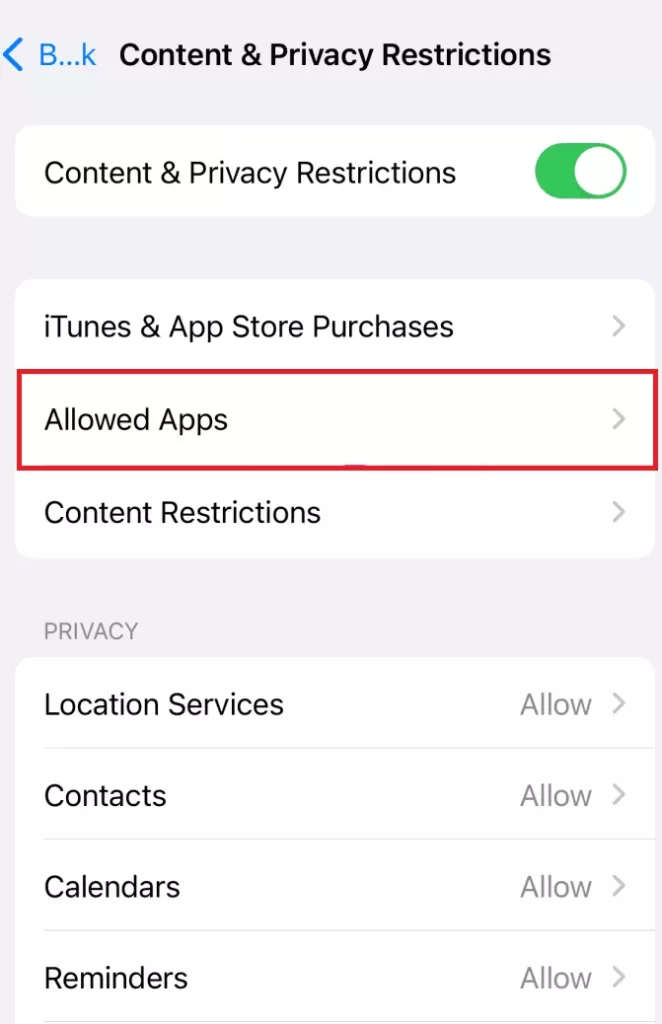
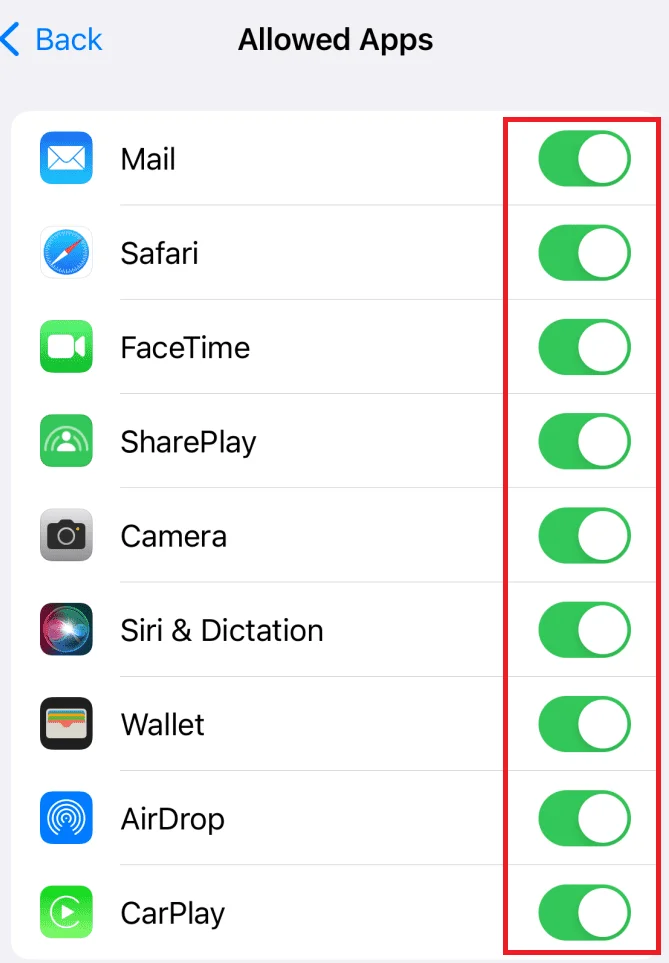
You can also have an option to restrict web content that prevents your child from accessing adult web content accidentally using Safari or Chrome browser on your iPhone.
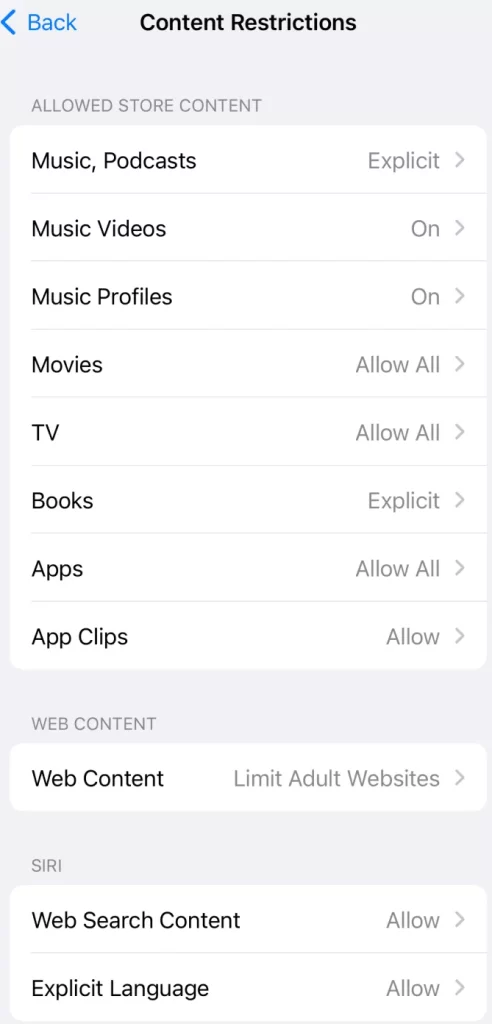
Bonus Tip: Use Guided Access to Lock Apps on Your iPhone
Guided Access is another feature that Apple introduced in iOS 6 to help users with accessibility needs or children stay focused on one app at a time. It also has a hidden option to lock any app on your iPhone with a passcode or Face ID/Touch ID. Let’s see how to do this.
- Go to the Settings App.
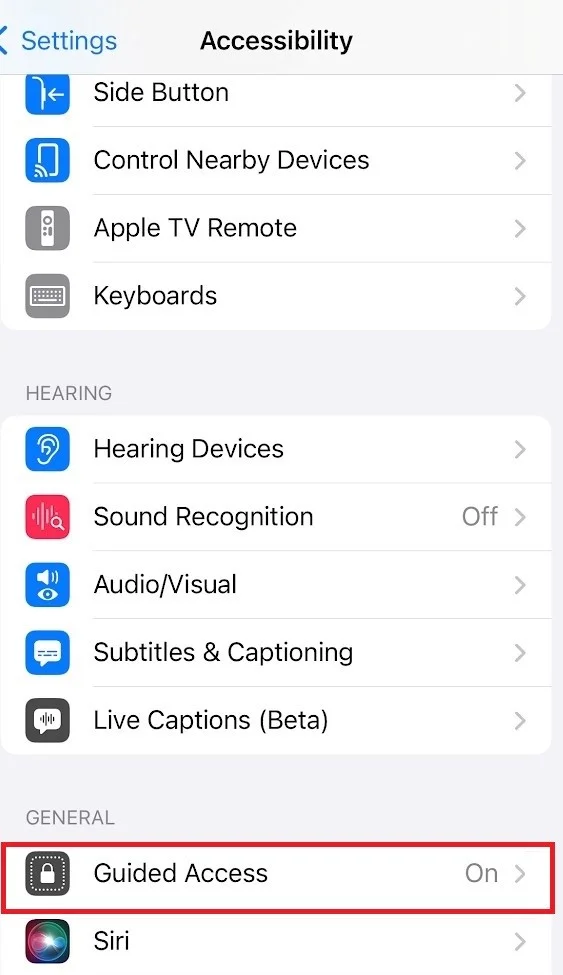
- Tap Accessibility.
- Tap Guided Access.
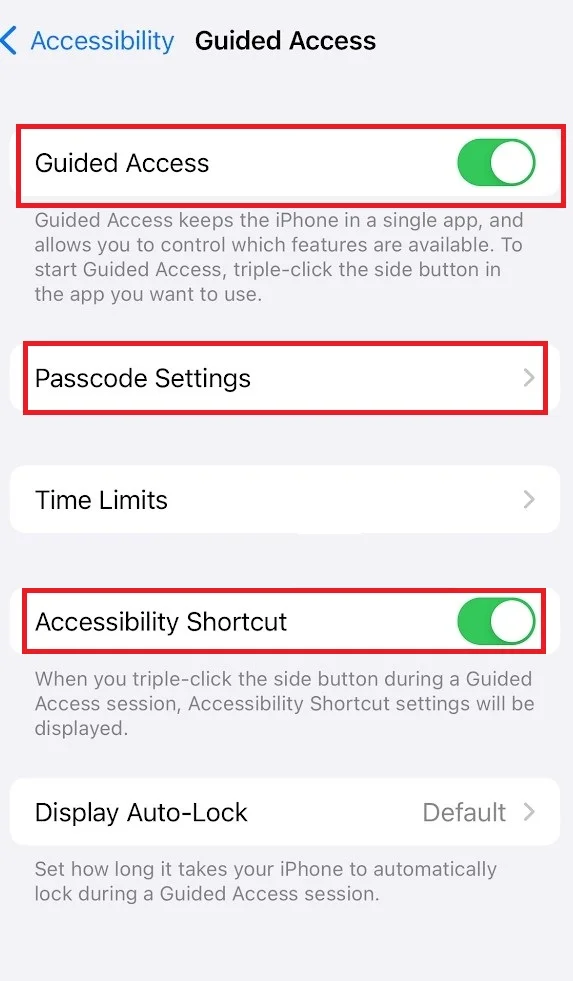
- Then, enable the toggle switch for Guided Access.
- Enable the toggle switch for Accessibility Shortcut. It will easily activate Guided Access with a triple click of the side button or home button (for older iPhones).
- Tap Passcode Settings and set a passcode or enable the toggle switch for Face ID (or Touch ID).
- Go back to the home screen and open the app that you want to lock.
- Triple-click the side button (or the home button on older models) to activate Guided Access.
- Tap Start in the top right corner. Enter and verify your passcode, if prompted.
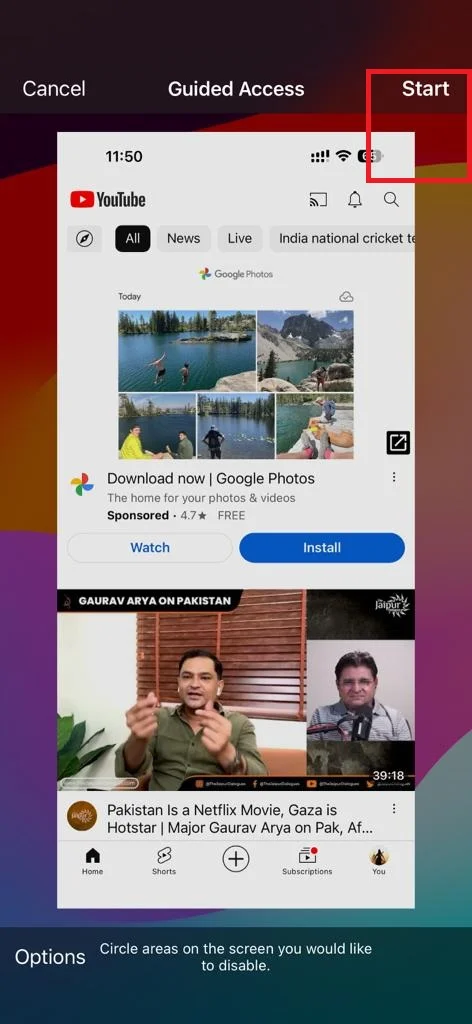
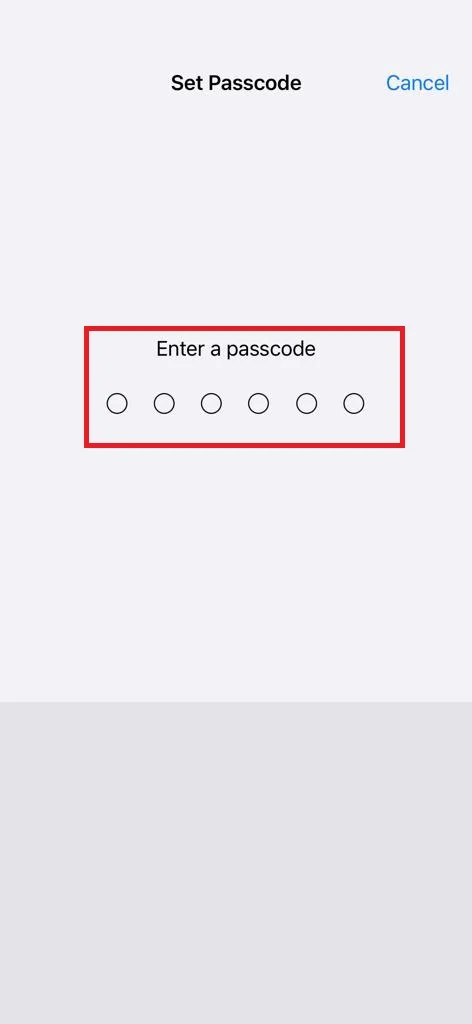
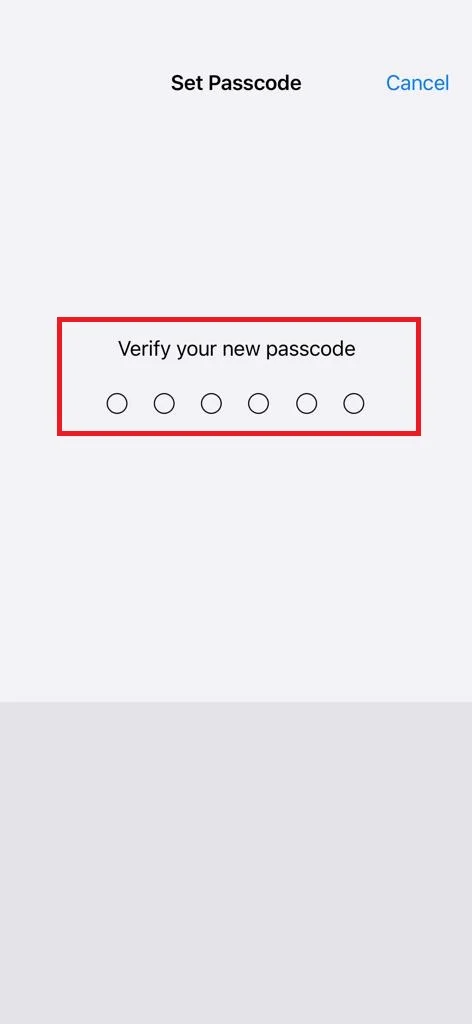
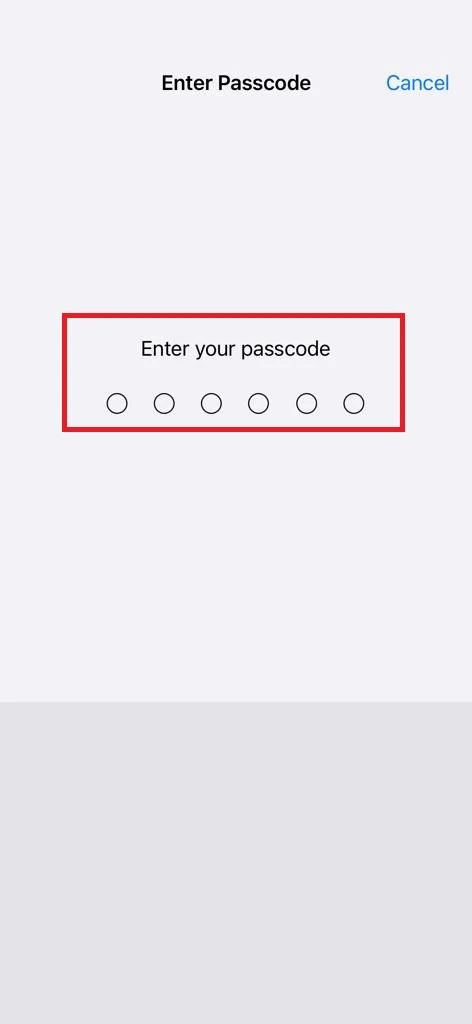
- Now, the app is locked and you can’t exit it without entering your passcode or using Face ID/Touch ID. To start the exit process, Triple-click the side button (or the home button on older models) and enter your passcode.
- Tap on End (at top left) to exit.
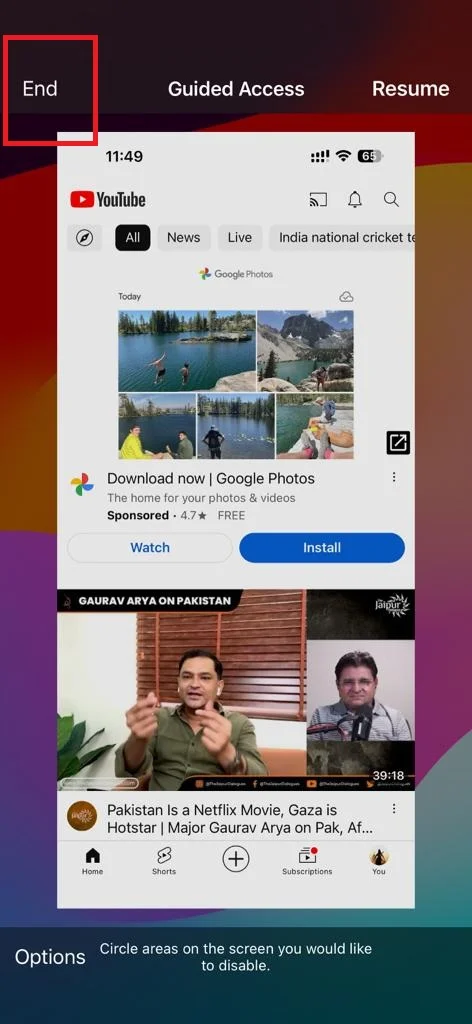
This option is good for locking any app on your iPhone, but it has some drawbacks too. First, it only works for one app at a time, so you have to repeat the process for each app that you want to lock. Second, it can be inconvenient to triple-click the side button every time you open a locked app. Third, it can interfere with some app functions, such as notifications or calls.
Conclusion
In conclusion, you have two easy ways and one bonus way to lock apps on your iPhone. None of them are perfect, but they can offer some level of protection and privacy for your apps. I hope this blog post on locking apps on your iPhone was helpful and informative for you. If you have any questions related to the steps for locking apps, please comment in the comment section.
Must Read

1 thought on “How To Lock Apps on Your iPhone: Two Easy Ways”
Comments are closed.