
If you share your Windows 11 PC with other people in the office or home, you might want to create a guest account for them. A guest account is a type of user account that has limited access to your PC’s settings and files. It can be useful for letting someone who uses your PC temporarily in a public place or home without compromising your privacy or security. In this blog post, we will show you how to create a guest account on your Windows 11 PC in a few simple steps. Let’s see it in detail.
How to Create a Guest Account on Your Windows 11 PC
It is very simple and convenient to create a guest account on your Windows 11 PC or laptop. Follow the below methods to create a new guest account.
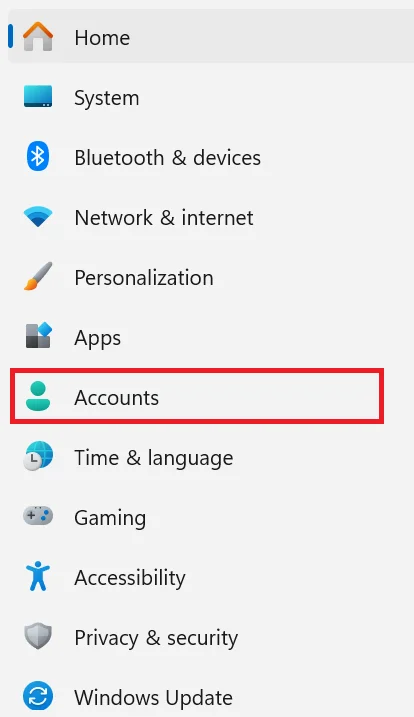
- Open the Settings app on your Windows 11 PC or laptop. To open, click on the Start button then click on the Settings (gear) icon. There is also an alternate way to open the settings app and that is to press Window + I.
- Now click on the Accounts from the left-hand sidebar menu options. This will open the Accounts settings page, where you can manage your user accounts and sign-in options.
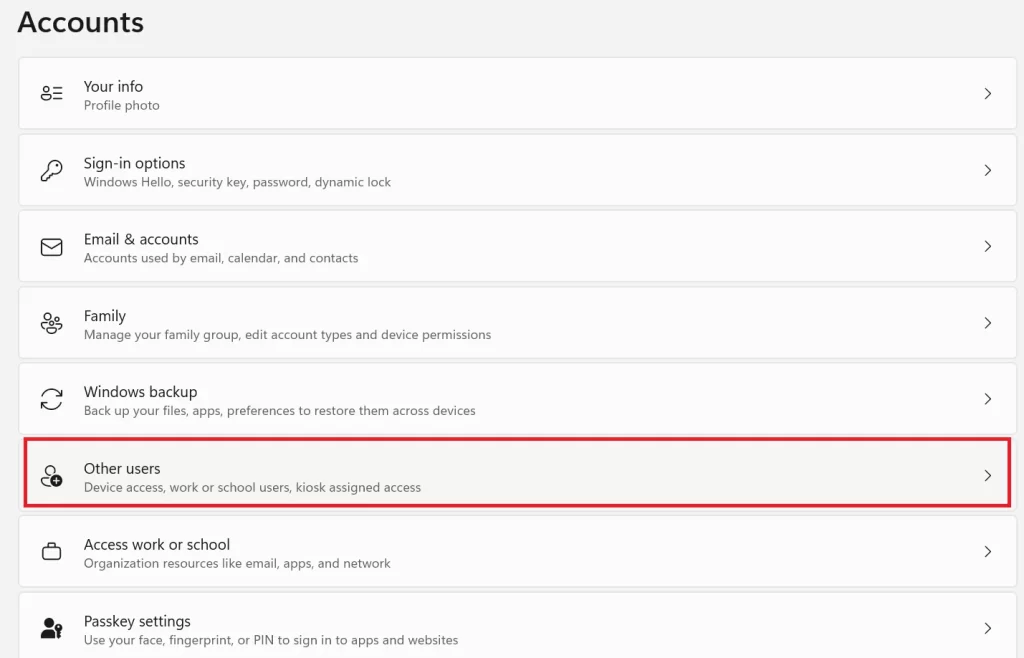
- If you want to create a guest account for other users (other than family members), click on Other users from the right-hand side of the pane. This will show you a list of all the user accounts on your PC (if you have any).
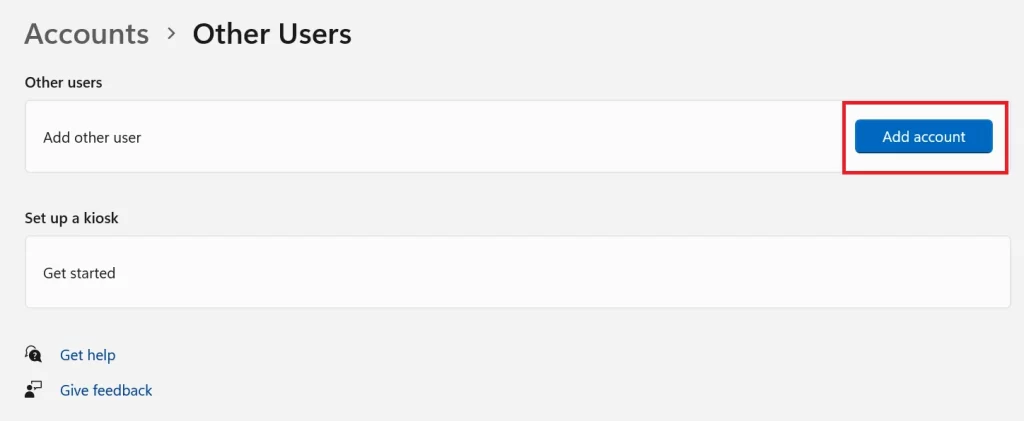
- Click on the Add Account button next to the Add other user.
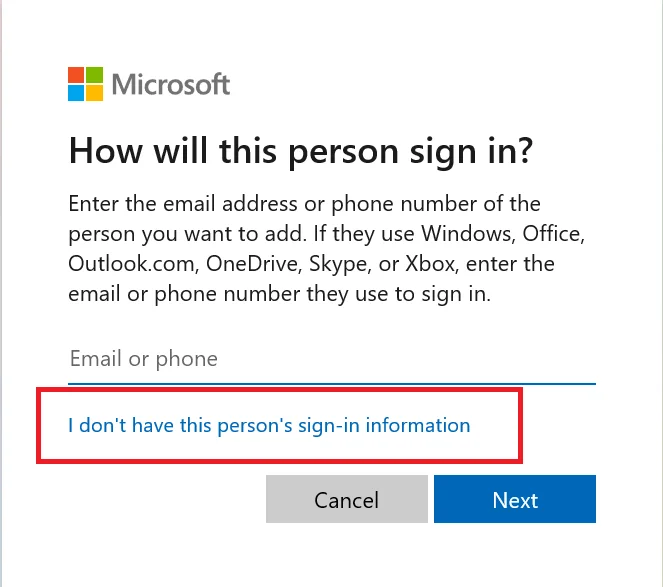
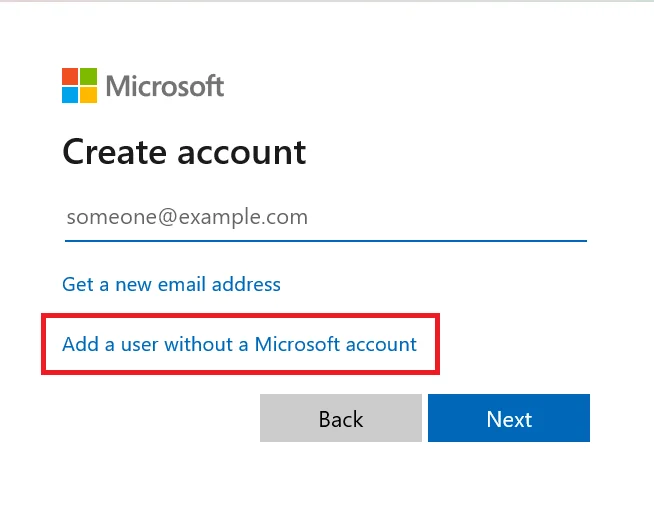
- Now click here on I don’t have this person’s sign-in information option which is just above the Cancel and Next buttons.
- Now again, click here on Add a user without a Microsoft account option which is just above the Back and Next buttons.
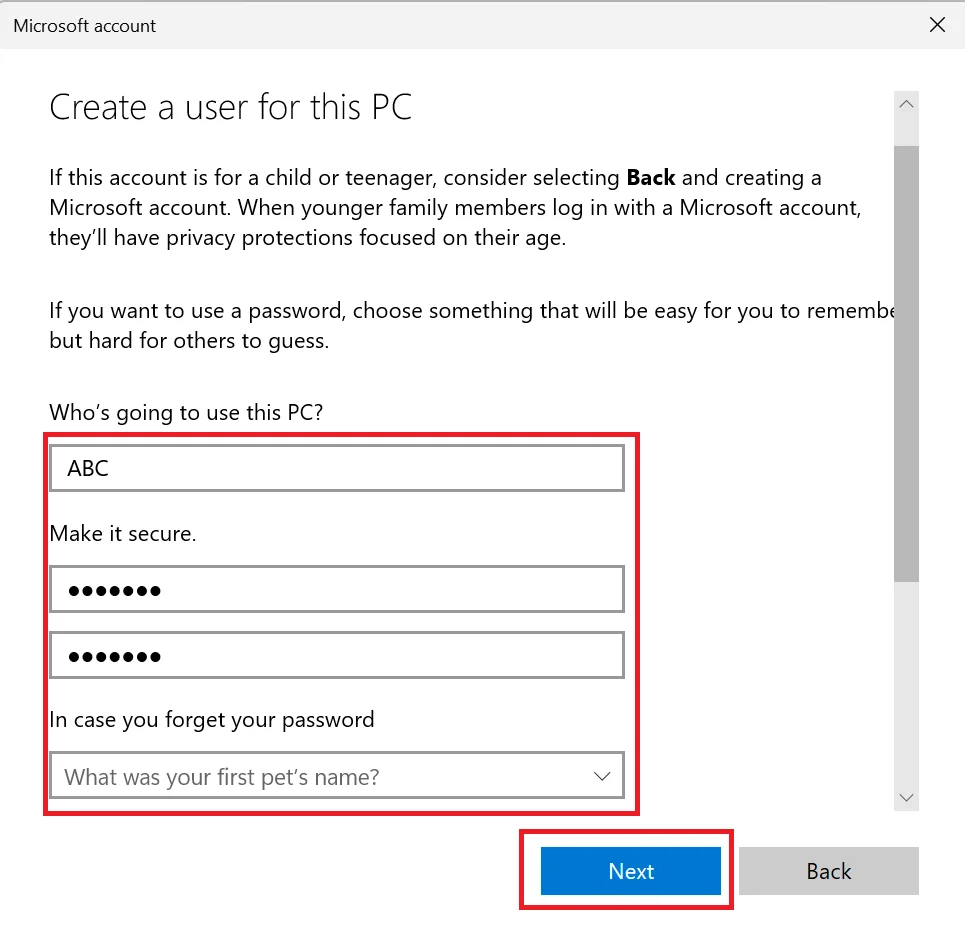
- Here you have to add some basic information: set the Guest user name and make it secure by passwords. You can also set security questions to help you recover the guest user passwords if forget.
- Once you fill in all the details click on Next.
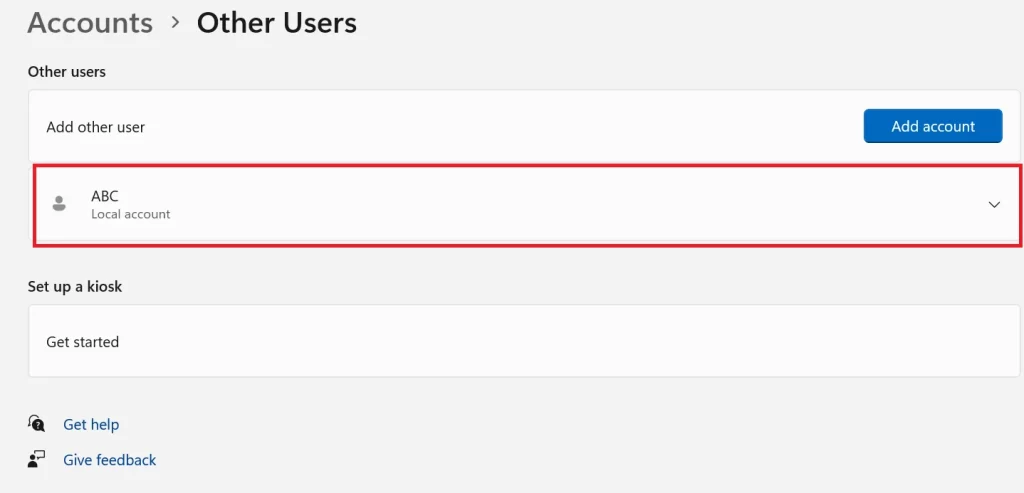
Now you will see the new guest account appear in the list of user accounts on your PC.
How to Change the Account Type to Guest/Standard
By default, the new guest account will have standard user privileges, which means it can still access some of your PC’s settings and files. To make it more secure, we need to change its account type to Guest. To do this follow the below steps:
- Press Window + I.
- Click on the Accounts.
- Click on Other users from the right-hand side of the pane.
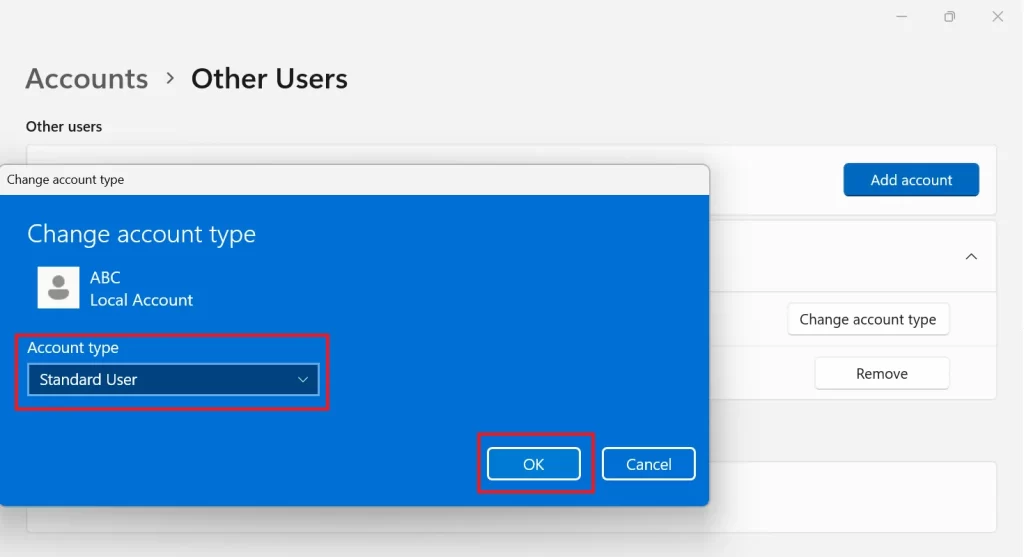
- Then, click on the guest account name in the list of user accounts.
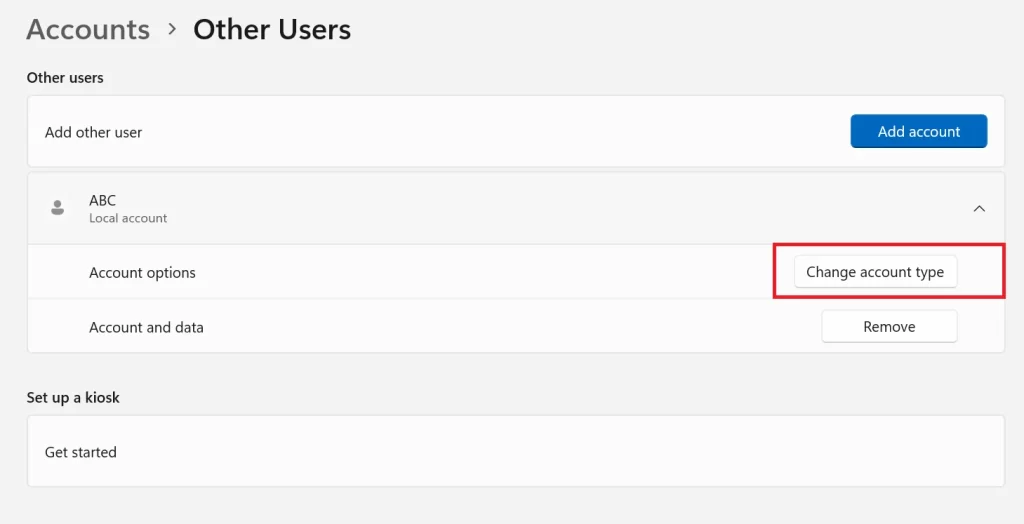
- Click on Change account type.
- On the new window, click on the Account type dropdown menu and select Standard user.
- Then click on OK (to save the changes).
Congratulations! You have successfully created a guest account on your Windows 11 PC. Now you can let anyone use your PC without worrying about your data or settings.
How to Delete the Guest Account on Your Windows 11 PC
By following just a few steps you can delete the guest user account in no time. Let’s see how.
- Press Window + I.
- Click on the Accounts.
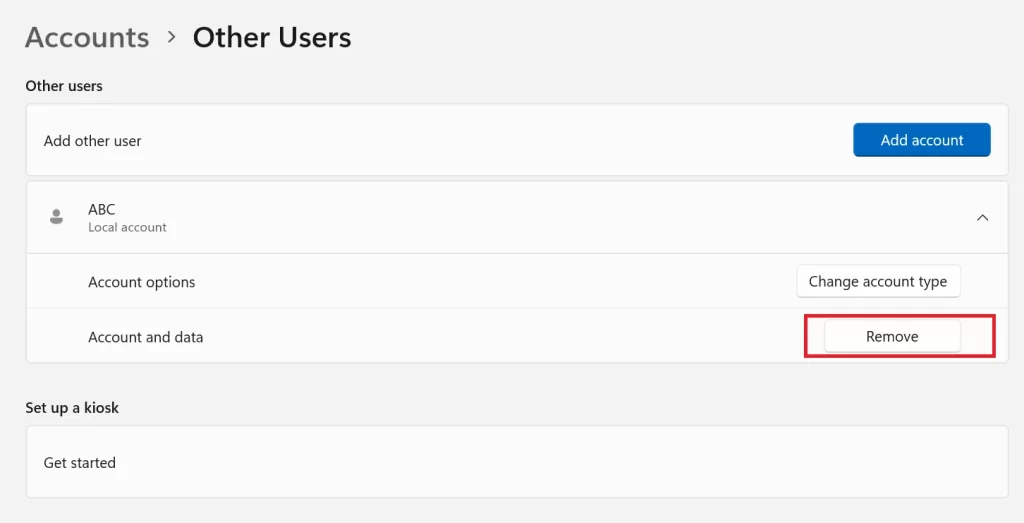
- Click on Other users from the right-hand side of the pane.
- Then, click on the down arrow icon next to the guest account name in the list of user accounts.
- Click on the Remove button.
- Finally, click Delete account and data.

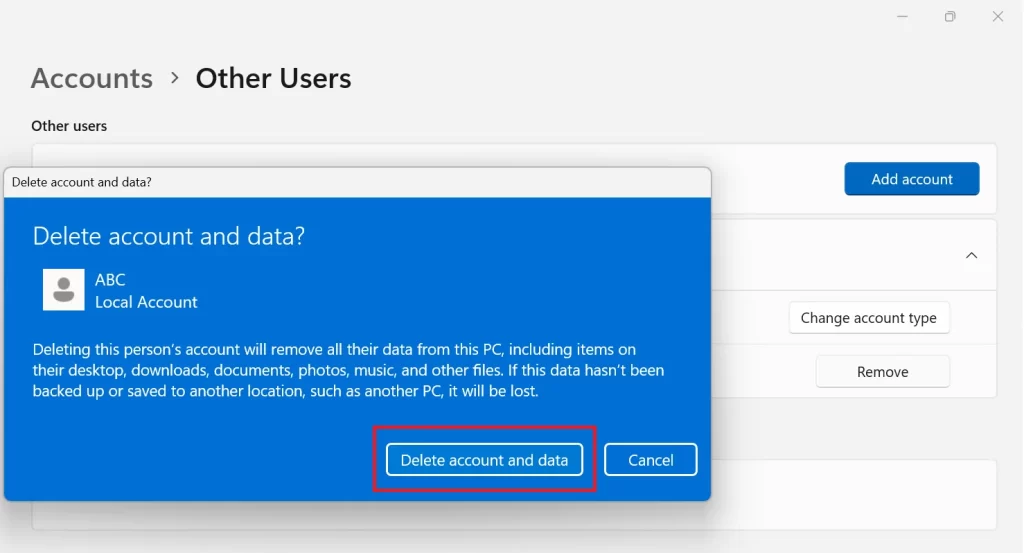
That’s it! You successfully deleted the guest user account from your Windows 11 PC.
Conclusion
Creating a guest account on your Windows 11 PC is a simple and useful way to let others use your device without compromising your privacy or security. You can easily set up a guest account from the Settings app, and customize its permissions and restrictions according to your preferences. A guest account is ideal for temporary or occasional users who don’t need to access your files or settings. By following the steps mentioned in this blog post, you can create a guest account on your Windows 11 PC in minutes.
Must Read
1 thought on “How to Create a Guest Account on Your Windows 11 PC?”
Comments are closed.