Sometimes people want to check their system specifications to upgrade it or just want to see their system specifications since the technical person knows how to see their device specifications but not all the people who use electronic gadgets know how to check this. In this blog post, we will show you how to check computer specifications on Windows 11 using different methods. So that non-technical people can easily know their system specifications.
What are the Ways to Check Computer Specifications on Windows 11
There are many ways to see the system specifications on Windows 11 but visiting the settings applications is the most common way. Let’s see in detail.
1. Use the Settings app to Check Computer Specifications on Windows 11
One of the easiest ways to check your computer specifications on Windows 11 is to use the built-in Settings app. Let’s see how to check this.
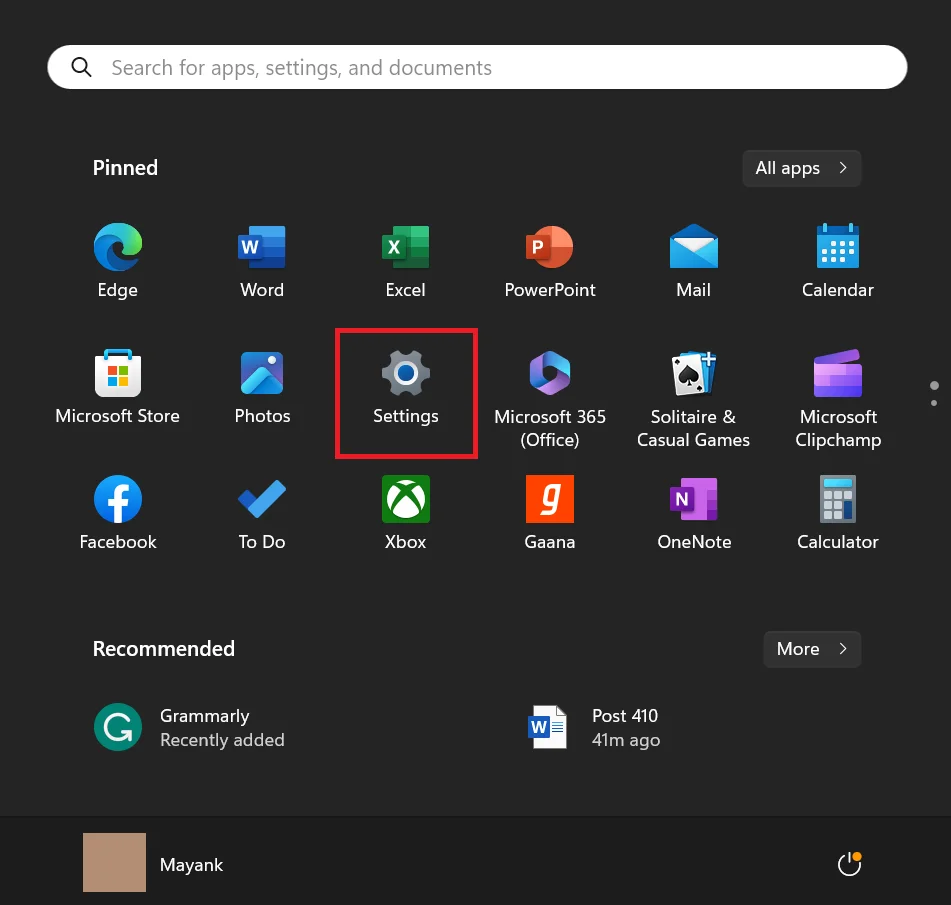
- Open the Settings by clicking the Start menu and selecting the gear icon, or pressing Windows + I on your keyboard.
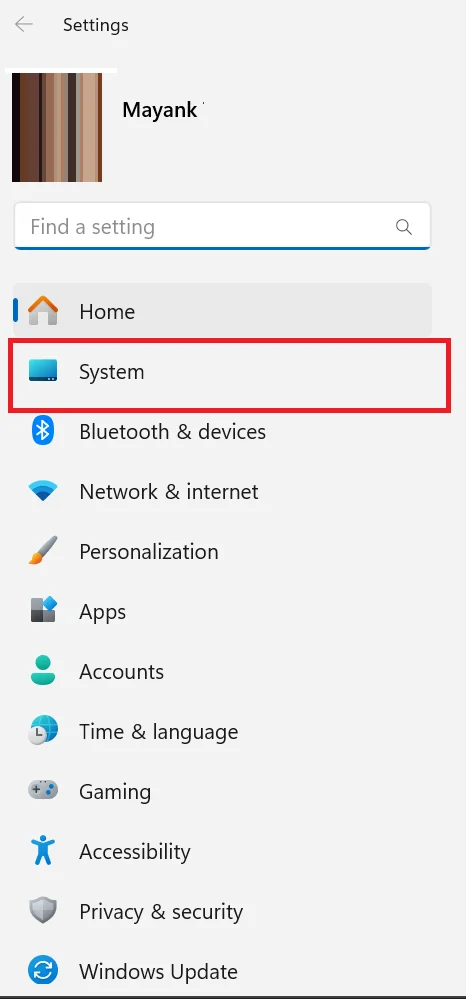
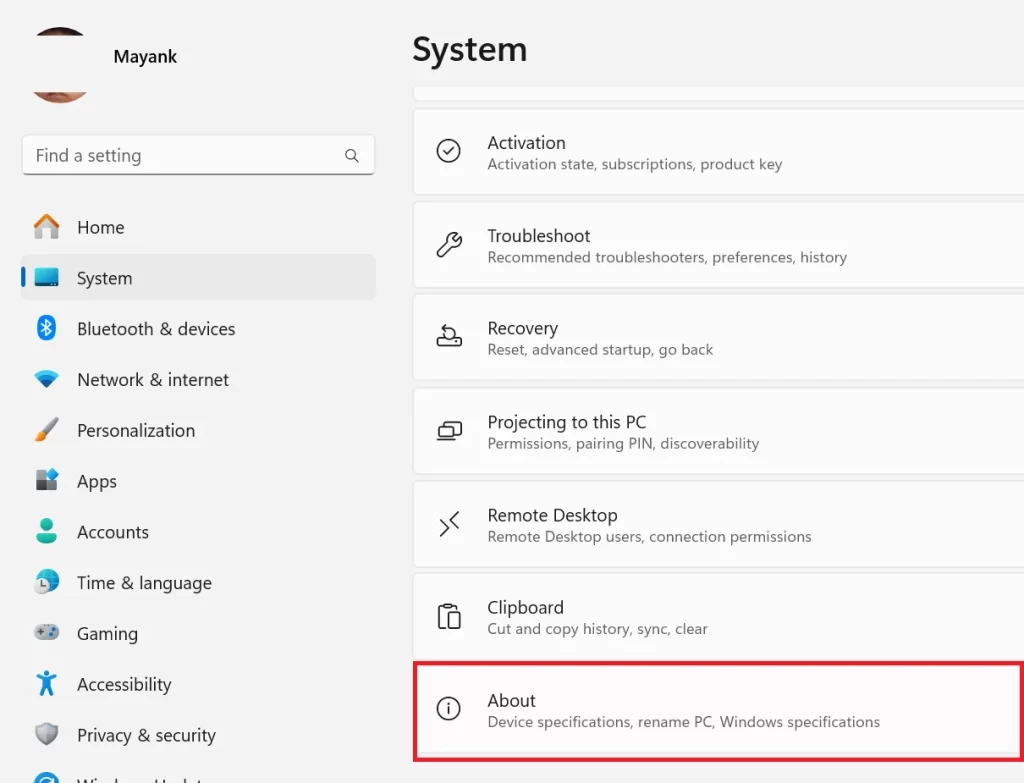
- In the Settings, click on System in the left sidebar, and then scroll down and click on About in the right pane.
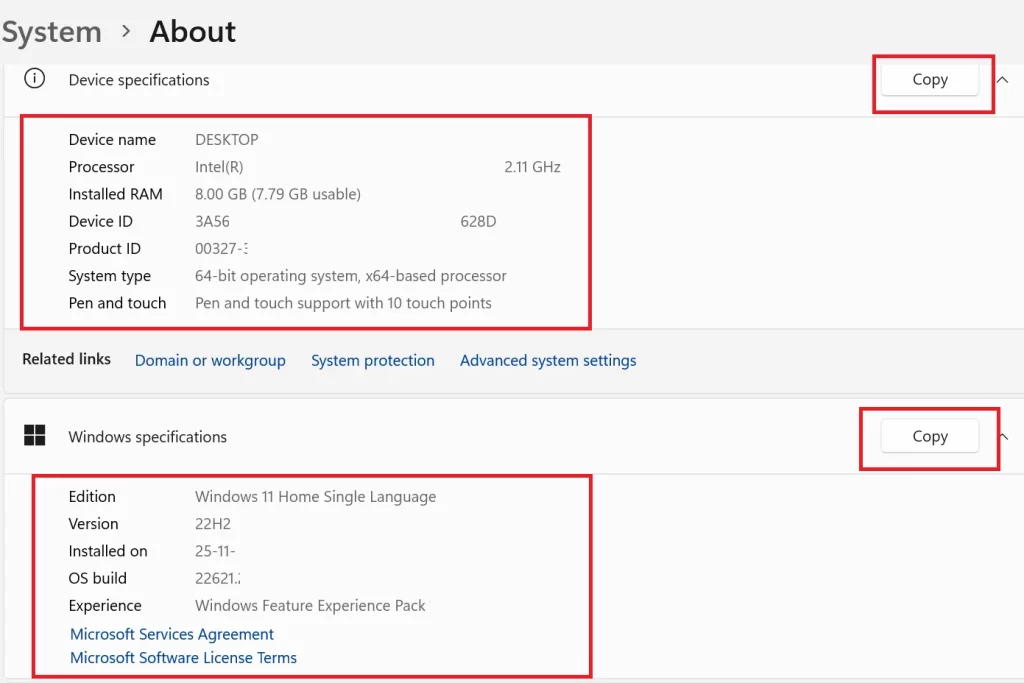
- Under Device specifications, you will see information such as your device name, processor, installed RAM, device ID, product ID, and system type (32-bit or 64-bit). If you want to copy this information, click the Copy button next to the Device specification and paste it where you want to save it.
- Under Windows specifications, you will see information such as your edition of Windows, current version of Windows, installation date, and OS build. If you want to copy this information, click the Copy button next to the Windows specification and paste it where you want to save it.
That’s it! You Successfully checked the computer specifications on the Windows 11 PC using the System app.
2. Use the System Information tool to Check Computer Specifications on Windows 11
Another way to check your computer specifications on Windows 11 is to use the System Information tool. This tool provides more detailed information about your hardware and software components. Let’s see how to check it.
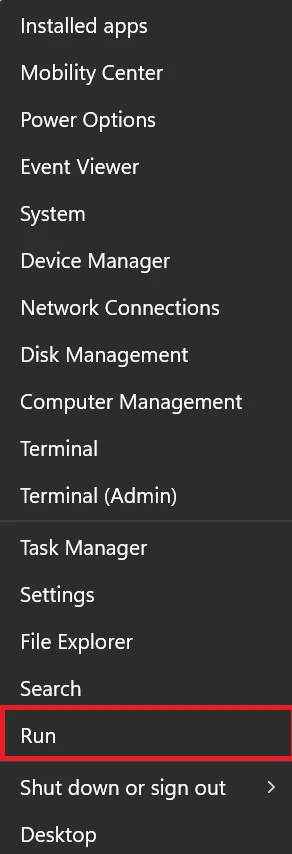
- Open the Run dialog box by pressing Windows + R on your keyboard, or by right-clicking on the Start menu and selecting Run.
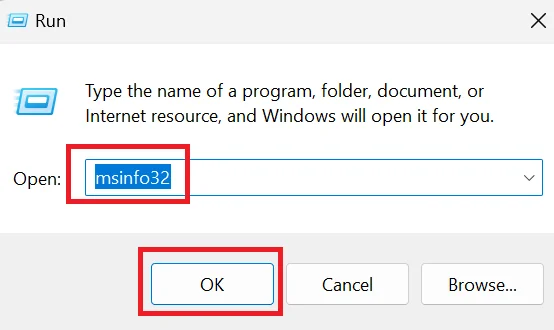
- In the Run dialog box, type msinfo32 and click OK or press Enter.
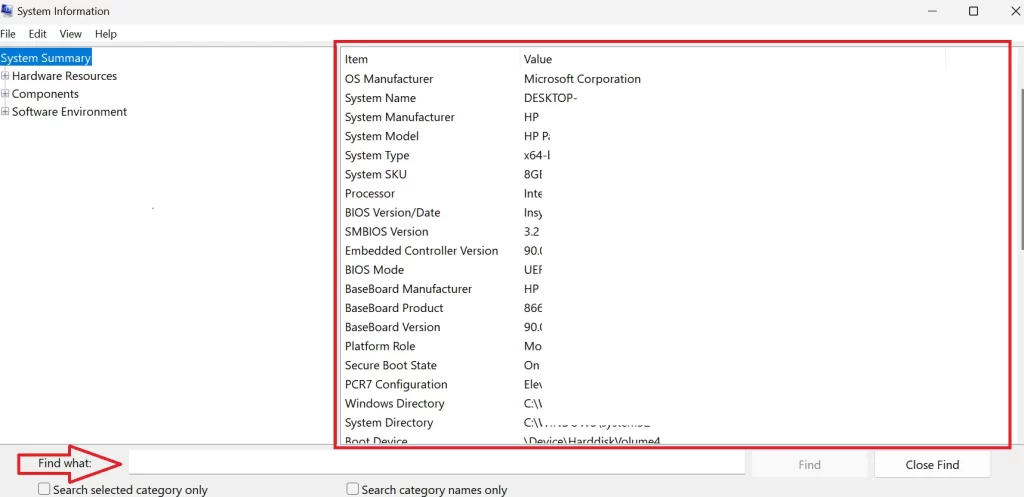
- The System Information tool will open in a new window. You can expand the categories one by one in the left pane to see more information about each component. For example, under System Summary, you can see information such as your system model, BIOS version, baseboard manufacturer, and more.
- You can also use the search box at the bottom to find specific information. For example, if you want to know your graphics card model, you can type graphics in the search box and press Enter. The tool will highlight all the items that contain the word graphics in their names or values.
That’s it! You Successfully checked the computer specifications on the Windows 11 PC using the System information tool.
3. Use the Command Prompt to Check Computer Specifications on Windows 11
The third way to check your computer specifications on Windows 11 is to use the Command Prompt. This is a command-line interface that allows you to execute various commands and scripts. Let’s see how to check using the command prompt.
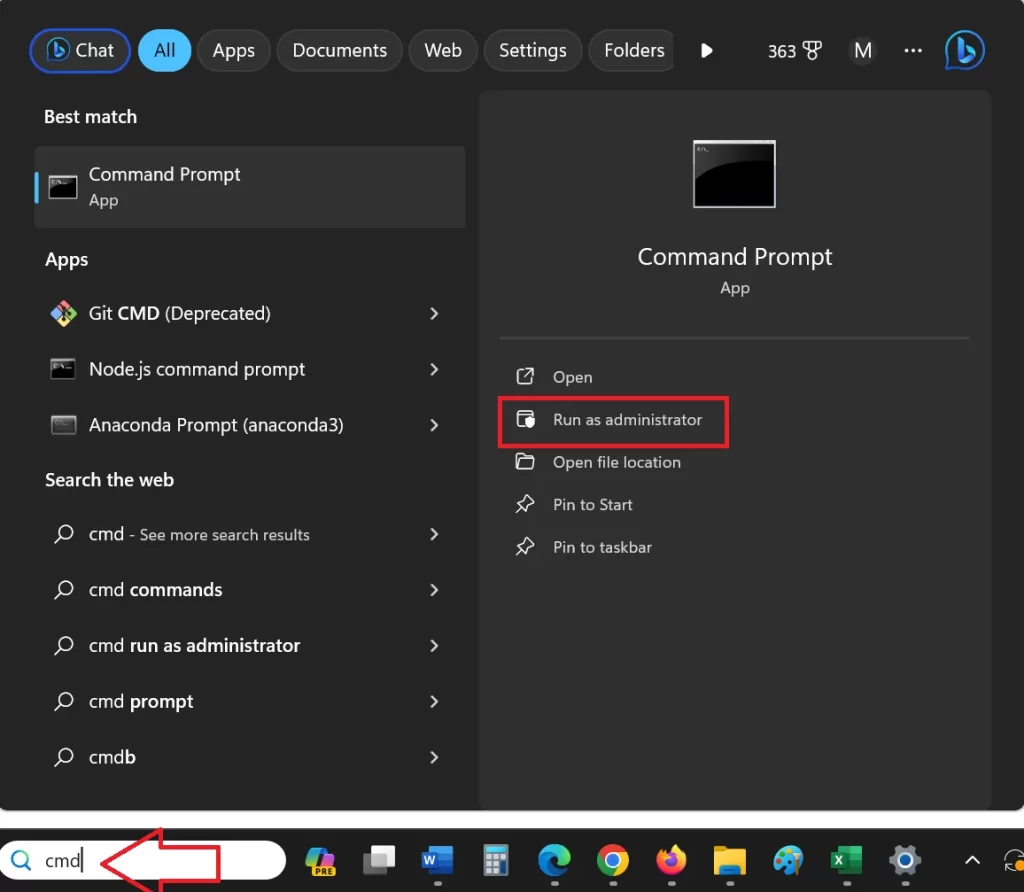
- Open the Command Prompt by typing cmd in the search box on the taskbar and clicking on Run as administrator.
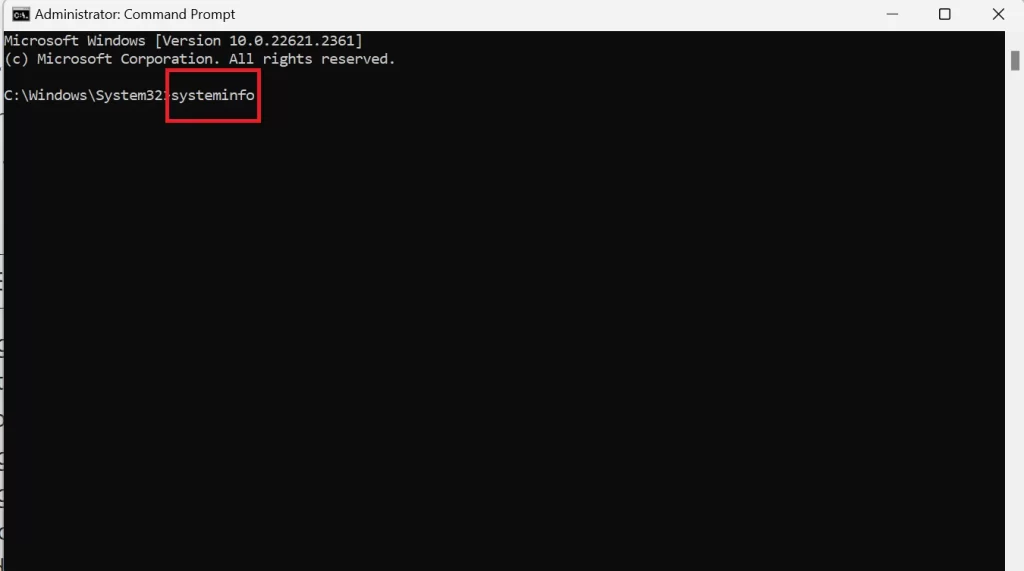
- To get system information, type the command systeminfo and press Enter. Now you can see all the details of your Windows 11 computer. Apart from this, you can also get specific information by typing specific commands.
- To get information about your processor, type wmic cpu get name and press Enter.
- To get information about your memory, type wmic memorychip get capacity and press Enter.
- If you want to get information about your disk drives, type wmic diskdrive get model,size and press Enter.
- To get information about your network adapters, type wmic nic get name,speed and press Enter.
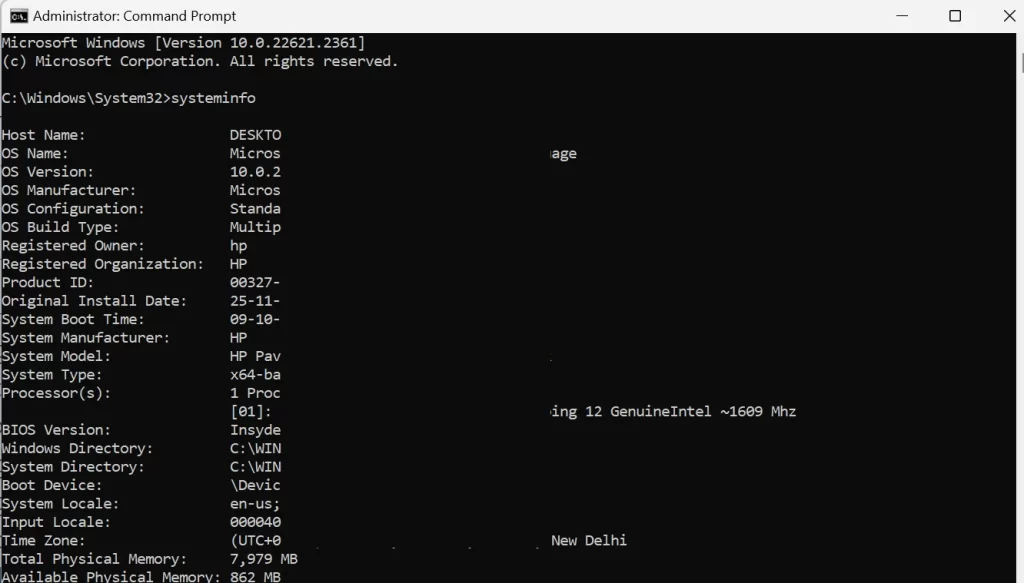
That’s it! You Successfully checked all or specific computer specifications on the Windows 11 PC using the command prompt.
4. Use Device Manager
The last and fourth easy method is to use the Device Manager to check your computer specifications on Windows 11. Let’s see how to check this.
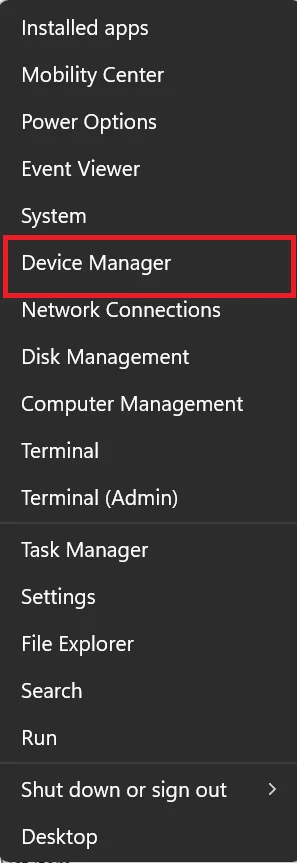
- To open the Device Manager, right-click on the Start menu then, click on Device Manager.
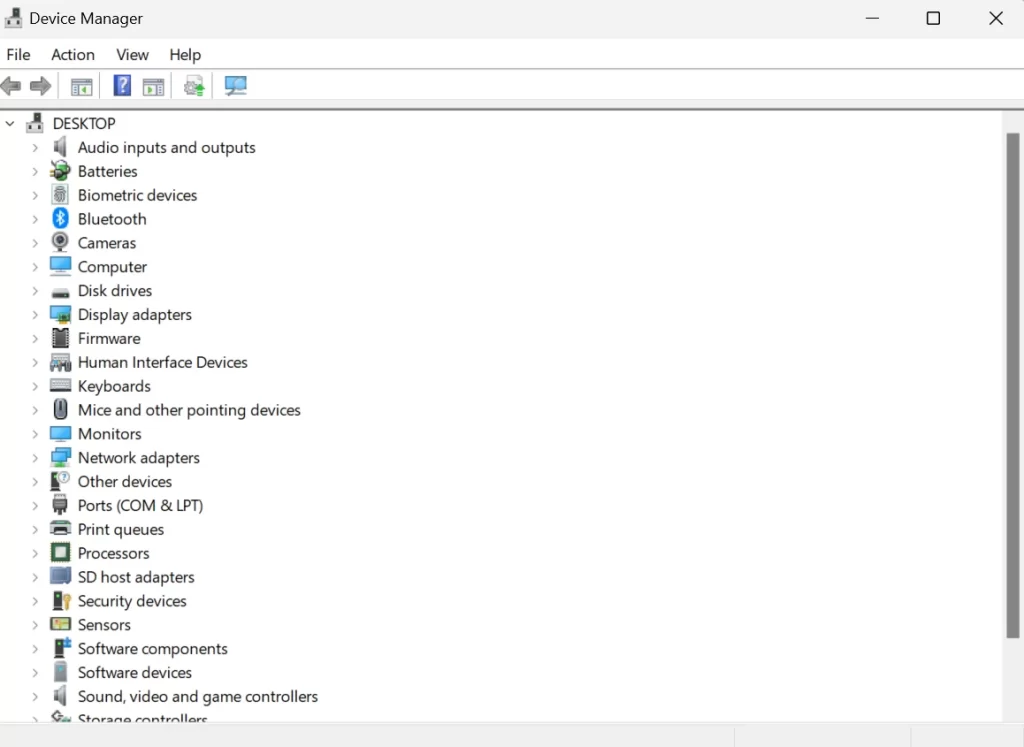
- Now here you see a list of all hardware components installed on your Windows 11 system. Click on each option to see the details about it.
Conclusion
All technical people know how to check this all. But in this blog post, we have shown the easy methods for non-technical people to check their computer specifications on Windows 11 using the four different methods: the Settings app, the System Information tool, the Command Prompt, and the Device Manager. You can use any of these methods to check system information depending on your preference and needs. Now it’s up to you which methods you want to use to check your computer specifications.
Must Read

3 thoughts on “How to Check Computer Specifications on Windows 11?”
Comments are closed.