If you use the Notes app on your Mac to store your personal or sensitive information, you might want to protect them from prying eyes. Luckily, you can lock your Mac notes with a password or Touch ID and keep them safe from unauthorized access. Let’s see how to do it.
Activate iCloud Keychain for Notes Before Locking Your Mac Notes
First, you need to activate the iCloud Keychain on your Mac. Let’s see how to do this.
- Click on the Apple Logo.
- Click on System Settings.
- Now click on Apple ID (at the top).
- Click on iCloud.
- Scroll down and click on Passwords & Keychain.
- Turn on the toggle for Sync to this Mac.

Now you can lock your Apple Notes on Mac with just a few clicks.
How to Add Lock on Your Mac Notes
If you don’t want anyone to see your notes, you can do it easily. Let’s see how.
- Open the Notes app.
- Find and select the note that you want to lock.
- Right-click on the note and click on Lock Note.
- Enter your Mac’s password to continue, If prompted.
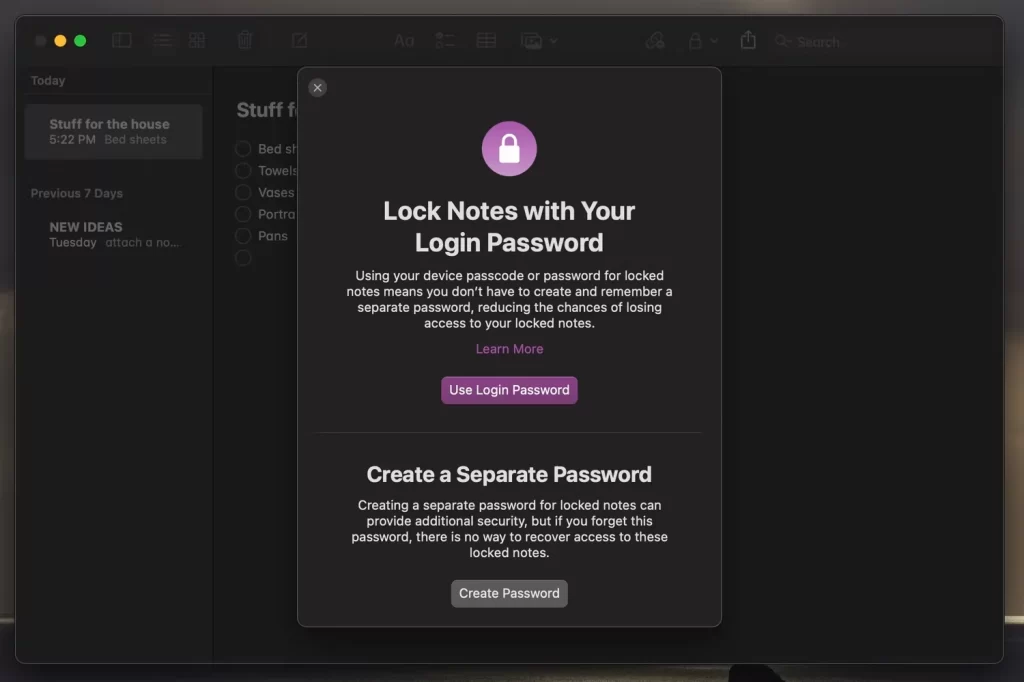
- Select either Lock Notes with your Login Password or Create a Separate Password.
- The Notes app may ask you to enable Touch ID. If so, you can do it if you want.
How to Lock and Unlock Your Mac Notes
If you want to keep some of your notes private, you can use the lock feature in the Notes app. But there’s a catch: you can’t lock just one note. You have to lock them all and then unlock the ones you need.
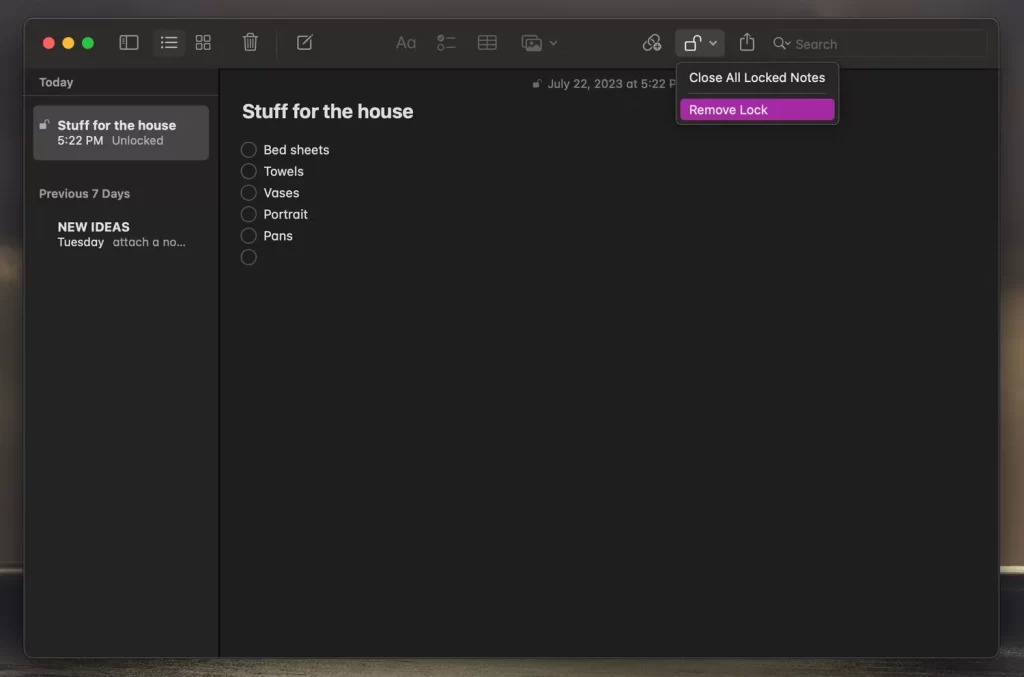
Lock Your Mac Notes
- Click on the lock icon in the top-right corner of the app.
- Click on Close All Locked Notes.
Unlock Your Mac Notes
- When you want to access (or unlock) a locked note, just pick the one you want
- Enter your password, or use Touch ID to open it.
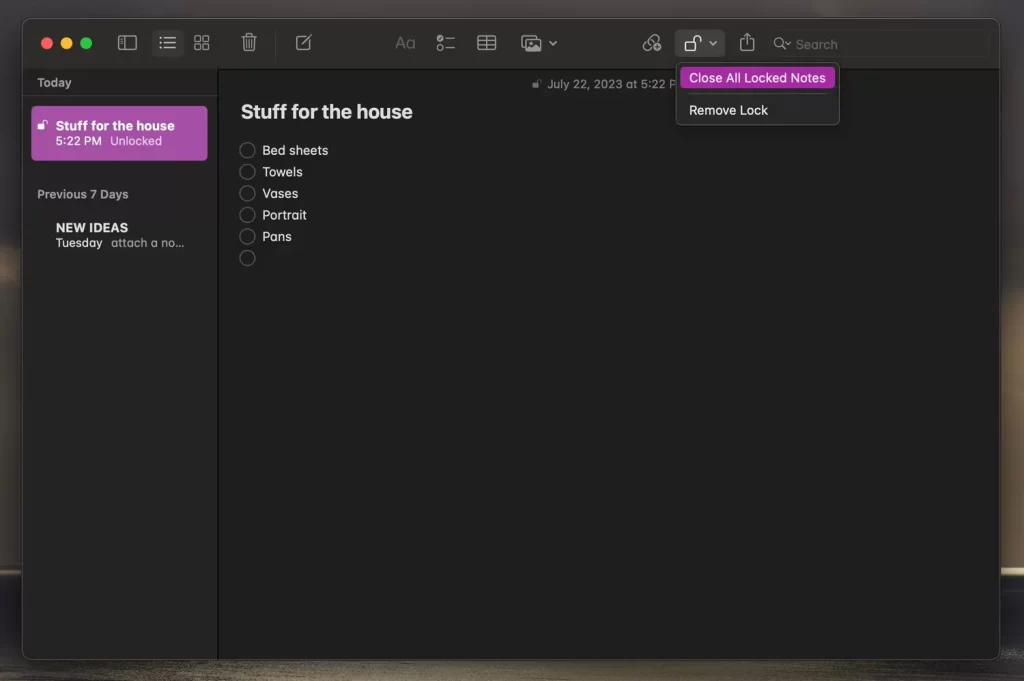
Note: No need to panic if you left your notes unlocked; it will be closed by itself after a short while or when you exit the app.
How to Setup Custom Passwords to Lock Your Mac Notes
- Open the Notes app.
- Click on Notes from the menu bar.
- Click on Settings.
- Now click on the drop-down menu, next to the Locked Notes.
- Click on Use Custom Password.
- If you want you can use the Touch ID (or enter your Mac Computer login password to continue).
- Now enter the new password. Make sure the password is tough and easy to remember for you. Verify the password. Create a password hint (it will help you in case you forget your password).
- Finally, click on Set Password.
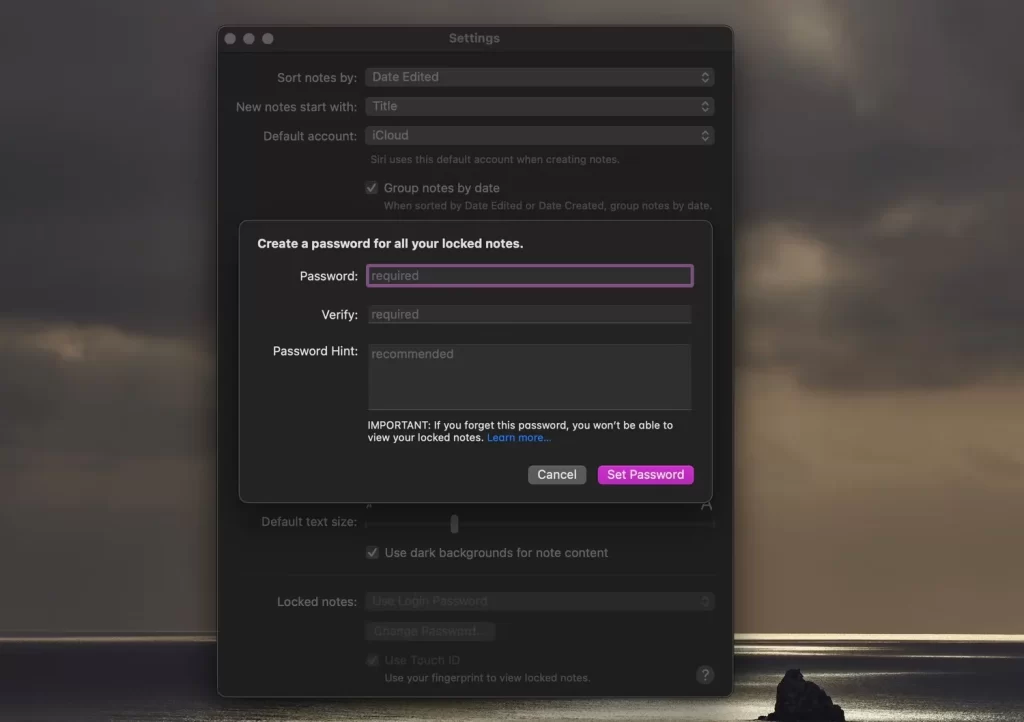
Note: Don’t forget the custom passwords because they are not recoverable if you lose them. That’s why it’s important to have a Password Hint. You don’t want to get locked out of your account, right? So, if you think you might not remember your custom password, just use your login password instead. It’s easier and safer.
How to Remove Locks from Your Apple Notes
- Click on the lock icon in the top-right corner of the app.
- Click on Remove Lock.
Conclusion
Note that locking your notes only prevents them from being viewed in the Notes app. They are still stored in plain text on your Mac and can be accessed by other apps or users who have access to your Mac. Therefore, locking your notes is not a substitute for encrypting your Mac or using a secure cloud service. However, it is a useful feature for adding an extra layer of privacy to your notes.
Must Read
- Get Rid of Spam Group Chats on iPhone
- Change Screen Time Passcode on iPhone
- Change Apple Notes Text Color on Mac
Please comment and Contact Us for any discrepancy. Follow MambaPost on Facebook, Twitter and LinkedIn. For the latest Tech News checkout at MambaPost.com.
3 thoughts on “How to Lock Your Mac Notes for Maximum Privacy?”
Comments are closed.