If you’re tired of dropped calls or poor cell reception, there’s a simple solution that you can use with your iPhone: Wi-Fi calling. Wi-Fi calling lets you make and receive phone calls over a Wi-Fi network, instead of using your cellular network. This can improve your call quality, save your battery life, and reduce your data usage. Plus, it’s free and easy to set up. In this blog post, we’ll show you how to enable Wi-Fi calling feature on your iPhone. Also, we will tell you what benefits it can bring to your communication experience.
What is Wi-Fi Calling?
Wi-Fi Calling is a feature that lets you make and receive phone calls over a Wi-Fi network instead of using your cellular connection. It can be useful if you have poor or no signal in your area, or if you want to save on your mobile data usage. With Wi-Fi Calling, you can use your regular phone number and contacts, and you don’t need any extra apps or devices.
To use Wi-Fi Calling, you need a compatible smartphone, a Wi-Fi network that meets the minimum requirements, and a carrier that supports the feature. You also need to turn on the feature in your phone settings and make sure your carrier supports it. Once you do that, you can enjoy clear and reliable calls wherever you have Wi-Fi access.
Depending on your device and carrier, you may need to enter or verify your emergency address, as Wi-Fi calls may not provide accurate location information to emergency services.
Benefits
Wi-Fi calling has many benefits, such as:
- Wi-Fi calling can improve your call quality and reliability, especially in areas with weak or no cellular signal.
- It can save you money on your phone bill, as Wi-Fi calls are usually free or included in your plan, while cellular calls may incur extra fees or charges.
- It can help you stay connected with your friends and family, even if you are in a different country or region, as long as you have access to a Wi-Fi network.
- Wi-Fi calling can reduce your battery consumption, as Wi-Fi uses less power than cellular networks.
How to Enable Wi-Fi Calling Feature on iPhone
Check if your carrier and device support Wi-Fi calling. Not all carriers and devices offer Wi-Fi calling, so you need to make sure yours do before you proceed. You can check the list of supported carriers and devices on Apple’s website.
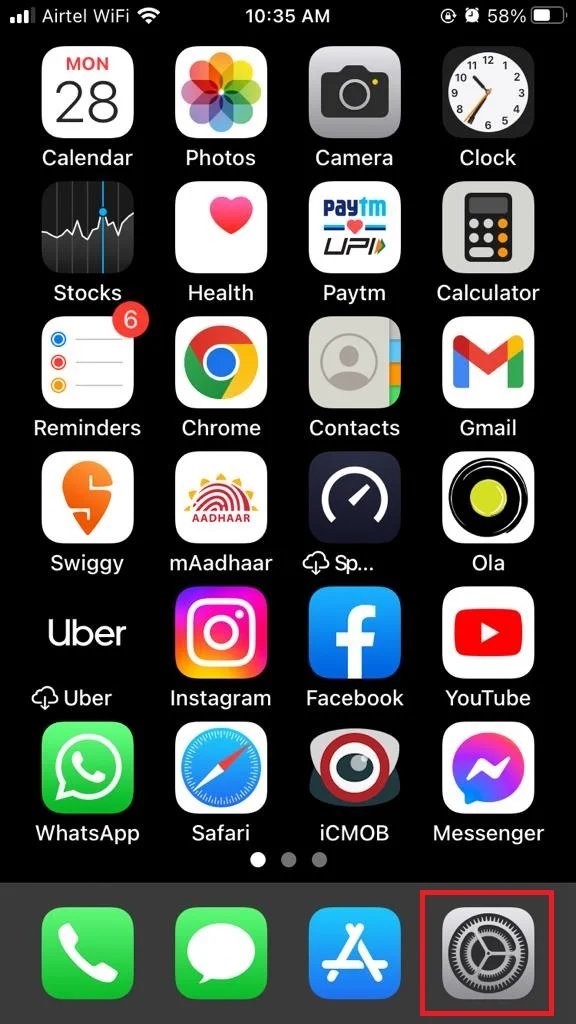
- Tap on the Settings app.
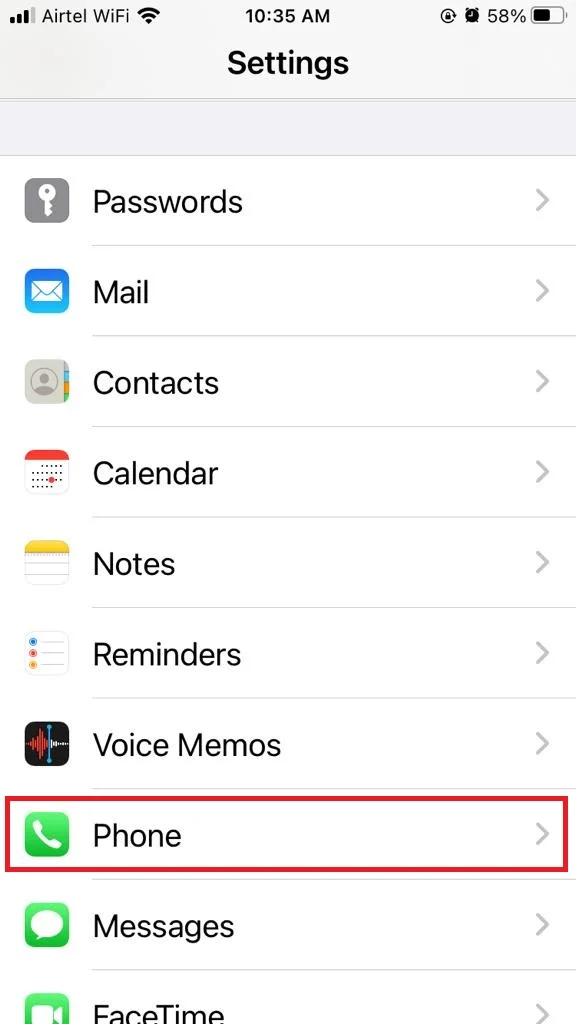
- Tap on Phone.
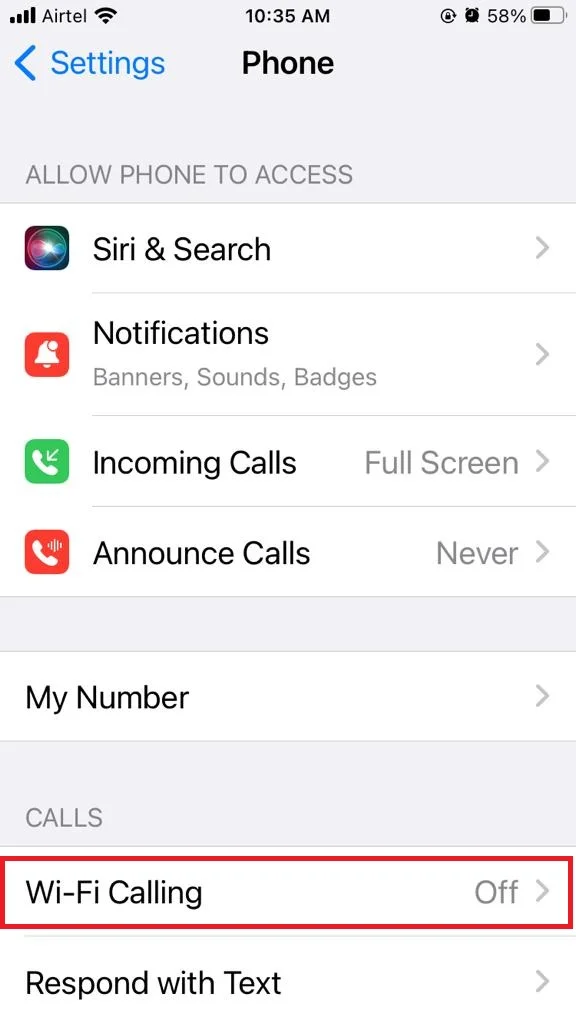
- Now tap on Wi-Fi Calling.
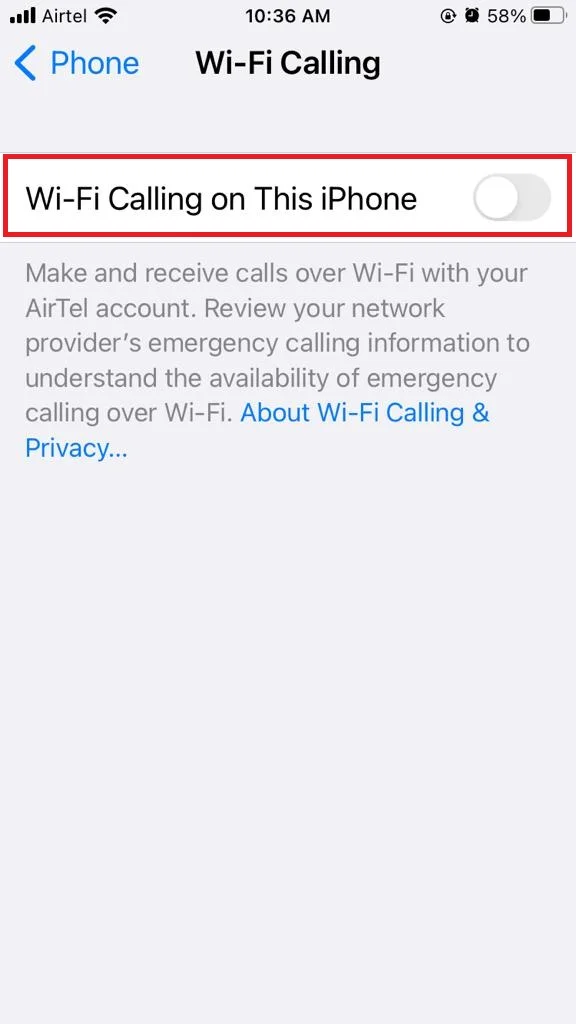
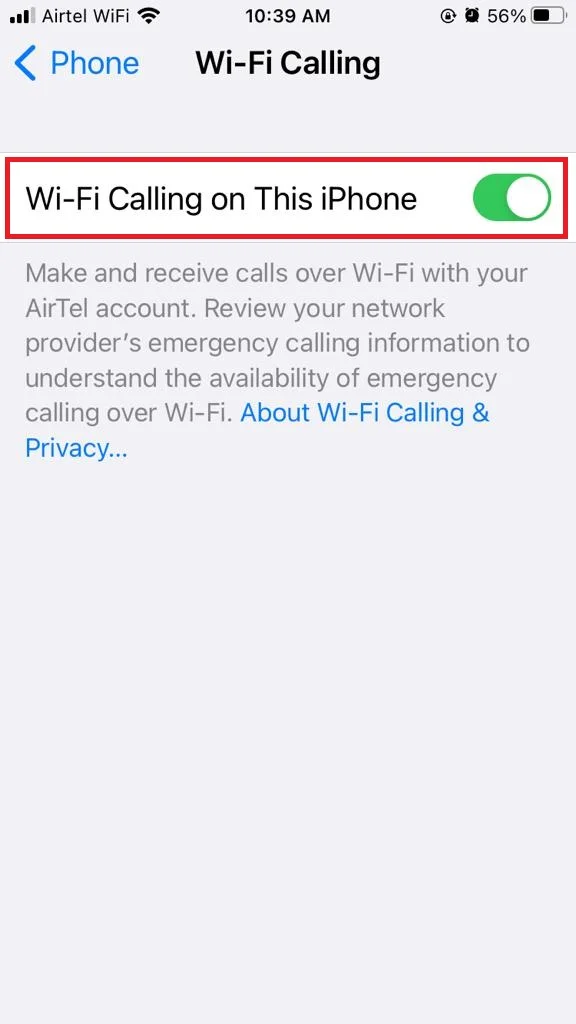
- Here you need to enable the toggle for Wi-Fi Calling on This iPhone.
- Tap on Enable if prompted.
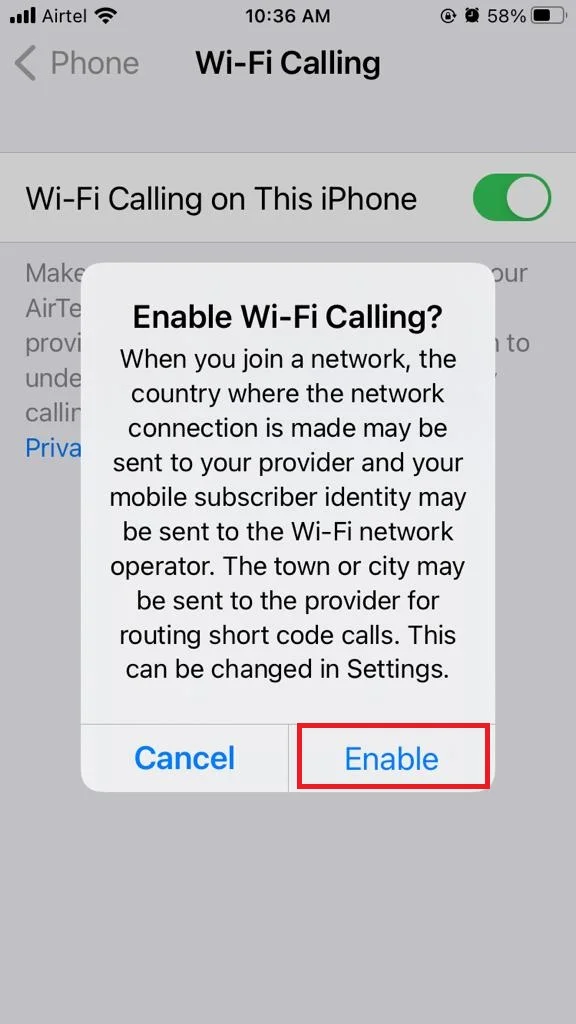
That’s it! You have successfully enabled the Wi-Fi calling feature on your iPhone. Connect your iPhone to a Wi-Fi network and start making calls. Once you have enabled Wi-Fi calling, you can connect to any Wi-Fi network and make calls as usual. You will see “Wi-Fi” next to your carrier’s name in the status bar when Wi-Fi calling is active.
Now you can enjoy the benefits of making calls over Wi-Fi, such as better call quality, lower costs, and wider coverage.
How to Turn Off Wi-Fi Calling on Your iPhone
You can easily disable it by just turning off the toggle for Wi-Fi calling.
- Tap on the Settings app.
- Tap on Phone.
- Now tap on Wi-Fi Calling.
- Disable the toggle for Wi-Fi Calling on This iPhone.
Conclusion
Wi-Fi calling feature is a great feature that lets you make and receive calls over a Wi-Fi network, even when your cellular signal is weak or unavailable. It can save you money on your phone bill, improve your call quality. It also help you stay connected with your friends and family. To enable Wi-Fi calling feature on your iPhone, you just need to turn on the feature Wi-Fi Calling on This iPhone. Remember, you need to be connected to a Wi-Fi network that supports this feature. Your carrier and plan must also support it.
Must Read

5 thoughts on “How to Enable Wi-Fi Calling Feature on Your iPhone?”
Comments are closed.