If you’re like me, you probably have a lot of windows open on your computer at any given time. Maybe you’re working on a project, browsing the web, checking your email, listening to music, and so on. But sometimes, having too many windows can be overwhelming and distracting. That’s where Virtual Desktop comes in handy. In this blog post, we will see, what is virtual desktop on Windows 11 and how to use it.
What is Virtual Desktop on Windows 11?
Virtual Desktop is a feature on Windows 11 that lets you create multiple desktops on your PC. Each desktop can have its own set of windows, apps, and wallpapers. You can switch between them easily with a keyboard shortcut or a swipe gesture. This way, you can organize your tasks and activities into different spaces and focus on one thing at a time.
For example, you can have one desktop for work, where you have your documents, spreadsheets, and presentations open. You can have another desktop for entertainment, where you have your games, videos, and social media apps open. You can have another desktop for personal stuff, where you have your photos, messages, and calendar open. And so on.
How to Use Virtual Desktop on Windows 11 PC?
It is very simple to use Virtual Desktop on Windows 11. Let’s see how to use it.
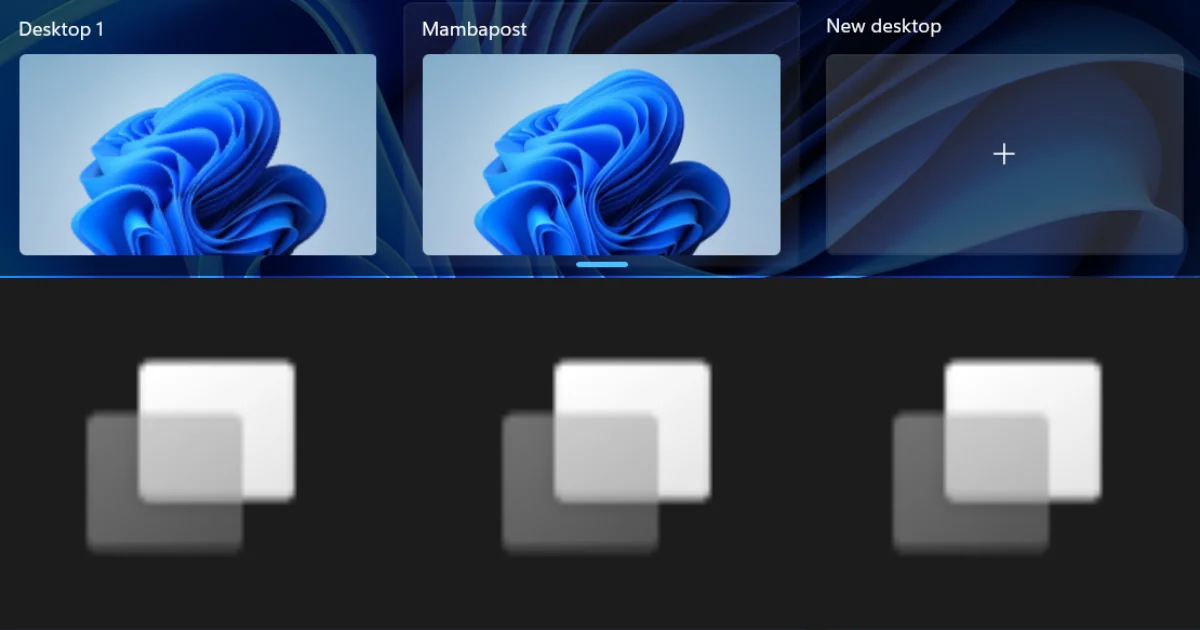
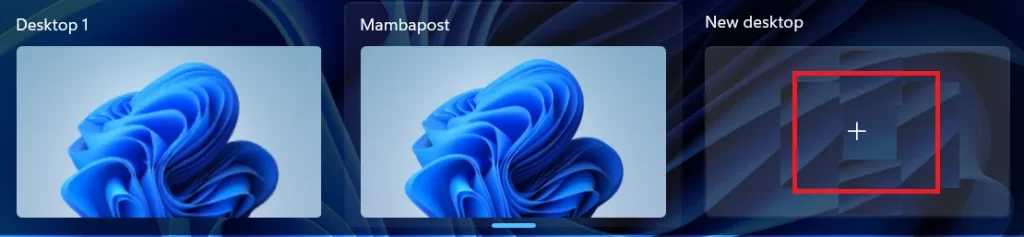
- To create a new desktop, click on the Task View button on the taskbar (or press Windows + Tab). You will see a preview of all your open windows and apps. Here you’ll see a plus sign with the label “New desktop”. Click on it to create a new desktop.
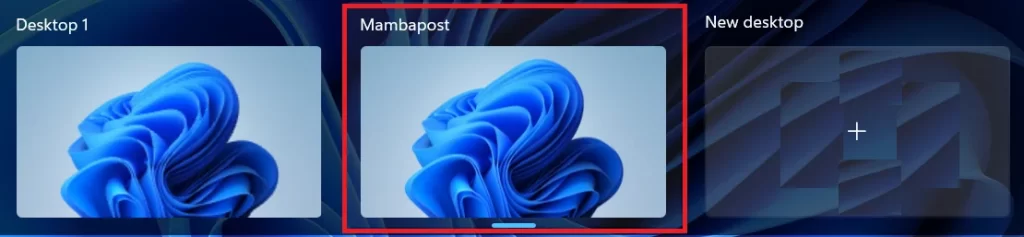
- To switch between desktops, click on the Task View button again (or press Windows + Tab). You’ll see a row of thumbnails representing your desktops. Click on the one you want to switch to.
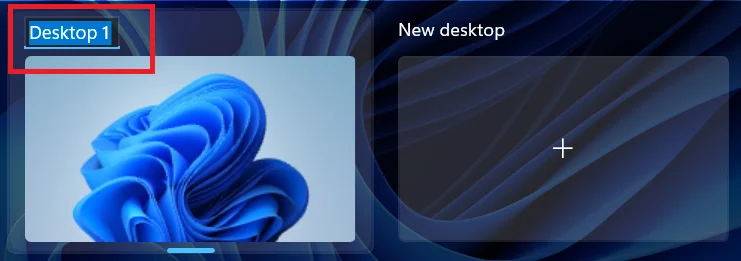
- To rename a desktop, click on the Task View button again (or press Windows + Tab). Right-click on the thumbnail of the desktop you want to rename and select “Rename”. Type in a new name and press Enter.
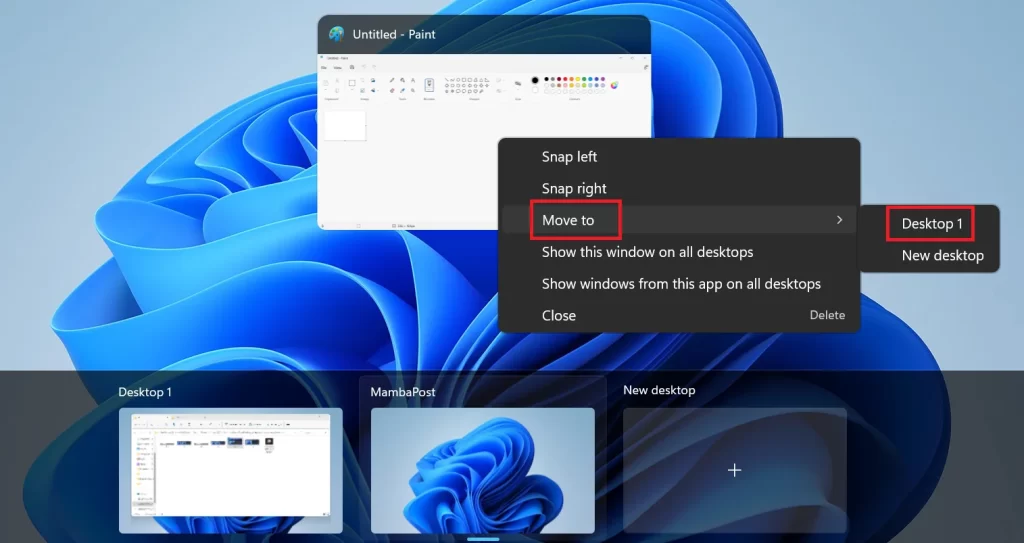
- To move a window from one desktop to another, click on the Task View button again (or press Windows + Tab). Drag and drop the window you want to move onto the thumbnail of the destination desktop. You can also right-click on the window and select “Move to” and choose the desktop you want to move it to.
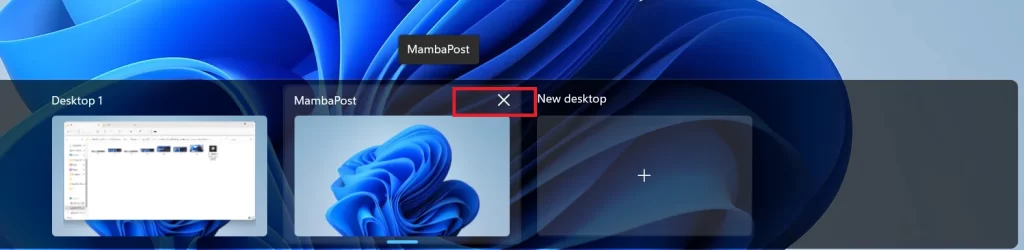
- To close a desktop, click on the Task View button again (or press Windows + Tab). Hover over the thumbnail of the desktop you want to close and click on the X icon that appears. You can also right-click on the thumbnail and select “Close”. All the windows and apps on that desktop will be moved to the next available desktop.
1.

2.

3.

4.
5.
Now you are able to know how to use Virtual Desktop on Windows 11. It’s a great way to keep your PC organized and productive.
Keyboard Shortcuts for Using Virtual Desktop on Windows 11
- Windows+Tab: It open Task View.
- Windows+Ctrl+D: It is used to create a new Virtual Desktop.
- Windows+Ctrl+Left or Right Arrow: It is used to switch between Virtual Desktops.
- Arrow Keys and Enter: It is used in Task View to select a Virtual Desktop.
- Escape: It is used to close Task View.
- Delete: If Task View is open and you press this key then it will remove the selected desktop.
Conclusion
Virtual Desktops are a great way to organize your work and personal tasks on Windows 11. They let you create multiple desktops with different apps and settings, and switch between them easily. You can use virtual desktops to separate your work projects, your hobbies, your social media, or anything else you want. You can also drag and drop apps from one desktop to another, or right-click on a desktop to rename it or close it. Virtual desktops are a simple and powerful way to boost your productivity and creativity on Windows 11.
Must Read
Install and Use Skype on Windows 11
How to do Screen Recording on Microsoft Windows 11
Please comment and Contact Us for any discrepancies. Follow MambaPost on Facebook, Twitter, and LinkedIn. For the latest Tech News checkout at MambaPost.com.
4 thoughts on “What is Virtual Desktop on Windows 11 and How to Use it?”
Comments are closed.