Do you want to know how fast your network adapter is on your Windows 11 PC? Maybe you are curious about your internet speed or want to troubleshoot some connectivity issues. Whatever the reason, it’s easy and many ways to check your network adapter speed with a few simple steps. In this blog post, we are going to show you the five best ways to check network adapter speed on Windows 11 PC. Let’s see how to check it.
(1) Use the Settings app to Check Network Adapter Speed
It is very easy to check speed by this method. Let’s see how to check it.
- Right-click on the Start button and click on Settings or Press Windows + I to open Settings.
- Click on Network & internet.
- Here you need to click on Properties.
- Here an option Link Speed will show you the Network Adapter speed on your Windows 11 PC.


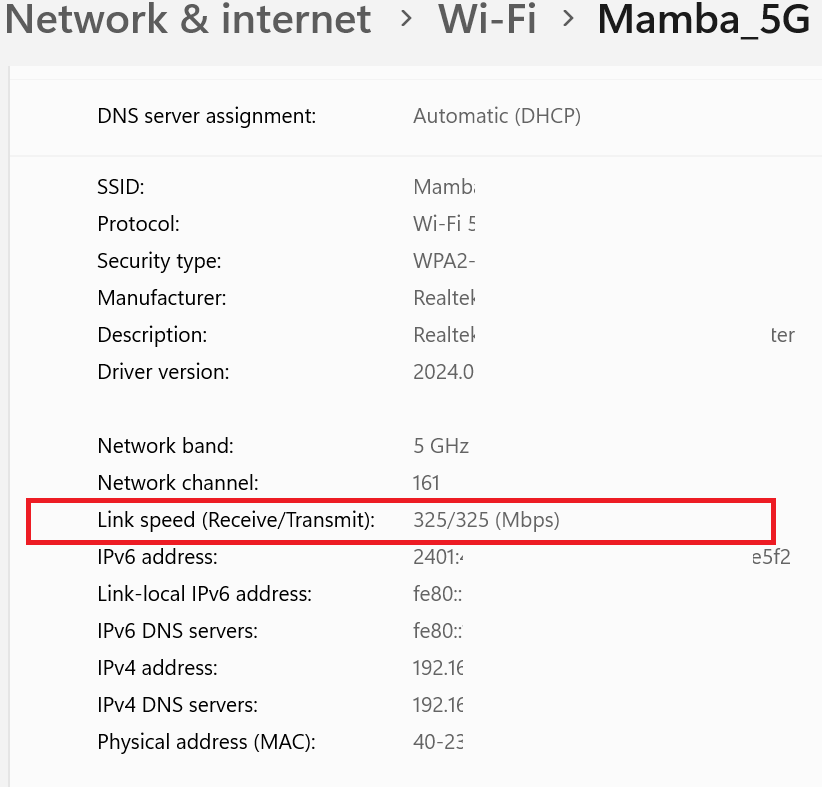
Now using the Settings app, you have successfully checked the network adapter speed of your Windows 11 PC
(2) Use the Control Panel app to Check Network Adapter Speed
It is also very easy to check speed by this method. Let’s see how to check it.
- Open Start Menu by pressing the Windows key.
- Type control panel. Click on the Control Panel app.
- Click on Network and Sharing Center.
- Now click on Change adapter settings.
- Right Click on Wi-Fi connection and click on Status.
- Here Speed will show you your Windows 11 PC network adapter speed.
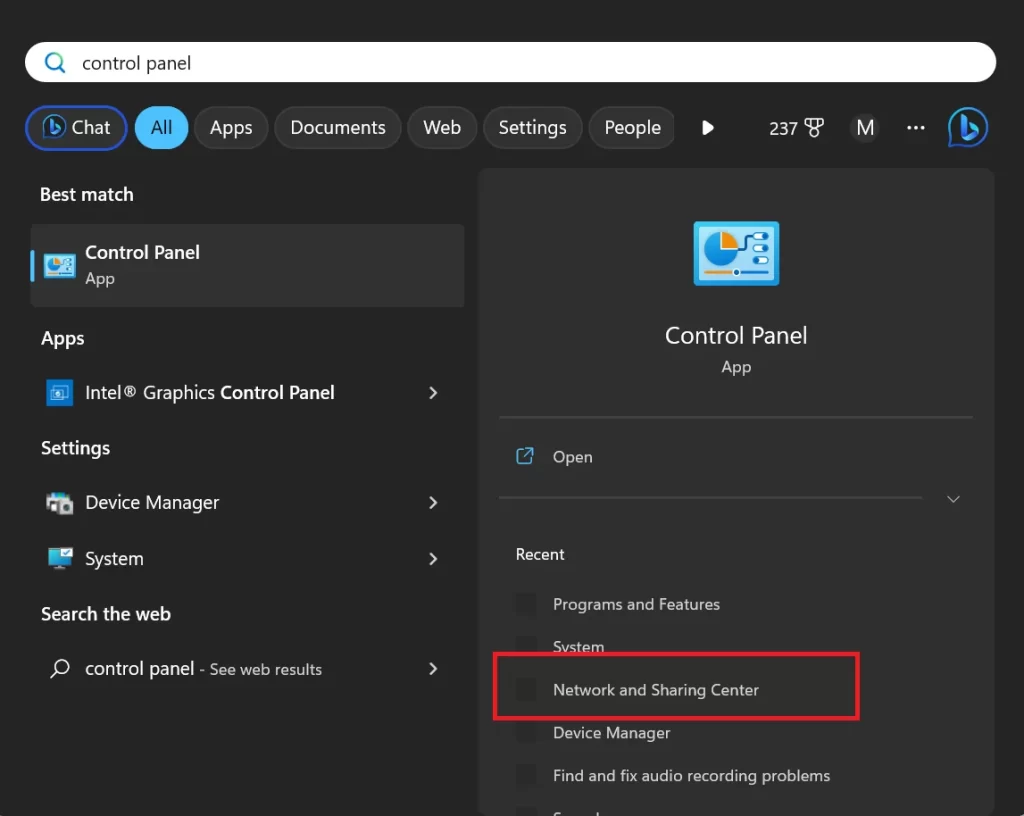
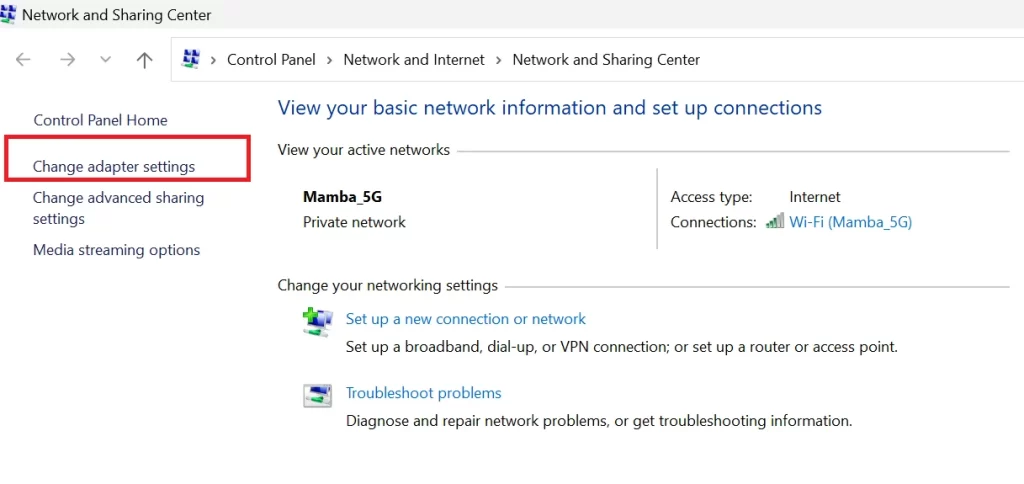


Now using the Control Panel app, you have successfully checked the network adapter speed of your Windows 11 PC
(3) Use the Task Manager to Check Network Adapter Speed
To check the network adapter speed on your Windows 11 PC using Task Manager, you need to follow below steps:
- First, right-click on the taskbar and click on Task Manager.
- Now from the left-hand side menu click on Performance.
- Now here you need to click on Wi-Fi.
- Here it will show you your Windows 11 PC network adapter Send and Receive speeds.


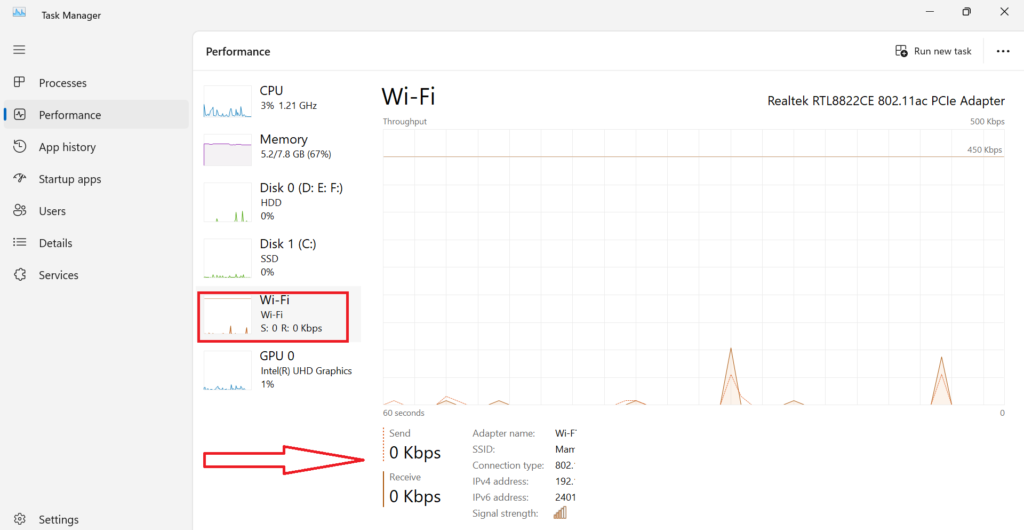
Now using the Task Manager, you have successfully checked the network adapter speed of your Windows 11 PC
(4) Use Command Line Tools
Using command line tools for checking network adapter speed on your Windows 11 PC is very easy. Let’s see how to do this.
- Open Start Menu by pressing the Windows key.
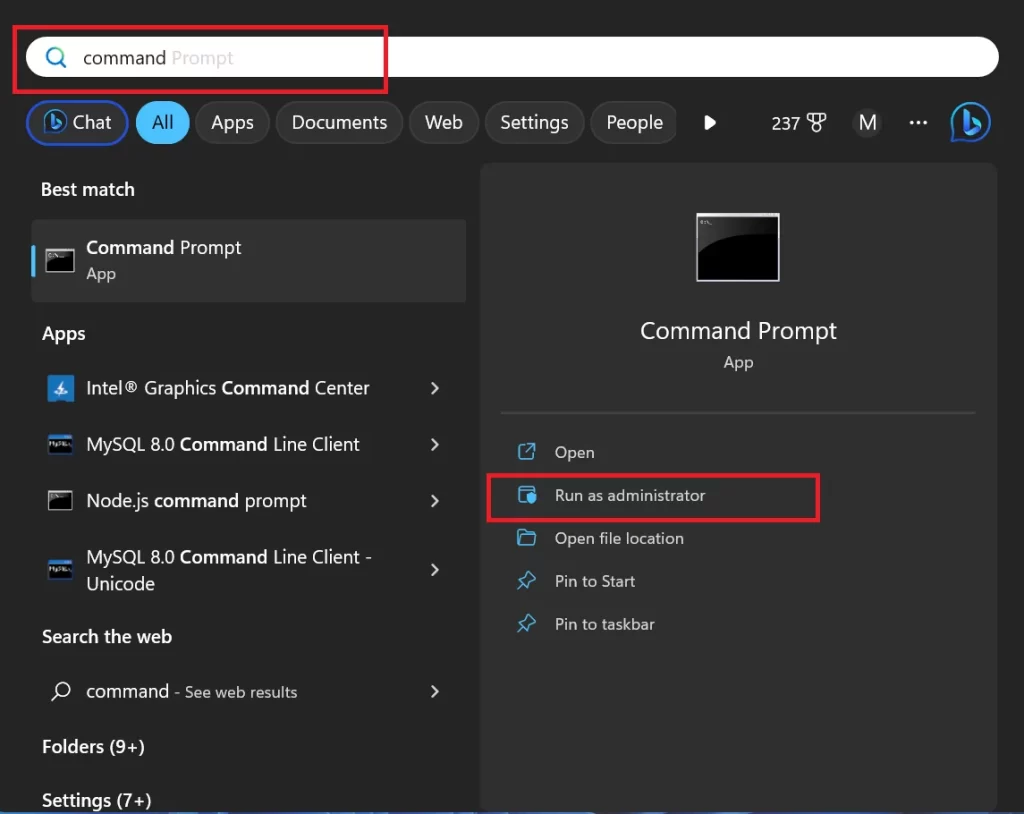
- Type command prompt. Now Click on Run as administrator in the options of the Command Prompt app. Click on Yes if prompted.
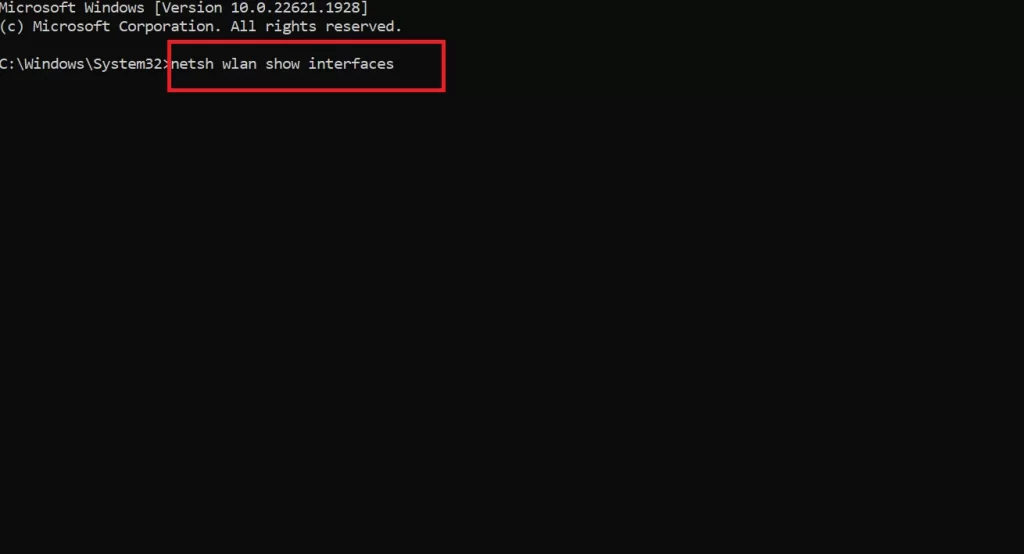
- Now type the command: netsh wlan show interfaces and press Enter.
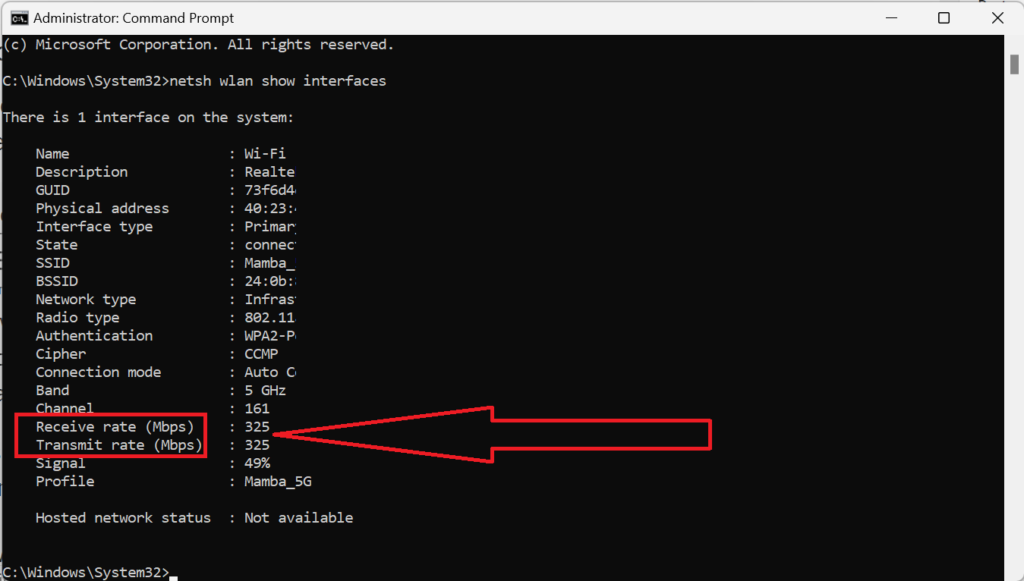
- Receive rate (Mbps) and Transmit rate (Mbps) fields will show you the network adapter speed of your Windows 11 PC.
Now using the command line tool, you have successfully checked the network adapter speed of your Windows 11 PC.
(5) Use Windows PowerShell
Let’s see how to check network adapter speed on your Windows 11 PC using Windows PowerShell.
- Open Start Menu by pressing the Windows key.
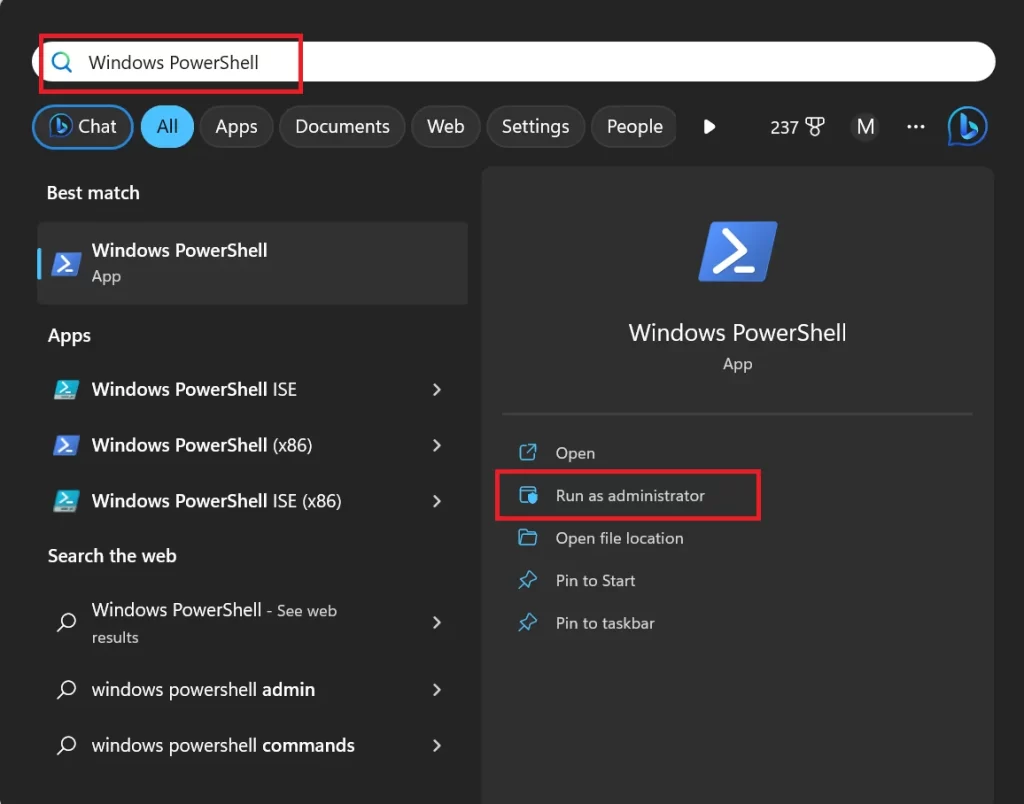
- Type Windows PowerShell. Click on Run as administrator. Press Yes if prompted.
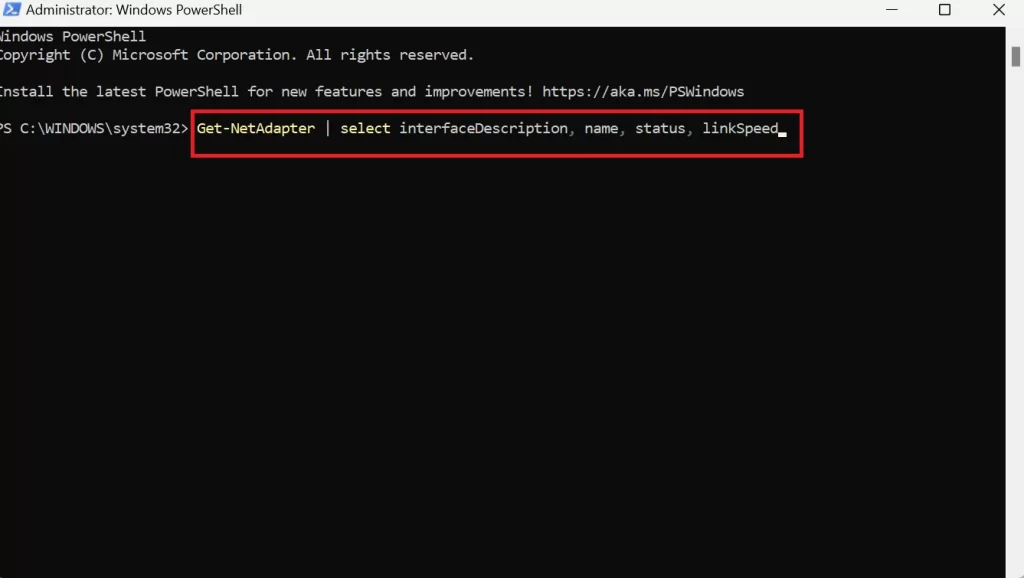
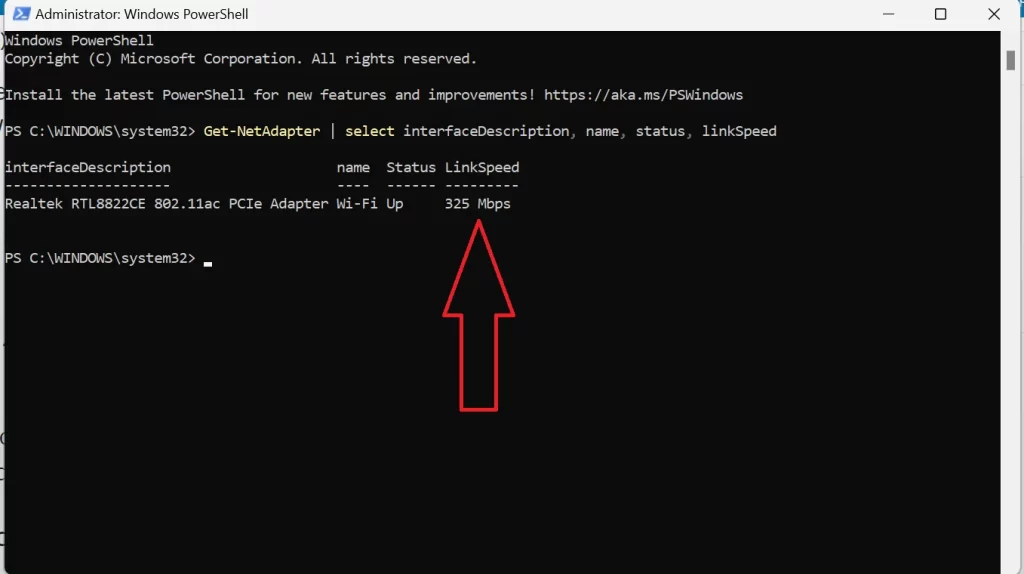
- Now here you have to type the command: Get-NetAdapter | select interfaceDescription, name, status, linkSpeed, and Press Enter.
- Now here you see LinkSpeed (in the LinkSpeed column) for both the Ethernet and Wi-Fi adapter of your Windows 11 PC.
Now using the Windows PowerShell, you have successfully checked the network adapter speed of your Windows 11 PC.
Conclusion
Checking the network adapter speed on your Windows 11 PC is a simple and useful task that can help you troubleshoot network issues, optimize your internet connection, and compare different devices. There are several methods to do this, such as using the Settings app, the Task Manager, the Control Panel, or the Command Prompt. You can choose the one that suits your needs and preferences. By knowing your network adapter speed, you can enjoy a better online experience on your Windows 11 PC.
Must Read:
What is Virtual Desktop on Windows 11 PC and How to use it?
How to Use and Install Skype on Windows 11 PC?
Please comment and Contact Us for any discrepancies. Follow MambaPost on Facebook, Twitter, and LinkedIn. For the latest Tech News checkout at MambaPost.com.

2 thoughts on “How to Check Network Adapter Speed on Windows 11 PC?”
Comments are closed.