
The night light feature by Microsoft is designed to minimize the strain on the eyes of users by adjusting the screen temperature (uses a warm color to block blue light emission from laptop or PC) during low light. But sometimes the night light not working on Windows 11 PC or laptops. If you are not able to turn on (or the option being greyed) the night light in Windows 11, here in this blog post we will tell you, how to resolve, the night light not working problem, in Windows 11 PC or laptop.
How to Fix Night Light Not Working on Windows 11 PC
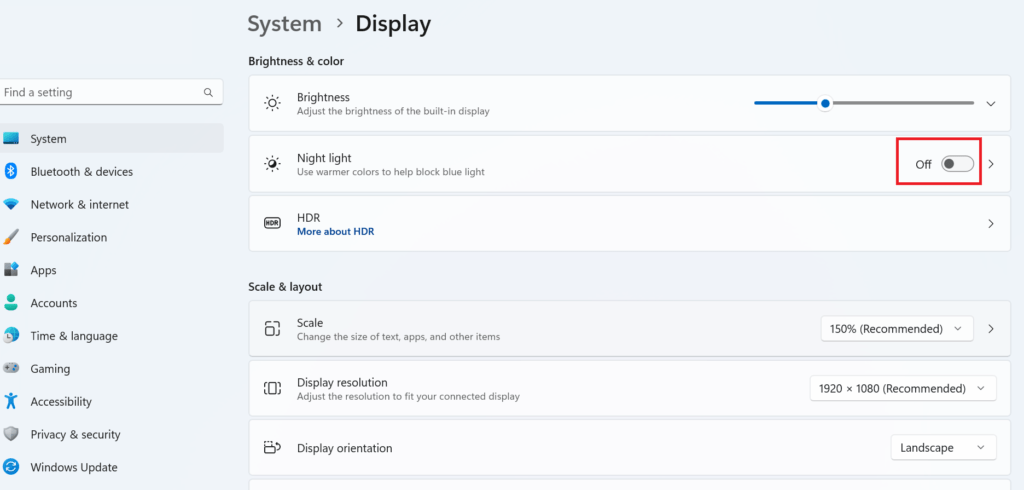
(1) Schedule Night Light
In Windows 11, there’s a cool feature called Night Light that helps your eyes feel more comfortable when you’re using your computer at night. It’s like having a special light that’s easier on your eyes. With the Night Light schedule, you can make it turn on and off automatically at the times you like best. This means you don’t have to remember to turn it on or off yourself. You can set it up to switch from the regular bright screen to a warmer, softer screen automatically. Here’s how you can make your own Night Light schedule in Windows 11 and fix the night light not working issue on the Windows 11 PC.
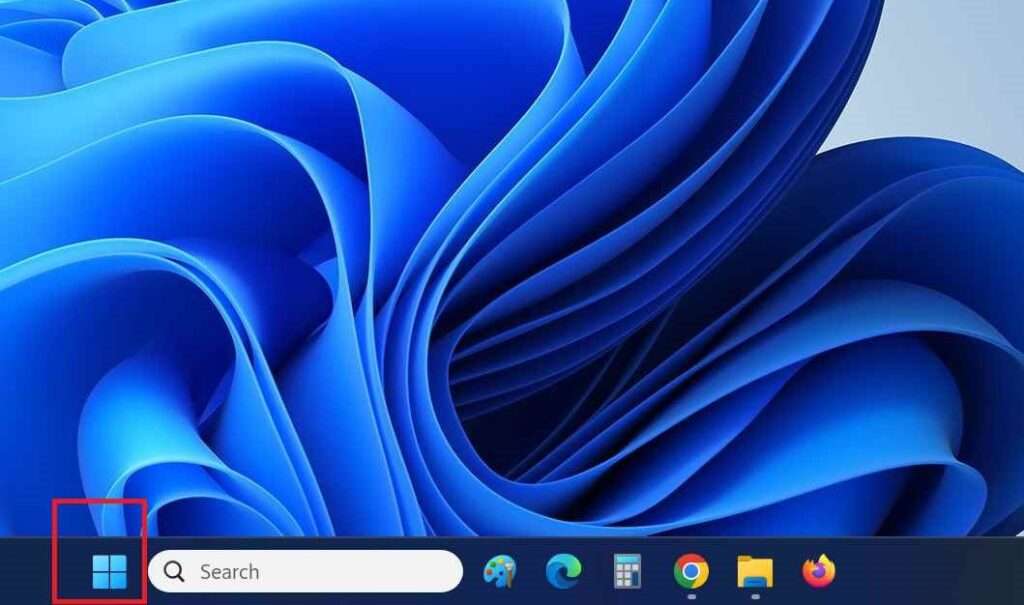
- Click on the Windows Start icon.
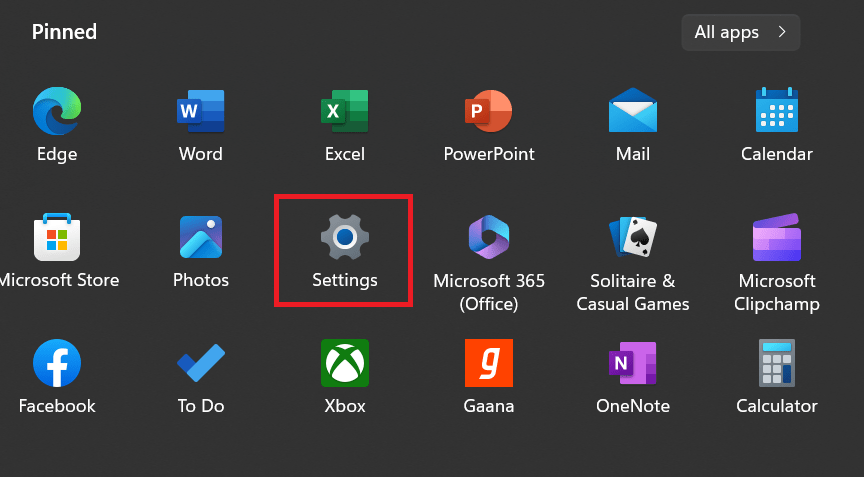
- Then, Settings.
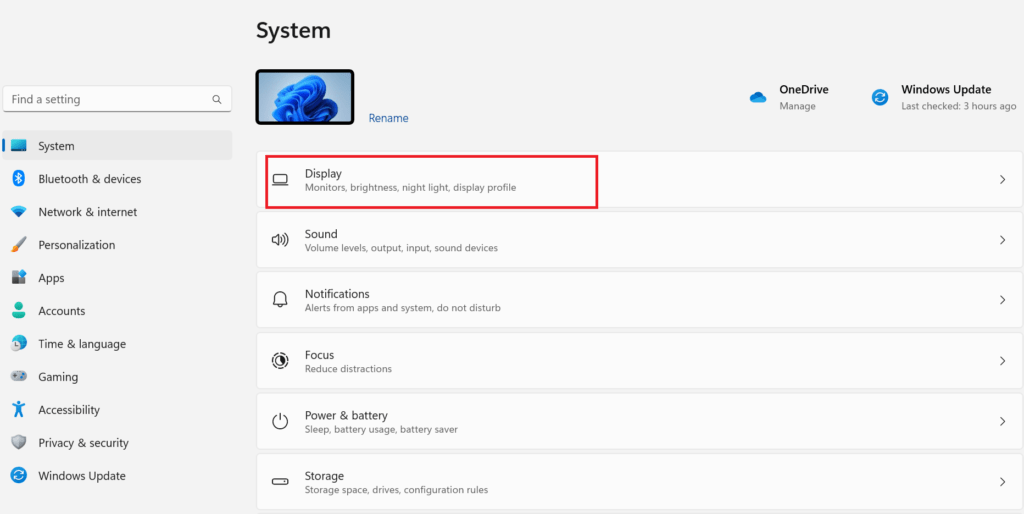
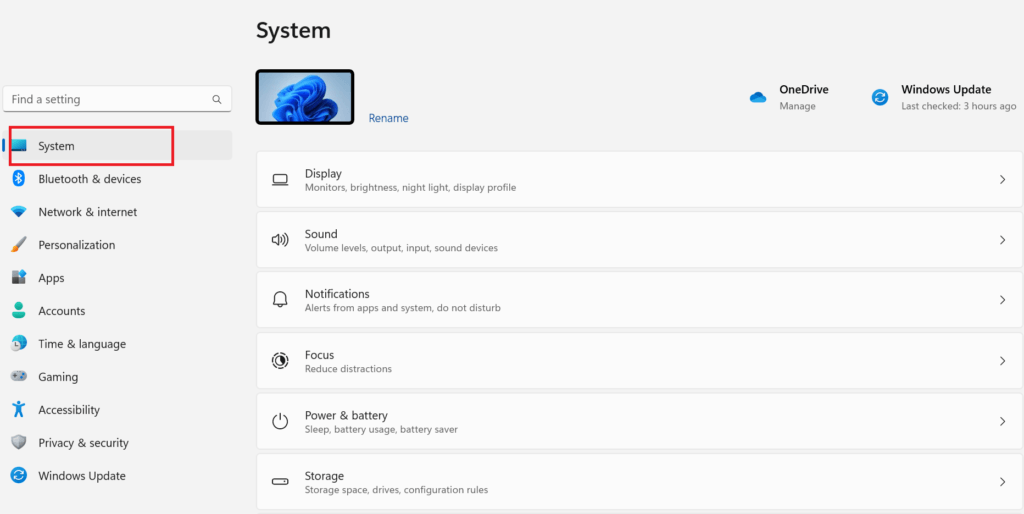
- Tap on System.
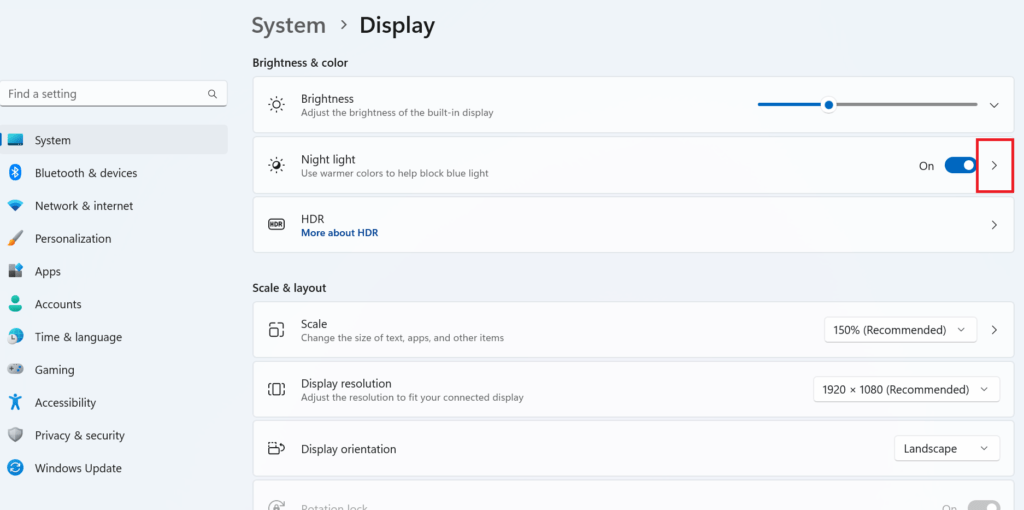
- Then, Display.
- Then, Night light.
- Turn on Toggle next to it.
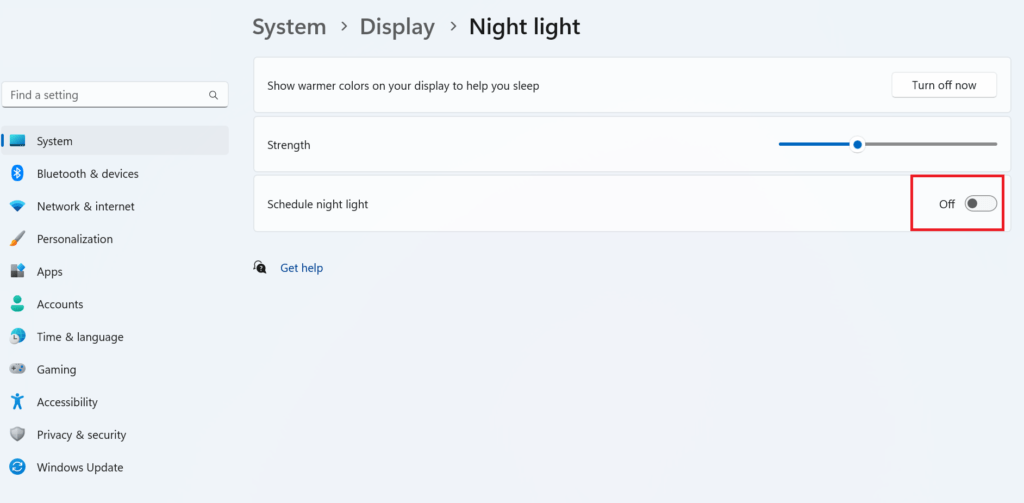
- Click on the Night light (next to the toggle button) to access its settings.
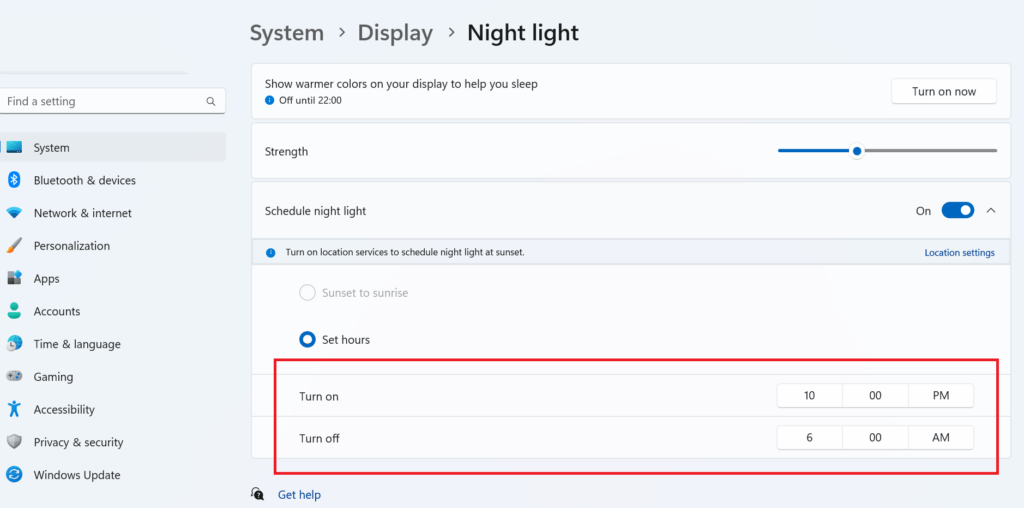
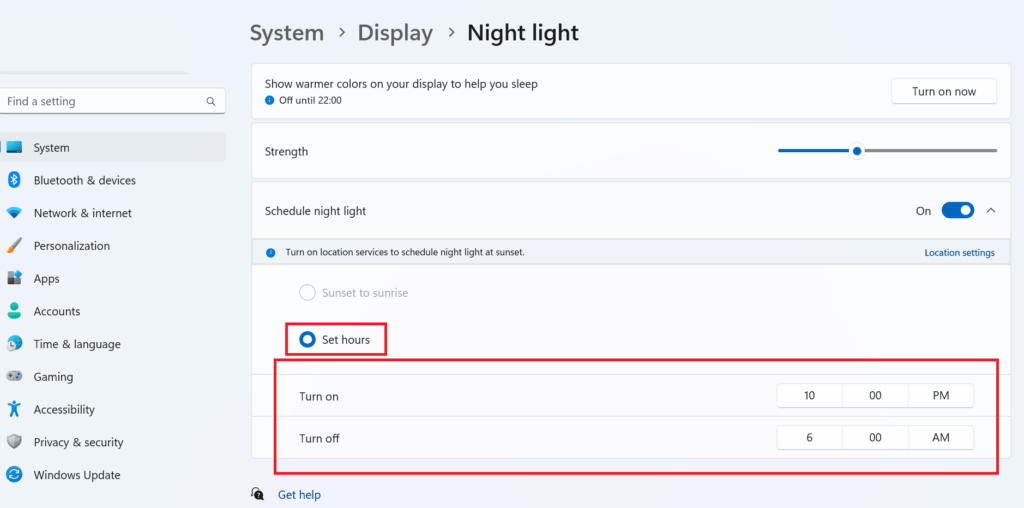
- Turn on the toggle of the Schedule night light.
- In the Set hours radio button, set Turn on time and Turn off time.


(2) Check the Intensity of Night Light
Sometimes, the warmth setting might be too low, which makes it seem like the Night Light feature isn’t working. To fix the night light not working issue on the Windows 11 PC, it’s a good idea to change the intensity of the Night Light in Windows 11.
- Click on the Windows Start icon.
- Then, Settings.
- Tap on System.
- Then, Display.
- Click on the Night light (next to the toggle button) to access its settings.
- Turn on the toggle for Schedule Night Light.
- Set Turn on and Turn off time.
- Now on the same page move up and you will see a slider labeled Strength. Move right or left as per your requirement (intensity of night light)


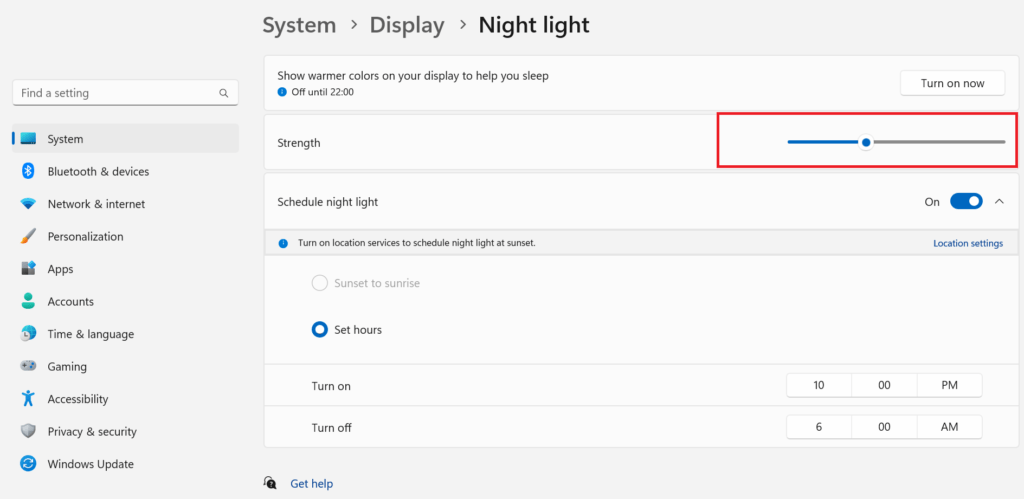
After this change in the intensity of the night light according to your preference, you see that you fixed the night light not working issue on the Windows 11 PC.
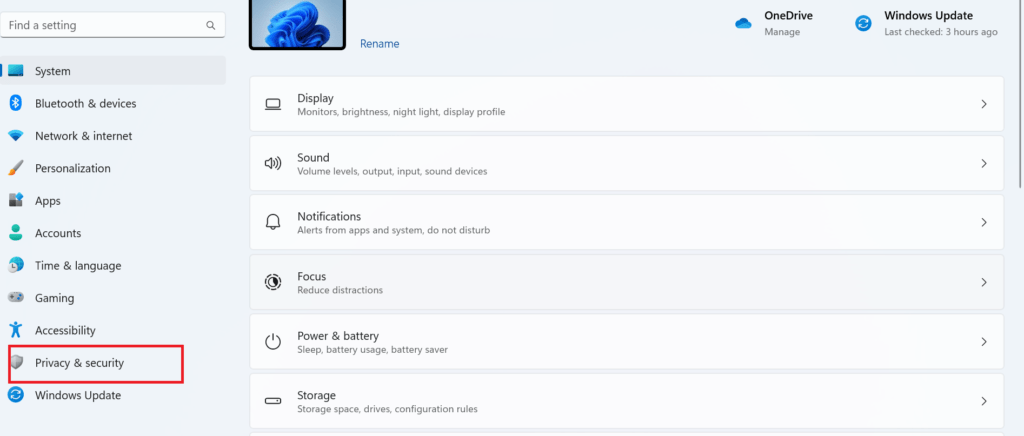
(3) Turn on Your Location Services
Enable the location service of your system to fix the night light not working on Windows 11 PC.
- Click on the Windows Start icon.
- Then, Settings.
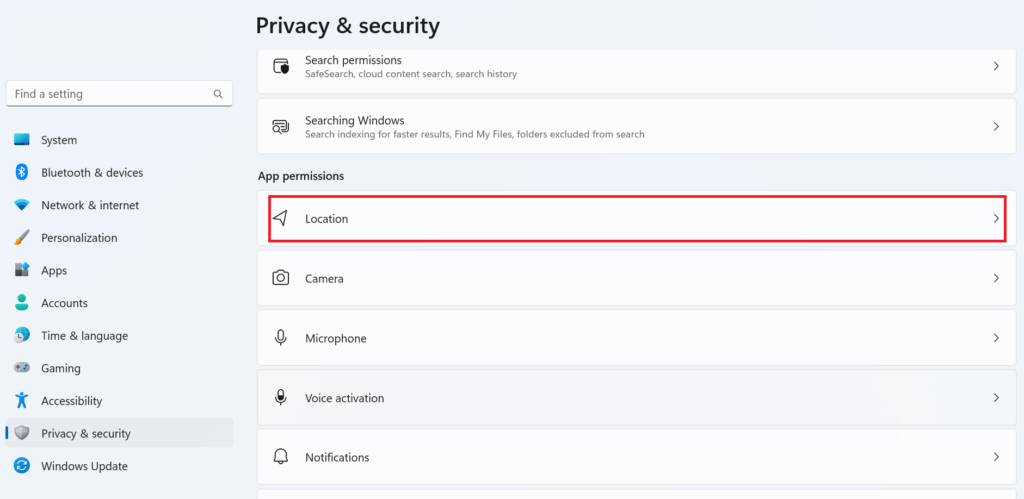
- Click on Privacy & security.
- Click on Location.
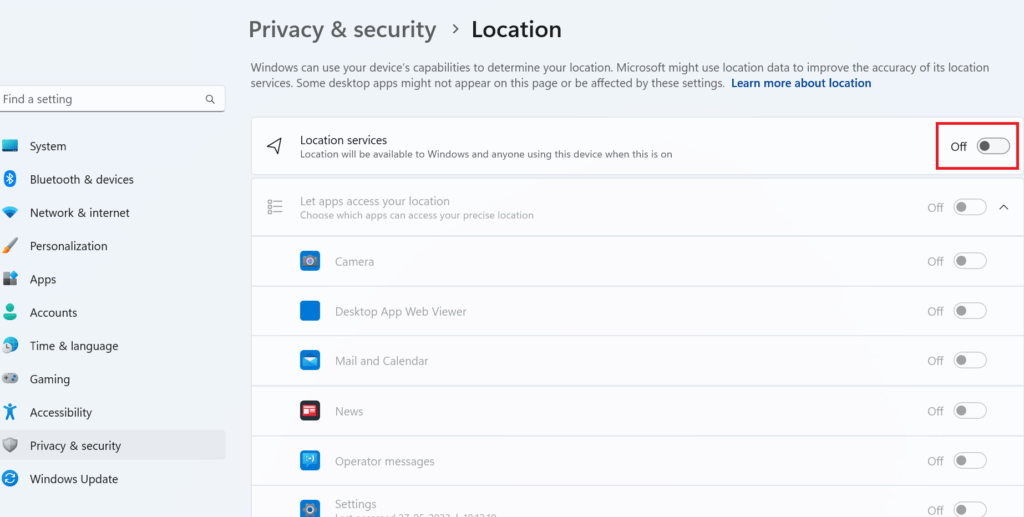
- Turn on the toggle for Location and Let apps access your location.


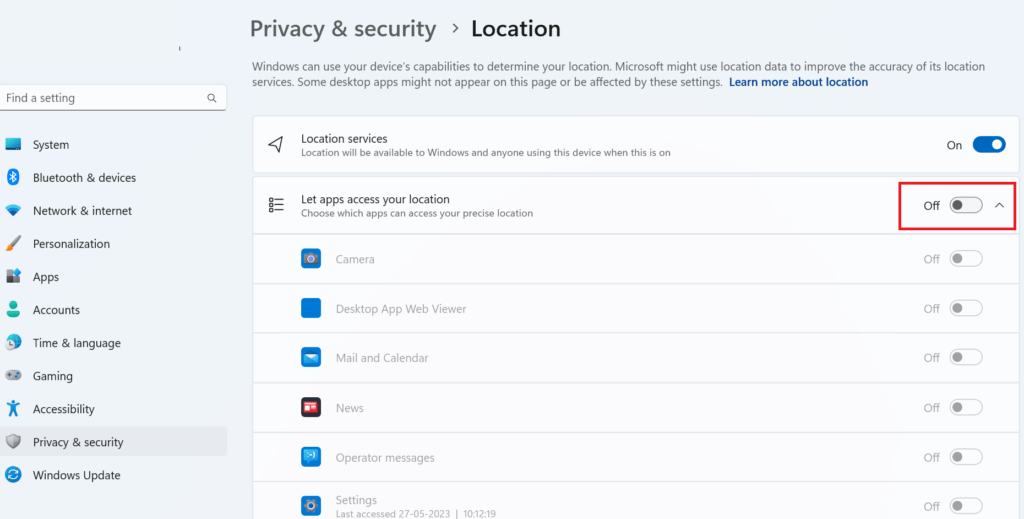
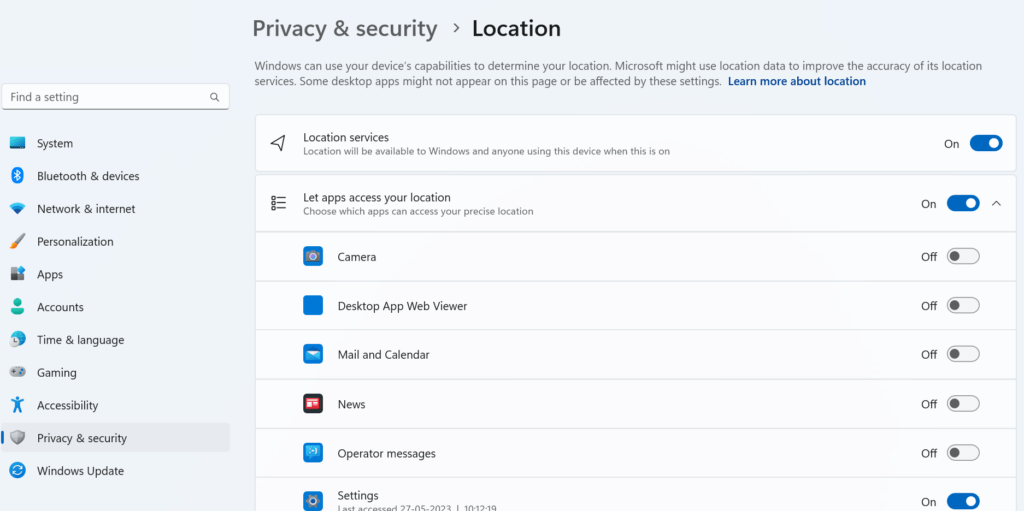
Now restart your PC, try to enable the night light feature, and check the night light not working issue on the Windows 11 PC is fixed or not.
(4) Configure the Display Settings
If the display settings aren’t just right, the night light might not work at all. That’s why it’s important to adjust the display settings to match what you like and need.
- Click on the Windows Start icon.
- Then, Settings.
- Tap on System.
- Then, Display.


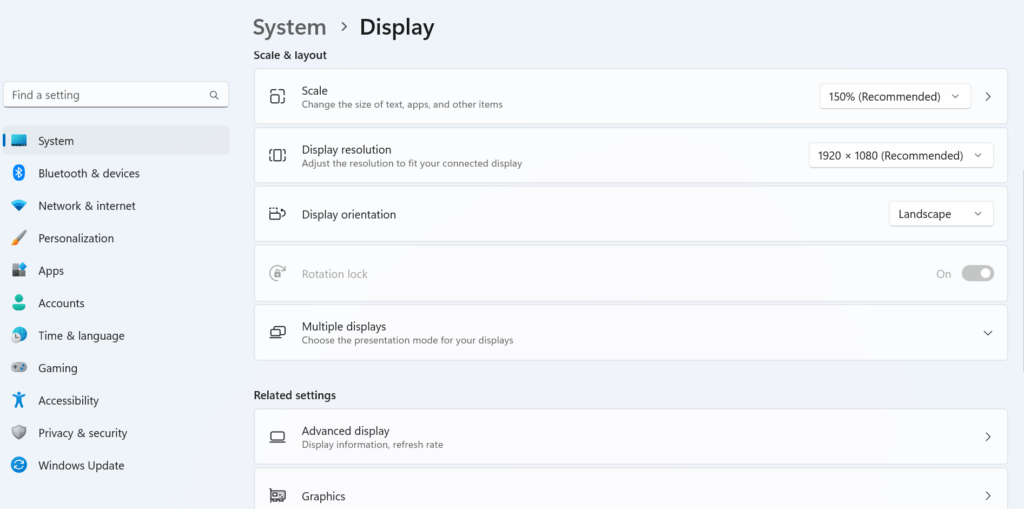
If you look on the right side of your screen, you’ll see different options for how your display looks. When you change these settings, Windows 11 shows you what it looks like right away, so you can see if you like it before you make it permanent. And when you adjust things like brightness and color, the night light feature will work correctly, making your screen easier on your eyes when it’s dark outside.
(5) Modify current date and time settings on your Windows PC
If your Windows 11 PC, date, and time settings are set incorrectly, might you face the problem of the night light not working. Let’s see how to do it.
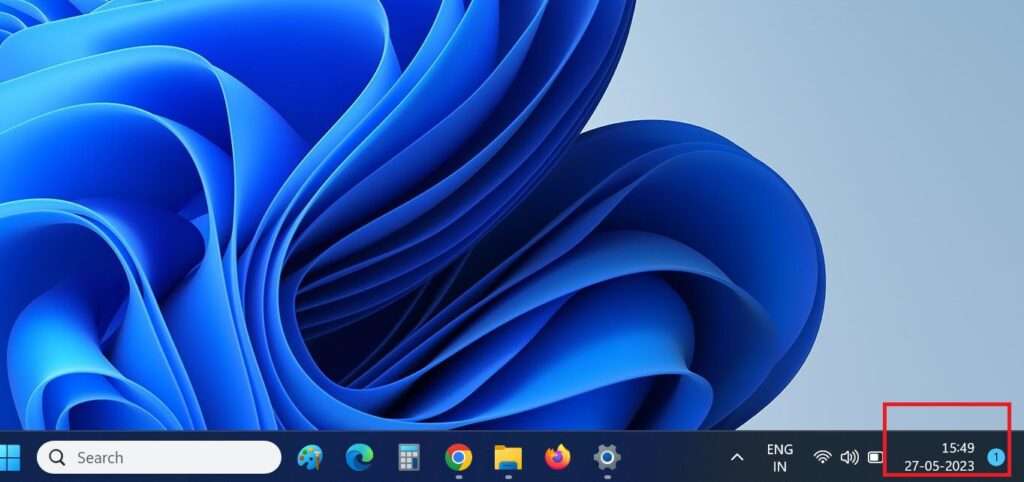
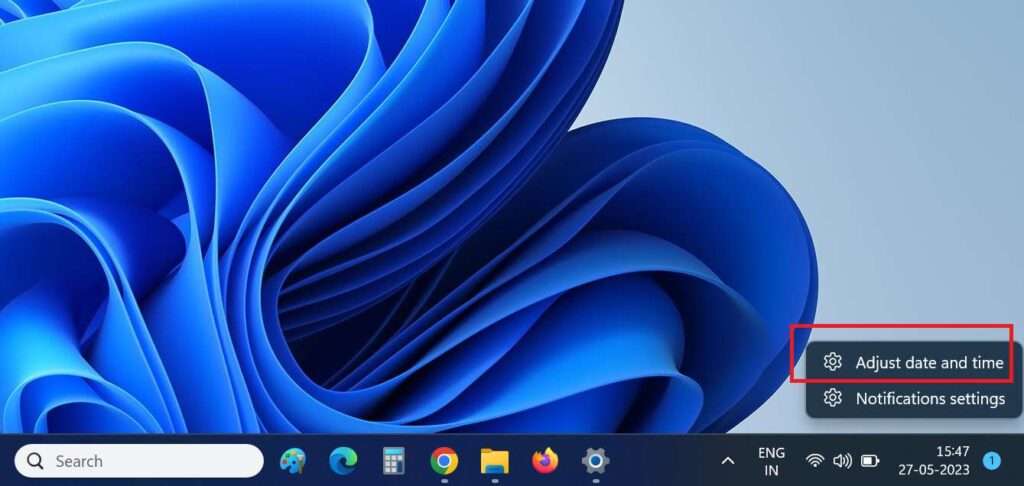
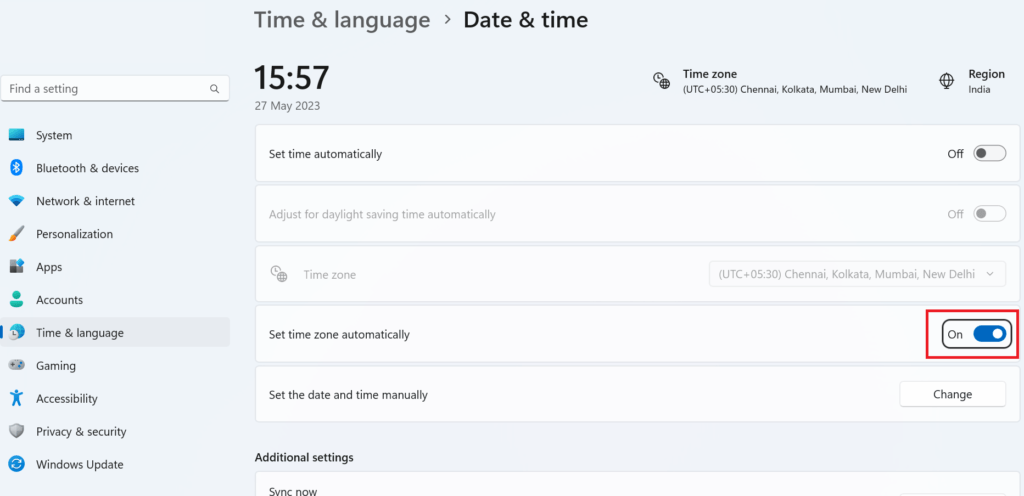
- Right-click on the Time and Date (present at the right corner of the taskbar) and click on Adjust date and time.
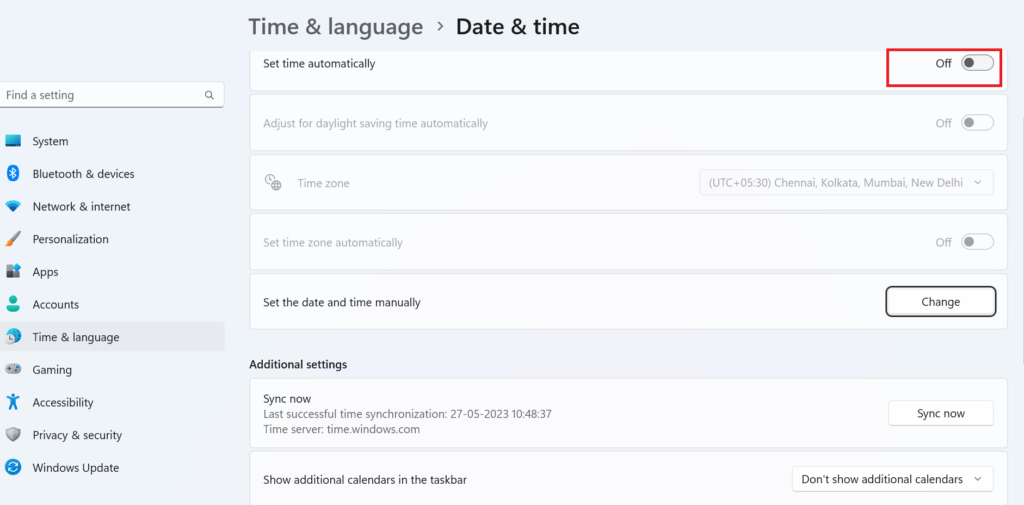
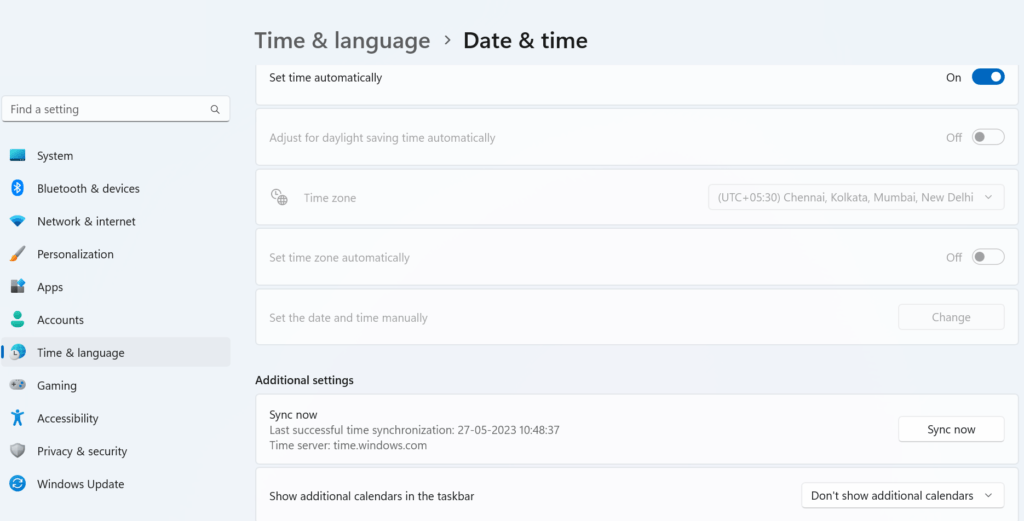
- Turn on the toggle for Set time automatically (if it is disabled). Make sure the date and time are set correctly for your time zone, if not, turn off the toggle for the Set Time automatically and turn on the toggle for the Set time zone automatically.
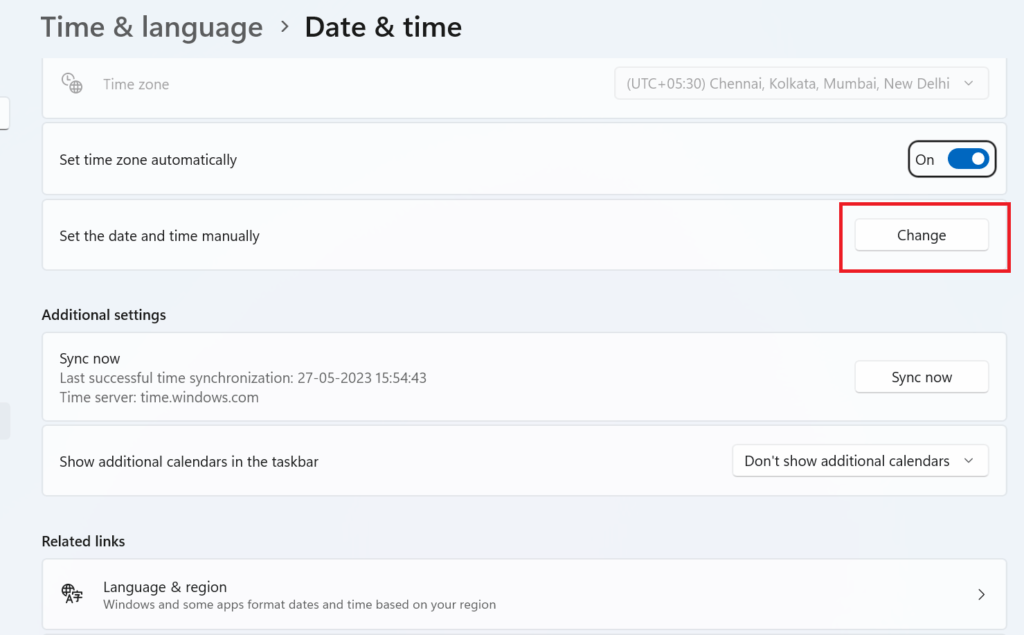
- Click on the Change.
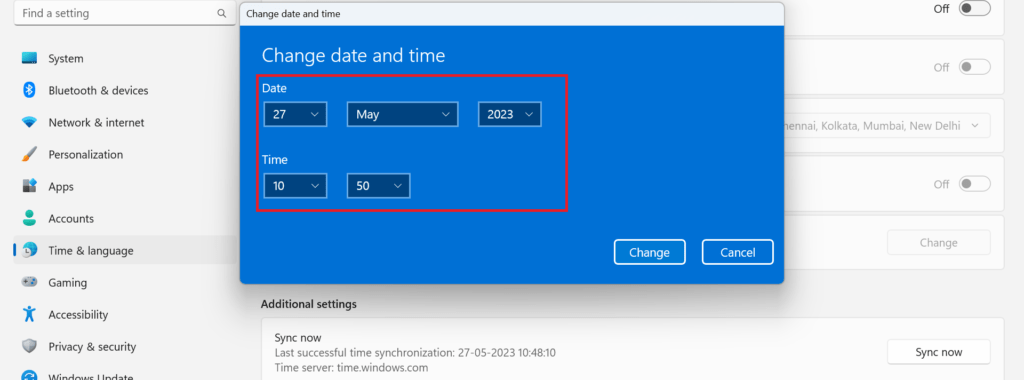
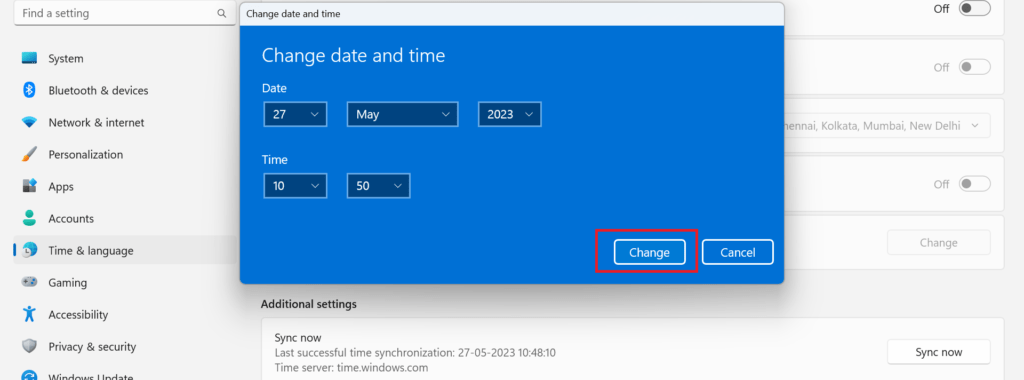
- Manually enter the correct date and time on the Pop-up window., and click on the Change.
- Restart your PC and hope you are able to fix your problem of the night light not working on the Windows 11 PC.
(6) Update or re-install the Display drivers
Sometimes the Night light not working due to the display driver. Might be it malfunctioned or outdated. Let’s see how to fix it.
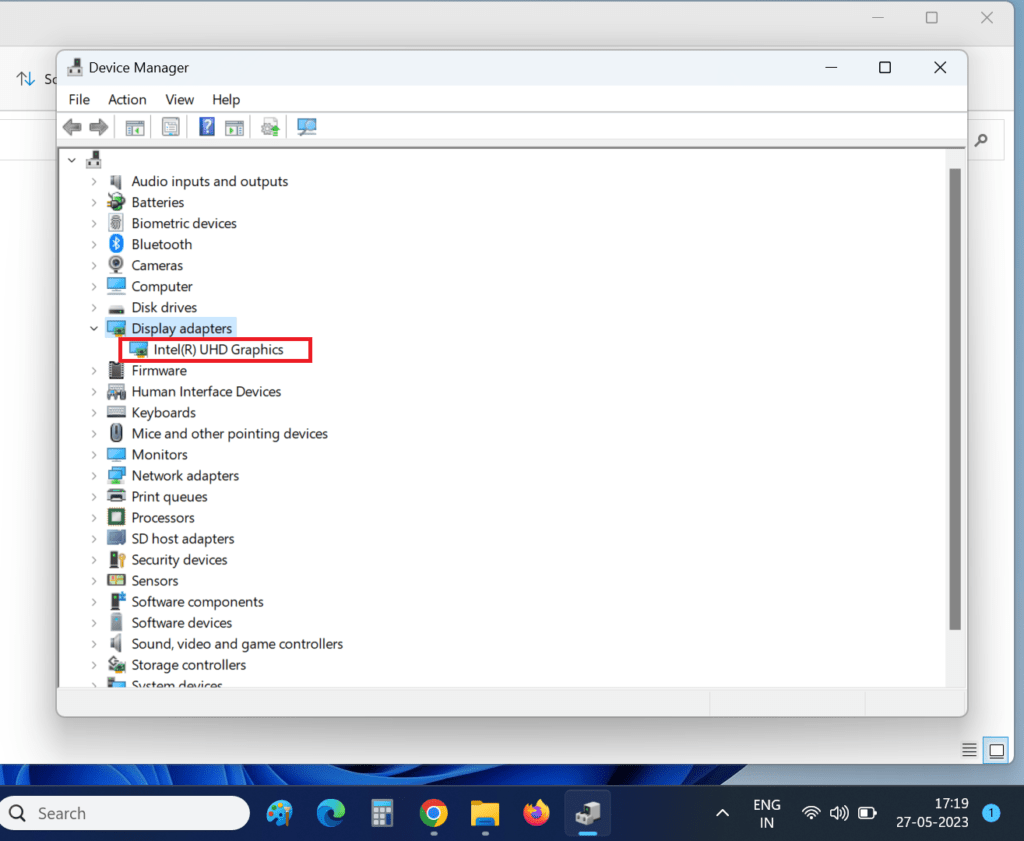
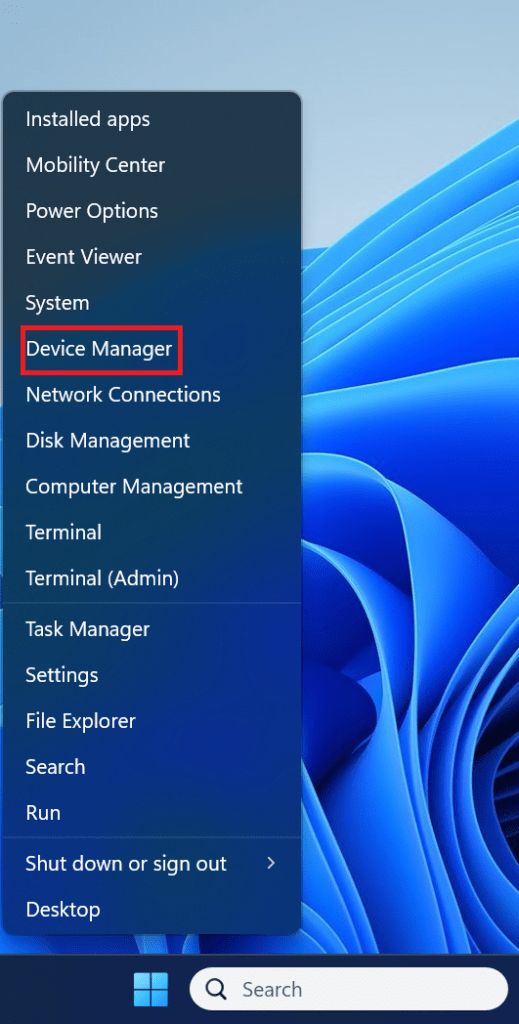
- Right-click the Windows Start icon and click on the Device Manager.
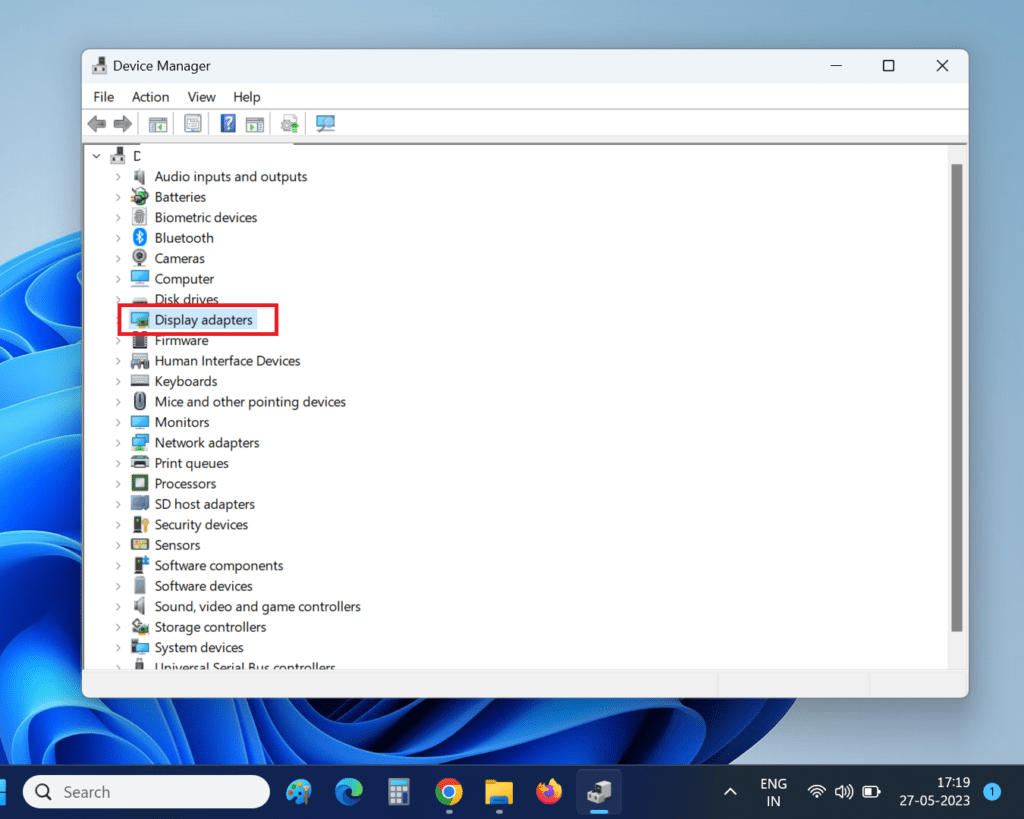
- Search and double-click the Display adapter.
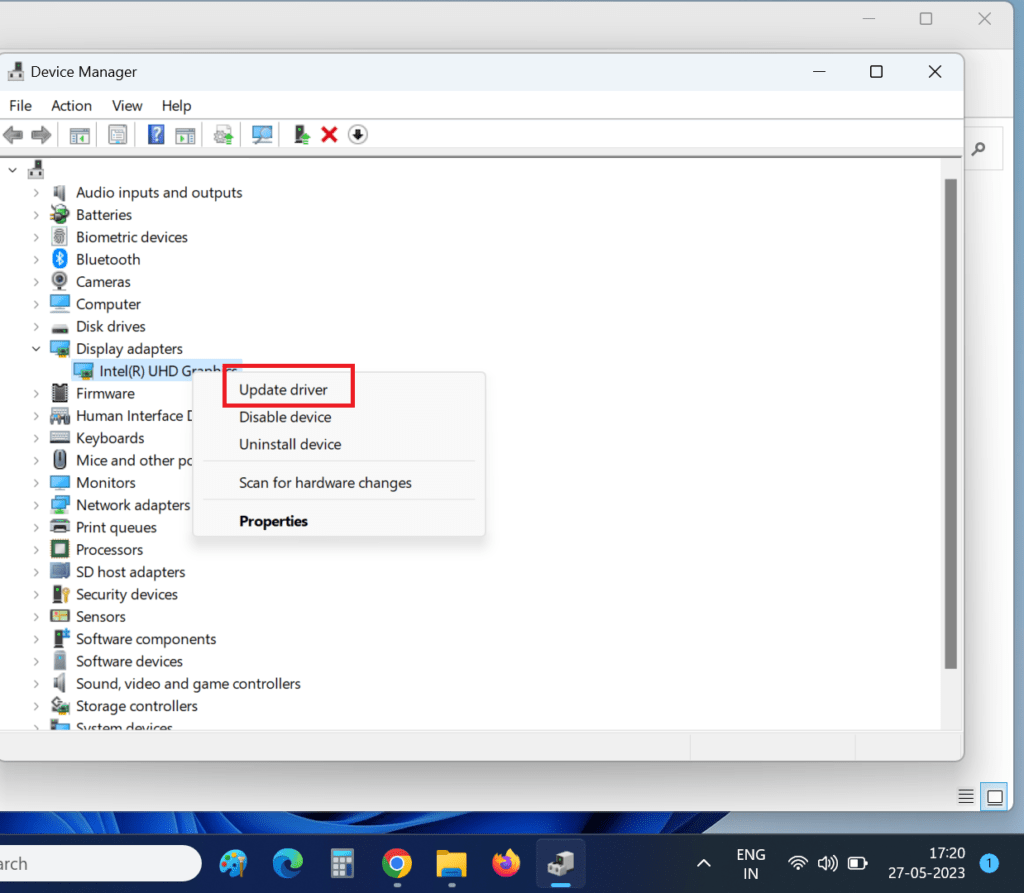
- You have to right-click on the display driver and click again on the Update driver.
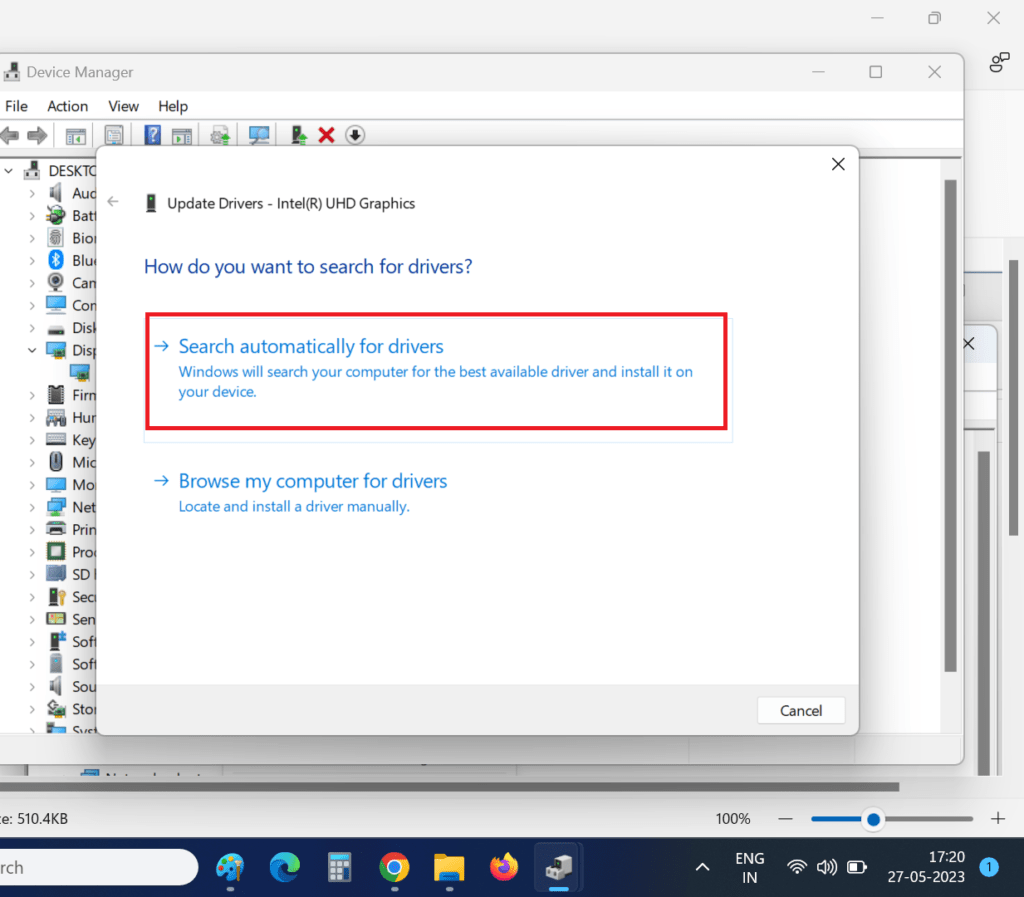
- Now click on Search automatically for drivers option.
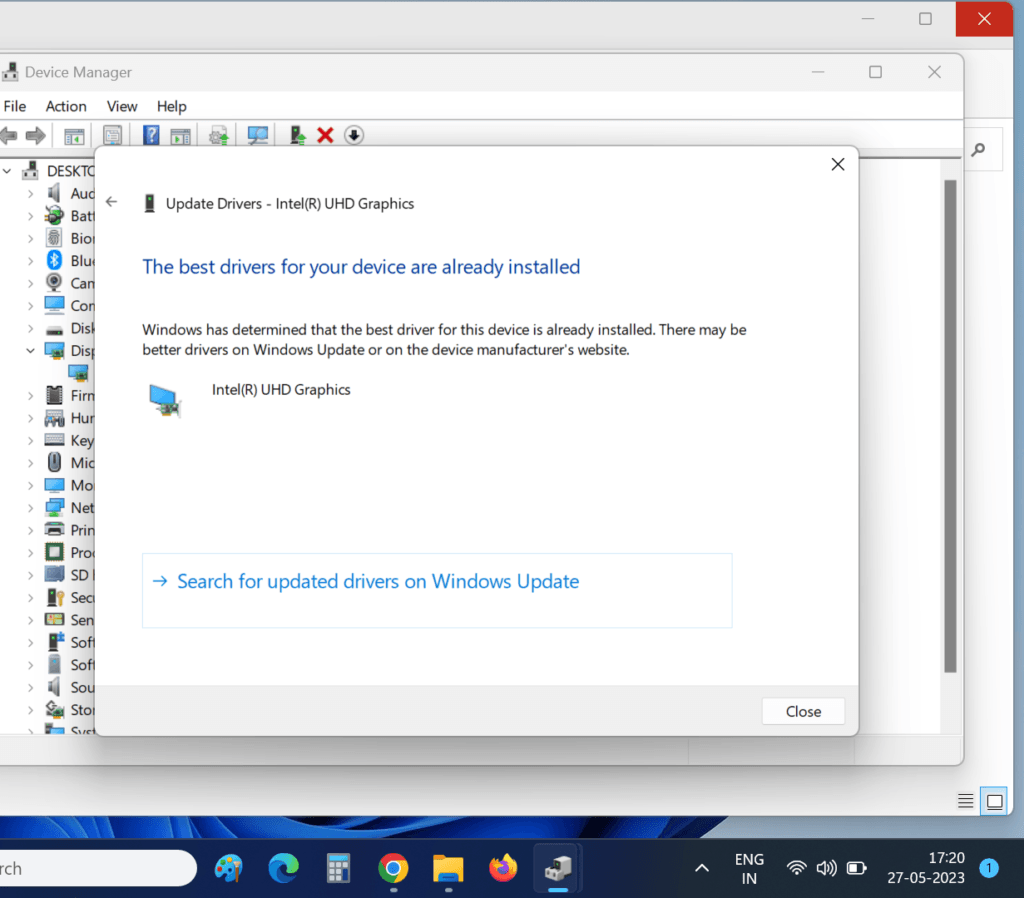
- Now Windows will install the best available driver for your PC. Restart your PC once done. Now see whether the problem of the Night Light not working is resolved or not. If not, re-install your display driver. For this:
- Right-click the Windows Start icon and click on the Device Manager.
- Search and double-click the Display adapter.
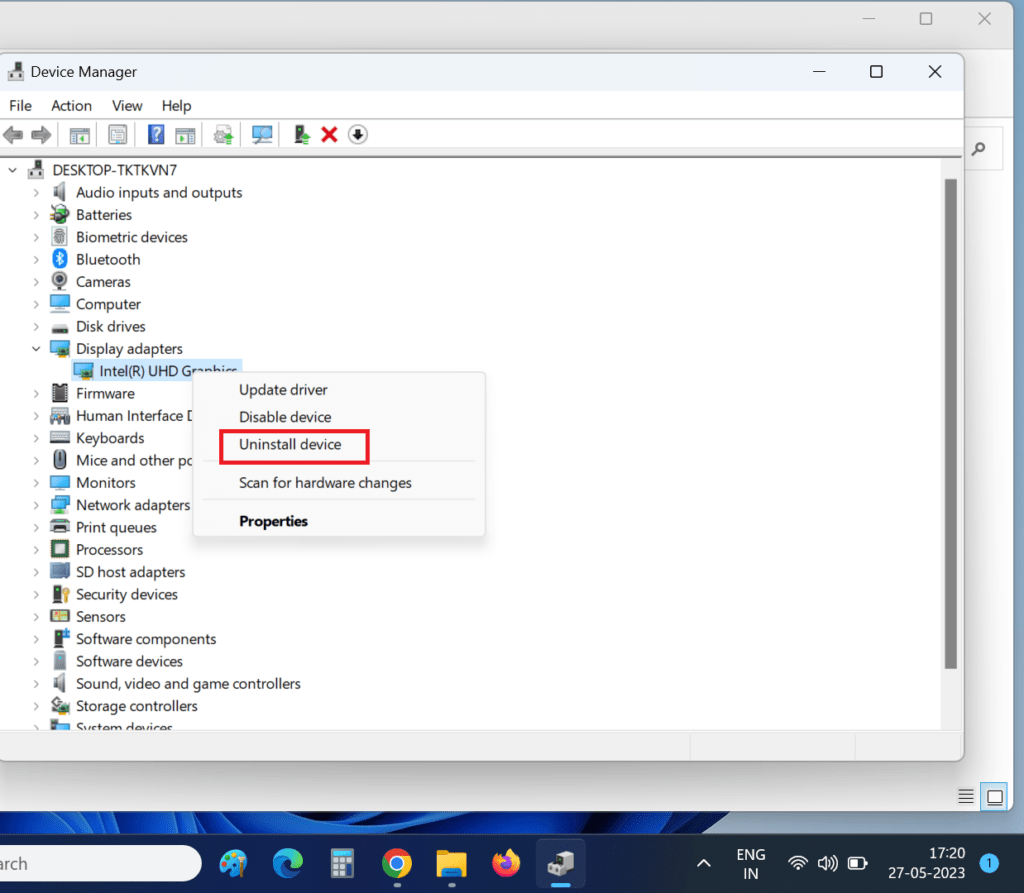
- Right-click on the display driver and click on the Uninstall device.
- Now restart your PC. Now Windows will install the driver (factory version) again and your problem will resolve.


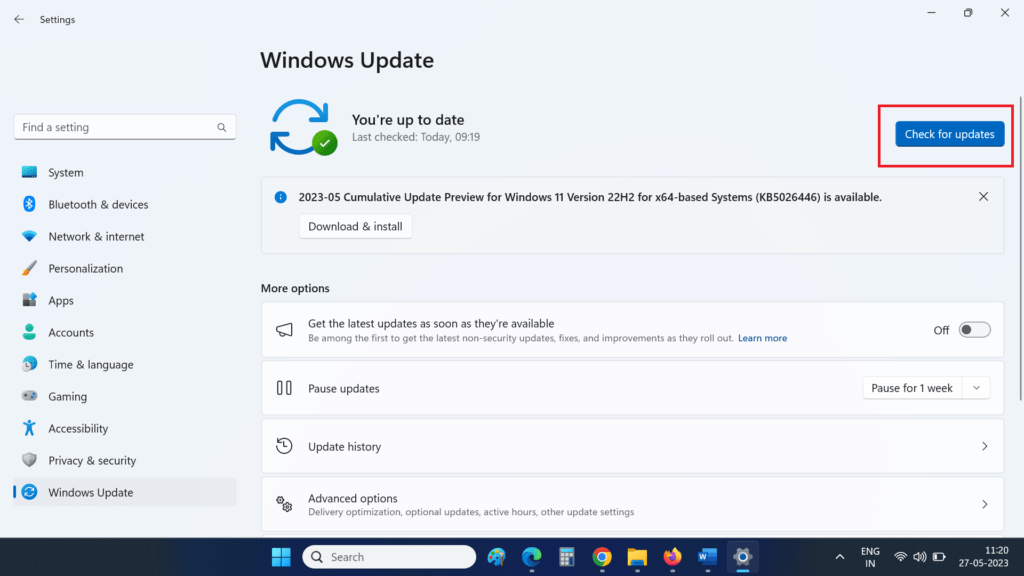
(7) Update Windows 11 to its latest version patch
Your system must be updated to the latest version of Windows. To resolve the Night light not working issue update your Windows to its latest version.
- Click on the Windows Start button icon
- Then, Settings.
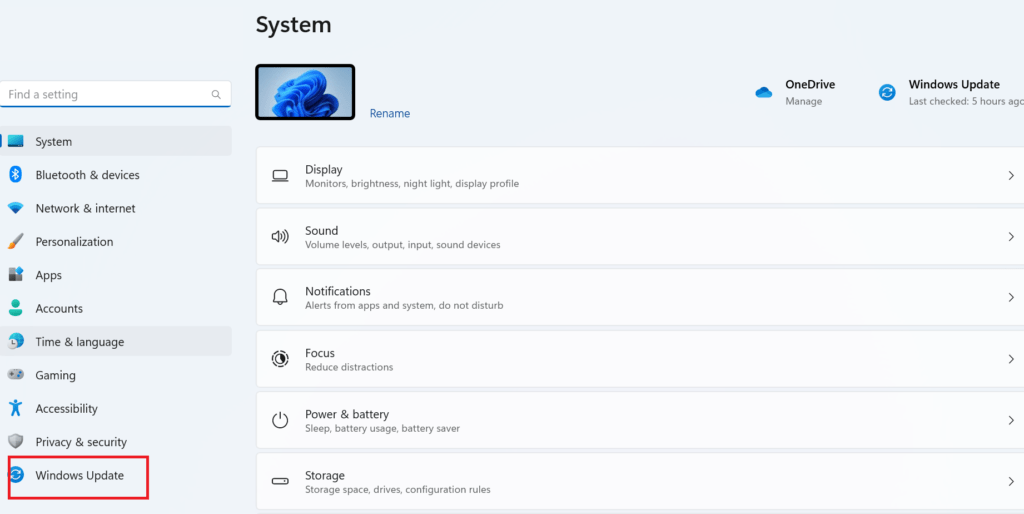
- Click on Windows update.
- Click on Check for updates.
- Now click on Download & install.


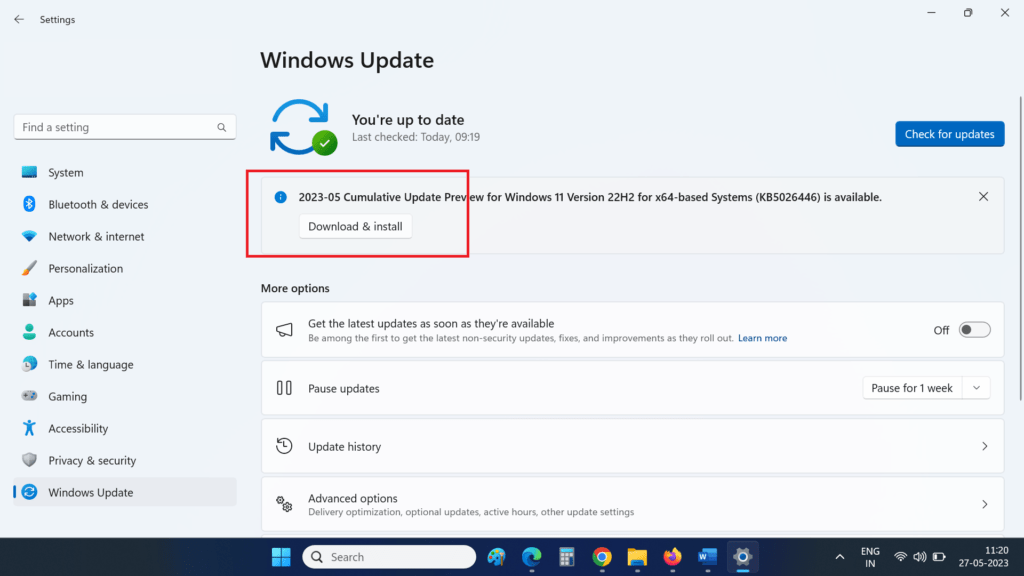
Restart your PC and check whether your problem is solved or not.
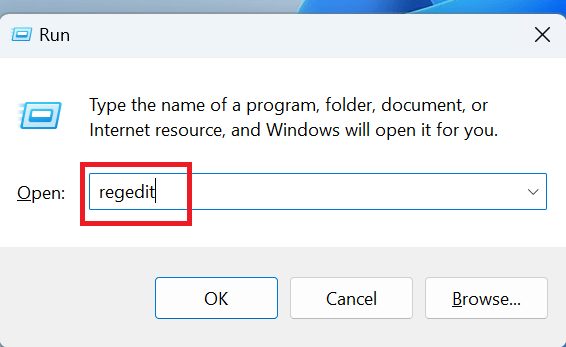
(8) Reset the Settings of the Night Light
If the Night light feature is disabled in your Windows 11 PC, then you have to modify the registry.
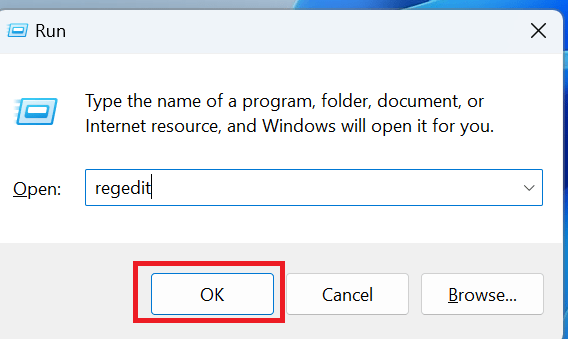
- Press the Windows Start icon + R.
- Type regedit and click on OK.
- Press YES for User Account Control.
- On the address bar of Registry Editor, type the below path: Computer\HKEY_CURRENT_USER\SOFTWARE\Microsoft\Windows\CurrentVersion\CloudStore\Store\DefaultAccount\Cloud
- Now right-click on below two registry keys (under the Cloud key) and delete them one by one.
- default$windows.data.bluelightreduction.bluelightreductionstate
- default$windows.data.bluelightreduction.settings
Now close and quit Registry Editor. Hope this will resolve your issue finally.
Conclusion
These are the all methods by applying which, you can solve your problem of night light not working on a Windows 11 PC. If you still facing this, please feel free to contact us via the comment section or the Contact Us page.
Must Read:
How to Enable Efficiency Mode in Windows 11
How to Fix Opera Not Responding on Windows 11
Please comment and Contact Us for any discrepancies. Follow MambaPost on Facebook, Twitter, and LinkedIn. For the latest Tech News checkout at MambaPost.com.
3 thoughts on “Night Light Not Working on Windows 11 PC. How to Fix?”
Comments are closed.